


2. Loosen the screws, disconnect the pins and remove the center console.
3. If necessary, disassemble the center console.
4. When removing and installing, as well as disassembling and assembling the center console, refer to the assembly drawing "Center console".
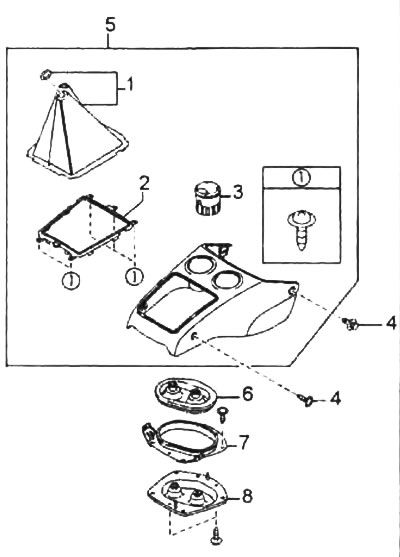
Center console (type 1).
1 - manual transmission lever and transfer case lever casing,
2 - casing holder,
3 - ashtray,
4 - piston,
5 - screw,
6 - insulator No.2,
7 - mounting plate,
8 - insulator No.1.
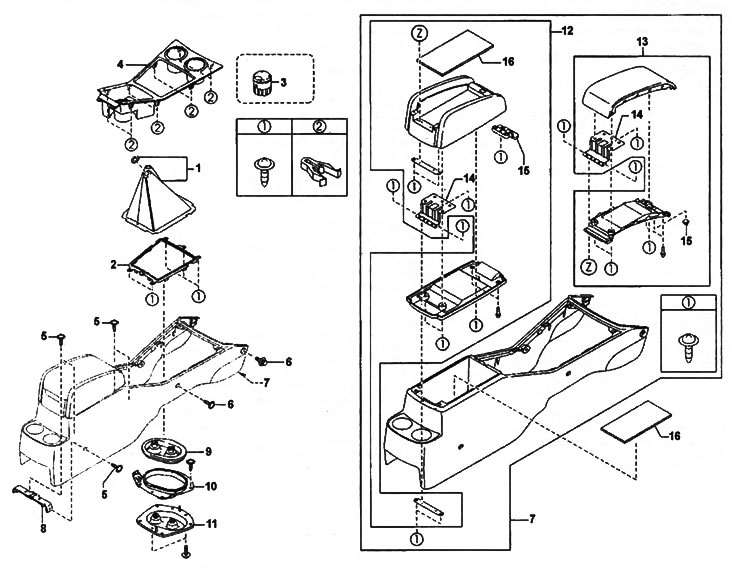
Center console (type 2).
1 - manual transmission lever and transfer case lever casing,
2 - casing holder,
3 - ashtray,
4 - upper trim of the central console,
5 - screw,
6 - piston,
7 - center console,
8 - center console bracket,
9 - insulator No.2,
10 - mounting plate,
11 - insulator No.1,
12 - console storage box,
13 - glove compartment lid,
14 - loop bryshkm,
15 - glove box roof lock,
16 - glove compartment trim.
Note: The illustrations show the center console for a Mazda BT-50. The layout of the center console components for a Ford Ranger is similar.
Text taken from an online platform www.MazBook.ru
5. Assembly and installation are carried out in the reverse order of disassembly and removal.
When installing, replace damaged parts and pins with new ones.