
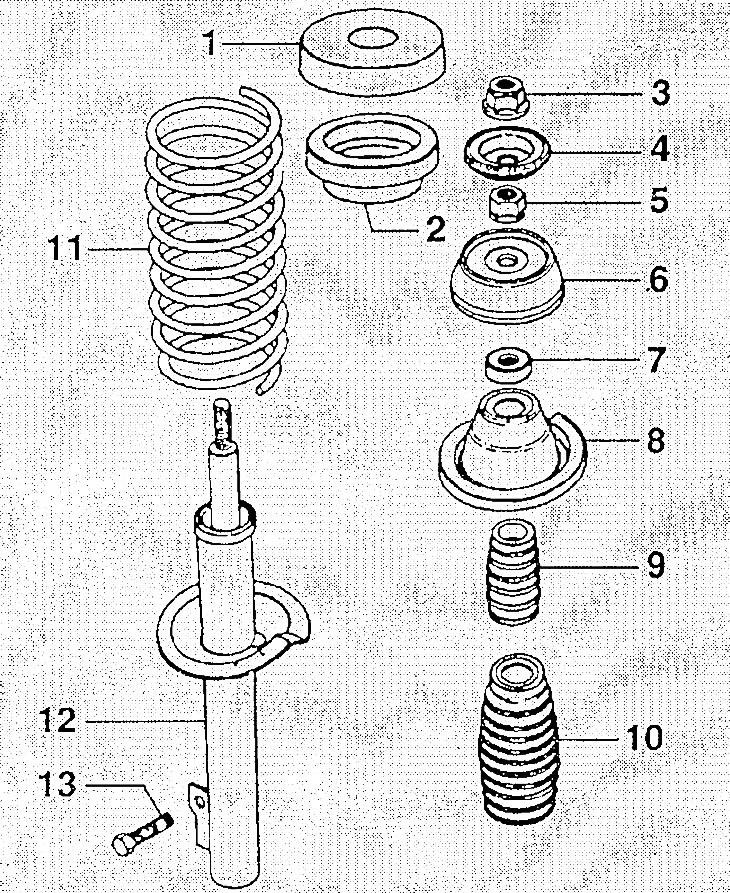
1. Lid; 2. Vibration damper (Ford Fiesta/Mazda 121 only); 3. Top nut, 50 Nm; 4. Fastening; 5. Bottom nut, 60 Nm; 6. Support; 7. Shock absorber bearing; 8. Upper spring seat; 9. Buffer; 10. Case (cuff); 11. Spring; 12. Shock absorber; 13. Lower mounting bolt (self-locking).
Removing
Remove shock absorber.
Attention: To shine the shock absorber, you need to compress the spring with a suitable puller.
Precautions: Unscrew the shock absorber nut only when the spring is compressed with the compressor. Is it dangerous!

Insert the spring strut into the compressor and compress the spring slowly and evenly until the upper spring seat is loosened.
Attention: Make sure that the coils of the spring are securely wrapped around the compressor, so that it cannot slip. Be sure to compress the spring in three opposite places. The spring is compressed very strongly, so you need to use only a reliable compressor. In no case do not tie the spring with wire - it is very dangerous!
Attention: The nut of the upper spring seat can only be unscrewed when the spring is securely compressed.
Loosen the fastening nut.
Remove the shock absorber mount, bearing and upper spring seat.
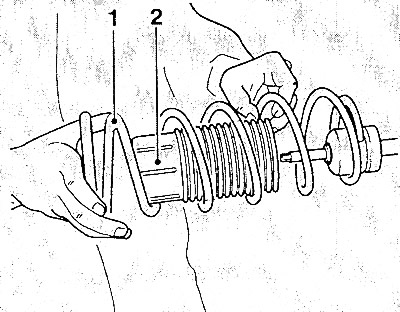
If only the spring needs to be replaced, slowly release the spring (1) and take it out with the case (2). If only the shock absorber needs to be replaced, the spring remains compressed. In this case, pull the shock absorber out of the spring.
Installation
Check shock absorber before installation.
If necessary, compress a new spring.
Attention: When buying a spring, make sure that the correct spring is installed for the model, as they differ in hardness.
Put on a cover.

Put on buffer (3) on the shock absorber.
Insert shock absorber through spring (5). Make sure that the spring lies correctly in the recess in the lower spring seat.
Put on a case (4) to the shock absorber.
Install upper spring seat (6) so that the end of the spring fits correctly into the recess in its socket.
Put on the suspension strut bearing (7) and support (2). Tighten the fastening nut to a torque of 60 Nm while holding the shock absorber rod with a hex wrench. To ensure that the nut can be tightened to the correct torque, a special socket wrench is required. (1 - protective cap, 8 - mount).
Attention: Before tightening the nut, check that the ends of the spring are seated correctly in the sockets.
Slowly release the spring compressor, making sure that the ends of the spring are correctly seated in the recesses of the sockets (supports).
Install shock absorber.