


Contents: Disassembly notes ⇓ Assembly Notes ⇓
1. Remove the parts, referring to the "Drive shaft" figure.
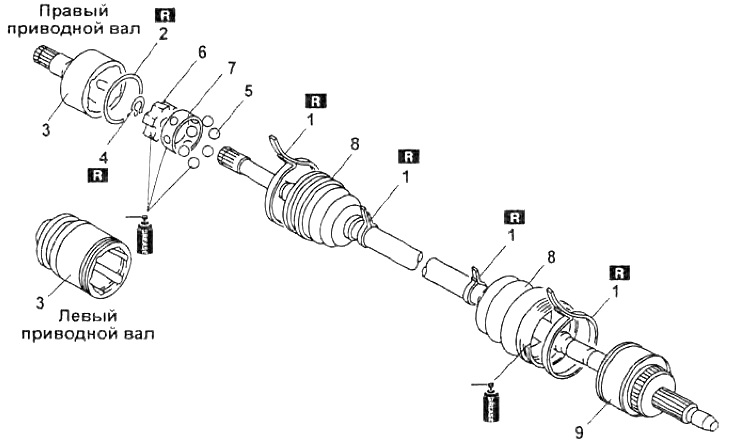
Drive shaft.
1 - clamp,
2 - thrust ring,
3 - outer race of the inner joint,
4 - retaining ring,
5 - balls,
6 - inner race of the inner joint,
7 - separator,
8 - case,
9 - outer hinge.
2. Assembly is carried out in the reverse order of disassembly.
Note:
- Do not disassemble the outer hinge.
- Remove the hinge covers only when necessary.
Disassembly notes
1. Remove the hinge boot clamp.
a) Use a screwdriver to pry up the boot clamp lock.
b) Pull the clamp by the end of the tape.
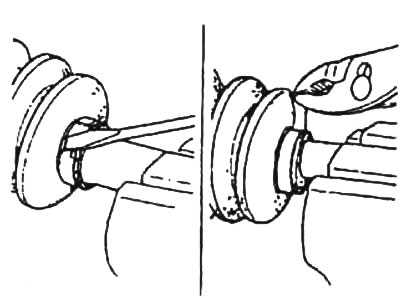
c) Remove any grease from the cover.
2. Remove the thrust ring.
a) Apply marks to the outer race of the joint and the drive shaft as shown in the figure.
Caution: Use paint only to make marks, do not use a punch to make marks.
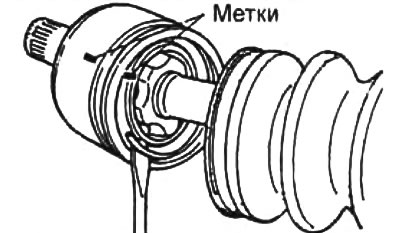
b) Remove the thrust ring.
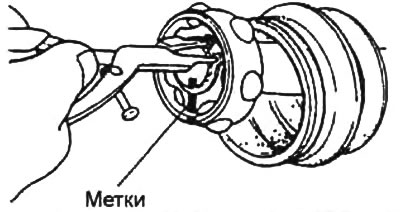
3. Remove the retaining ring.
a) Apply marks to the outer race of the joint and the drive shaft as shown in the figure.
Caution: Use paint only to make marks, do not use a punch to make marks.
b) Using a puller, remove the retaining ring.
4. Remove the separator and balls.
a) Apply marks to the inner race and separator.
Caution: Use paint only to make marks, do not use a punch to make marks.
b) Rotate the separator approximately 22.5°, remove the balls from the inner race and remove the separator.
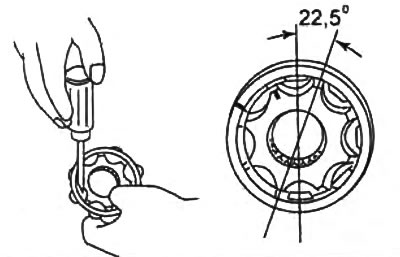
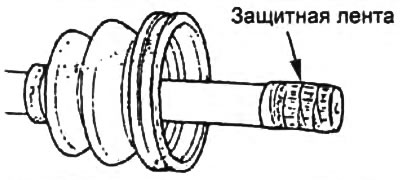
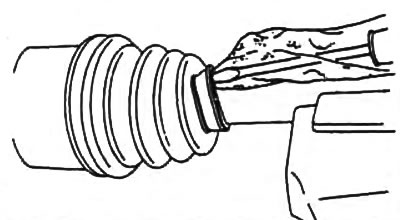
5. Wind the protective tape onto the splines of the drive shaft and remove the cover.
Note: Disassemble the outer joint only if necessary.
Assembly Notes
1. Install the outer hinge boot.
a) Fill the outer joint boot with grease.
- Amount of grease - 110-130 g
Caution: Do not allow foreign materials to enter the cover and lubricant.
Note:
- The inner and outer hinge covers have different sizes.
- Use the grease supplied in the repair kit.
b) Without removing the protective tape wound during removal, install the cover on the drive shaft.
c) Remove the protective tape.
2. Install the separator, inner race, balls and snap ring.
a) Align the marks and install the balls, inner race and separator, orienting the separator as shown in the figure.
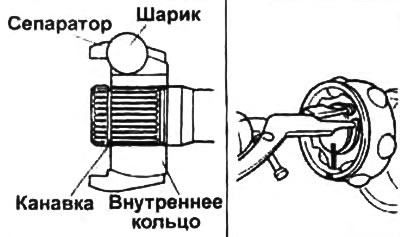
Note: Install the separator with the protruding edges facing the groove of the retaining ring. If the separator is installed incorrectly, the drive shaft may become disconnected.
b) Install a new retaining ring.
3. Install the outer race of the inner joint.
a) Align the marks on the outer race of the joint and the drive shaft.
b) Install a new thrust ring.
4. Install the outer race and thrust ring.
Note: Use only the special lubricant sold with the case.
a) Fill the boot and outer race of the inner joint with special grease.
- Amount of grease - 115 - 135 g
b) Install the cover.
c) Install the drive shafts.
Length of drive shafts:
- left - 507.8 - 517.8 mm
- right - 596.7 - 606.7 mm
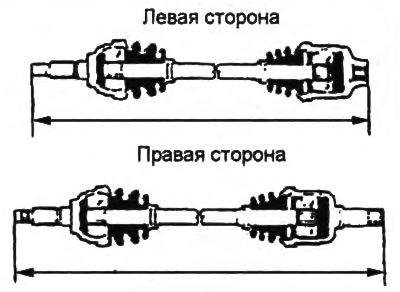
d) Release the air from the case using a screwdriver wrapped in cloth.
5. Install the inner hinge boot clamp.
Note:
- Always use new clamps.
- The clamp must be tightened in the direction opposite to the rotation of the drive shaft when moving forward.
a) Bend the clamp back and tighten it using pliers.
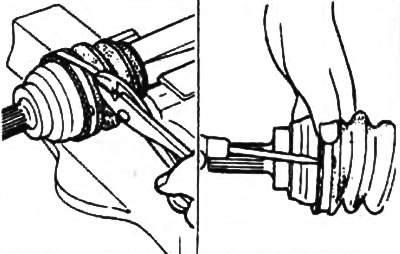
b) Clamp the end of the clamp by bending the locking bracket.
6. Install the outer hinge boot clamp.
a) Rotate the adjusting bolt of the special clamp installation tool to set the gap "A" between the jaws of the special tool.
- Gap "A" - 2.9 mm
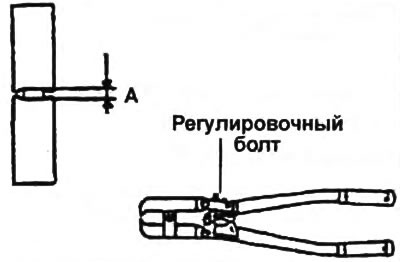
b) Compress the small clamp of the boot using a special tool. Make sure that the gap "B" is within the norm.
Note:
- If the gap "B" is larger than the norm, reduce the gap "A" between the jaws of the special tool and compress the clamp again.
- If the gap "B" is less than the norm: replace the clamp with a new one, increase the gap "A" between the jaws of the special tool and squeeze the new clamp.
- Gap "B" - 2.6 - 2.8 mm
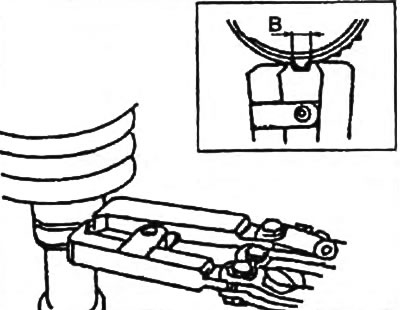
c) Make sure that the clamp tape does not protrude from the mounting groove of the boot.
Note: If the clamp protrudes beyond the groove, replace the clamp and repeat the steps in points "b" and "c".
d) Fill the cover with special grease.
d) Turn the adjusting screw of the special device to adjust the gap "A".
- Gap "A" - 3.2 mm
x) Using a special tool, clamp the large clamp of the outer hinge boot.
g) Make sure that the gap "B" is within the norm.
Note:
- If the gap "B" is larger than the norm, reduce the gap "A" between the jaws of the special tool and compress the clamp again.
- If the gap "B" is less than the norm, replace the clamp with a new one, increase the gap "A" between the jaws of the special tool and squeeze the new clamp.
- Gap "B" - 2.4 - 2.6 mm
c) Make sure that the clamp tape does not protrude from the mounting groove of the boot.
Note: If the clamp protrudes beyond the groove, replace the clamp and repeat steps "e" and "g".