
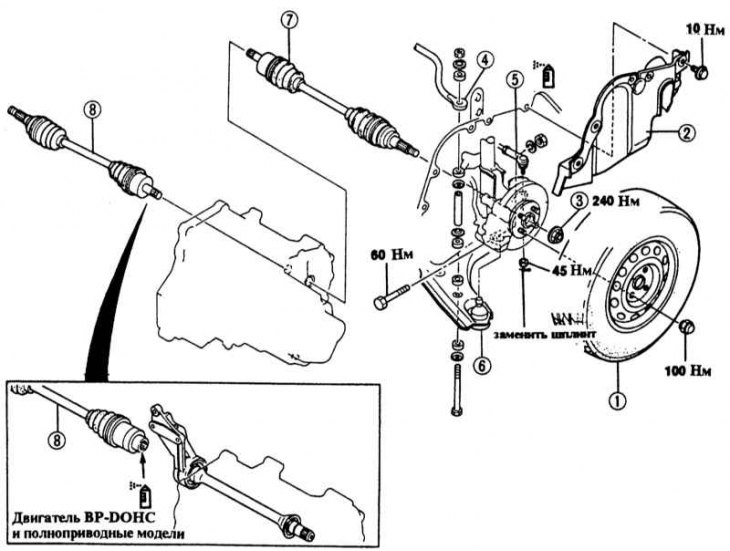
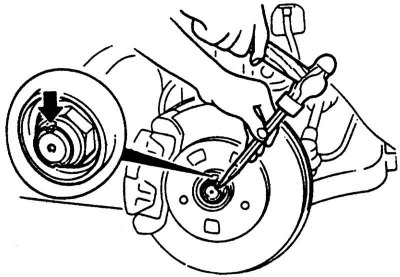
1 - wheel; 2 - mudguard; 3 - hub nut; 4 - stabilizer; 5 - tie rod end; 6 - rotary fist; 7 - left drive shaft; 8 - right drive shaft
Installation
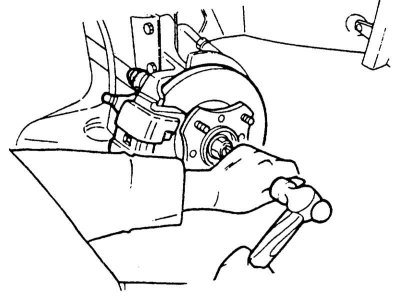
1. Bend back the hub nut stop plate with a hammer and chisel.
2. Unscrew the hub nut of the car standing on the ground. At the same time, ask an assistant to depress the brake pedal so that the hub does not rotate. High tightening torque, risk of accident!
3. Loosen wheel nuts.
4. Mark the position of the wheel disc in relation to the hub so that the balanced wheel can be returned to its original position.
5. Raise the front of the car.
6. Remove the wheel.
7. Drain gear oil, see chapter Maintenance.
8. To unscrew a mudguard and to take out from a wheel arch.
9. If available, unscrew the stabilizer on the transverse arm, remove the bolt with bushings and spacers.

10. To unscrew a nut and to take out a tightening bolt of a rotary fist.
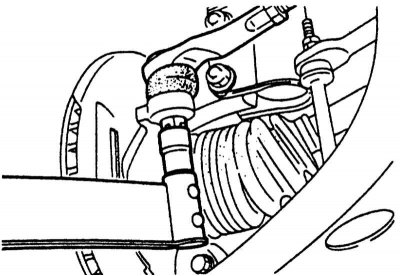
11. Press the ball joint pin down from the steering knuckle using a pry bar. Place a cloth over the cuff so as not to damage it.

12. Vehicles since 10/89, except models "station wagon": Straighten the cotter pin and remove it. Unscrew the tie rod end nut and press the tie rod end out of the steering knuckle arm using a standard puller.
Attention! Do not damage the cuff while doing this.
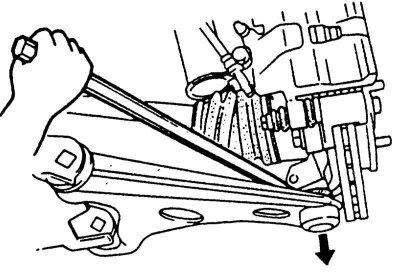
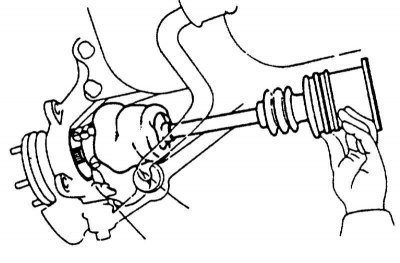
13. Install a pry bar between the hinge and the gearbox housing. Tilt the mount and squeeze out the hinge. Do not pull on the drive shaft, as on some models this can stretch the inner joint.
Attention! On models with an intermediate shaft (1.9L DOHC engine and/or all-wheel drive) the right drive shaft should be pressed from the intermediate support. See Section Removal and installation of an intermediate shaft.
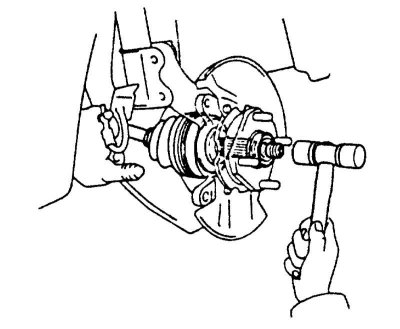
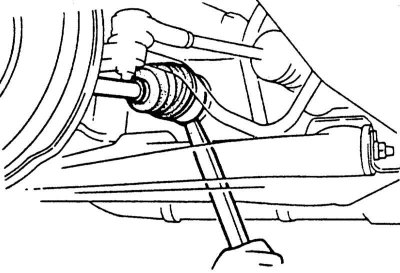
14. Press the drive shaft out of the hub using a standard puller or knock it out with a polymer hammer.
Installation
1. Before installation, check the seals for wear.
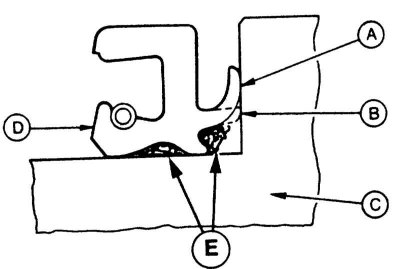
A - working edge (new),
B - working edge (worn out),
C - wheel hub or drive shaft,
D - stuffing box,
E is lubricant.
2. Remove the worn oil seal if necessary. If required, drill the oil seal with a drill, screw in a suitable self-tapping screw and remove the screw together with the oil seal with pliers.
Attention! If the oil seal is worn or defective, check the bearing rollers and races for damage and replace if necessary.
3. Lubricate the new seal, and evenly hammer with a suitable pipe.
4. Clean and lightly lubricate the splines and threads of the drive shaft.
5. Insert the drive shaft by hand into the hub bearing. Put on the washer, install the hub nut and, screwing it, pull the hub onto the end of the drive shaft. Do not completely tighten the nut yet.

6. Insert the drive shaft with a new circlip -arrow A- into the spline connection of the gearbox sprocket. The section of the retaining ring must be facing up during installation. Drive in drive shaft with a rubber mallet until it snaps into place -arrow B-. Slightly pulling and pressing to check if the shaft snaps into place.
7. Screw the steering knuckle and stabilizer on the transverse arm, see Chapter Suspension and steering system.
8. Insert the tie rod end element into the steering knuckle, tighten the nut with force 45 Nm and secure with a new cotter pin. If the cotter pin cannot be inserted, the nut should be slightly tightened, not loosened. Bend the ends of the pin.
9. Fill in gear oil.
10. Screw on the wheel arch mudguard.
11. Screw on new hub nut until completely tightened.
12. Screw the wheel, taking into account the mark on the hub. Lower the vehicle and tighten the wheel nuts crosswise with force 100 Nm
13. Tighten the hub nut of the car standing on the ground with a force 240 Nm, while the assistant must depress the brake pedal.
14. Fasten the hub nut. To do this, drive the collar of the nut with a punch into the groove of the shaft.
15. Measure the angles of the front wheels.