
On models with power windows, disconnect the cable from the negative battery terminal.
On the rear doors, remove the tape strip.
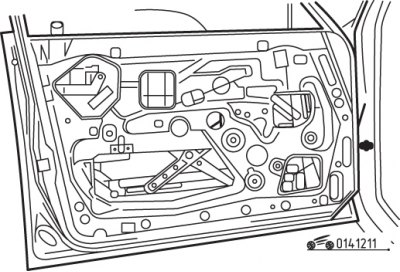
Pic. 12.11. The location of the bolts securing the glass to the power window
Move the window regulator to such a position that the bolts securing the glass to the window regulator are accessible through the access holes in the inner door panel (pic. 12.11). Turn out bolts.
On models with power windows, disconnect the connector from the power window motor.
On the front doors, unscrew the bolts and remove the glass.
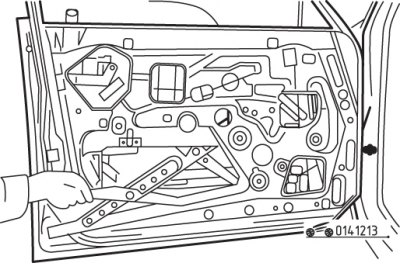
Pic. 12.12. Removing the B-pillar from the rear door
On the rear doors, remove the screw and bolt, remove the B-pillar (pic. 12.12). Tilt the back of the glass down, remove the glass support from the guide and then, moving up, remove the glass from the door.
Pic. 12.13. Removing the power window from the front door
On the front and rear doors, unscrew the bolts and remove the power window through the technological holes in the inner door panel (pic. 12.13).
On models with power windows, remove the bolts and remove the motor from the window regulator.
Attention! Be very careful when removing the motor, as the spring will be released to return the power window stopper to the up position.
Installation is carried out in the reverse order of removal, taking into account the following.
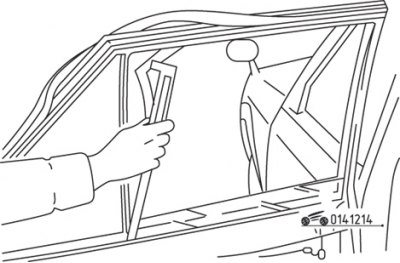
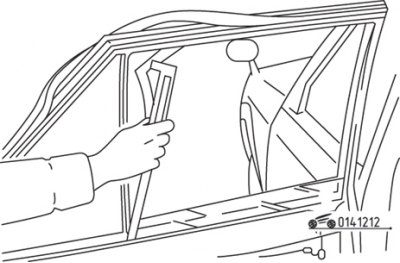
Pic. 12.14. Triangular window glass installation
To facilitate the installation of the glass of the triangular window, lubricate the glass frame with soapy water (pic. 12.14).
On models with power windows, connect the cable to the negative battery terminal and lower the window regulator to its lowest position before installing the glass.
After installation is complete, test the operation of the power window by raising and lowering the window several times to ensure that it moves freely and freely. If necessary, loosen the bolts and adjust the position of the power window.