
2. Drain the coolant (see chapter "Maintenance and general inspection and adjustment procedures").
3. Remove the turbocharger (see chapter "Air intake and exhaust system").
4. Remove the oil filter (see chapter "Maintenance and general inspection and adjustment procedures").
5. Remove the parts in the order they are numbered in the figure "Removal and installation of the oil cooler".
6. Installation of parts during assembly is carried out in the reverse order of removal.
7. Fill with coolant (see chapter "Maintenance and general inspection and adjustment procedures").
8. Check the oil level (see chapter "Maintenance and general inspection and adjustment procedures").
9. Start the engine and check for oil and coolant leaks.
Oil cooler installation note
Tighten the bolts and nuts of the oil cooler housing in the sequence shown in the figure.
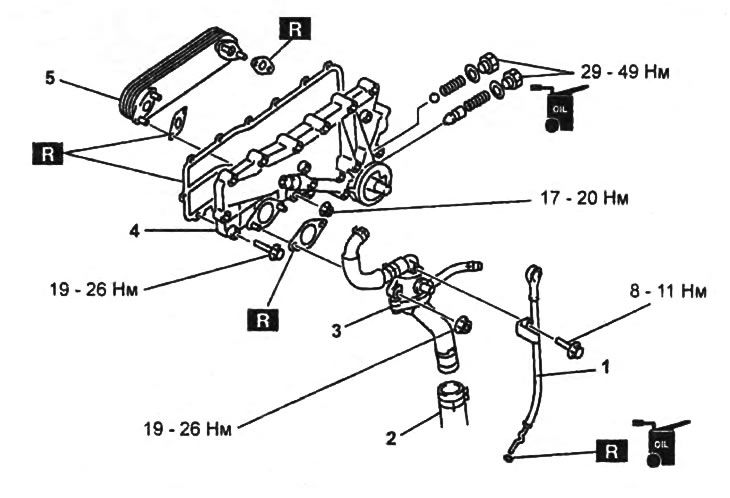
Removal and installation of the oil cooler.
1 - guide tube of the oil dipstick assembly,
2 - radiator hose,
3 - thermostat housing,
4 - oil cooler housing,
5 - oil cooler.
Checking the pressure reducing valve spring
Check the free length of the pressure reducing valve spring. Replace if necessary.
Spring length:
- type 1 - 36.7 mm
- type 2 - 54.7 mm
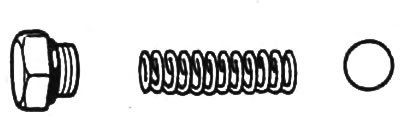
Type 1.
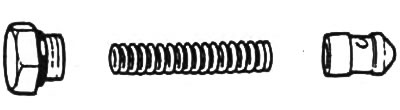
Type 2.