Note. The doors are very heavy and inconvenient to install, so we recommend that you do this work with two people.
Warning. Wear gloves when working inside doors to avoid scratching your hands from the sharp edges of the door panels.
Removal and installation
1. Fully lower the window, then disconnect the wire from the negative battery terminal.
2. Open the door all the way and place a block of wood of suitable height or a hydraulic jack under it. Cover the jack (or bar) with a rag so as not to damage the bottom of the door.
3. Remove the door lining and protective coating (see paragraph 15).
4. Disconnect all electrical connectors, ground wires and clamps that secure the electrical wiring to the door.
Note. We recommend that you mark the electrical wiring connectors to facilitate subsequent assembly.
5. Disconnect from a door a rubber tube connecting a door and a body Take out from an aperture of a door an electroconducting.
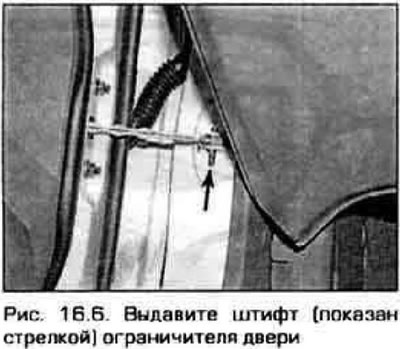
6. Remove the door stopper pin by pushing it up (pic. 16.6).
7. Mark the position of the loops with a felt-tip pen or scriber (to facilitate door adjustment after installation).
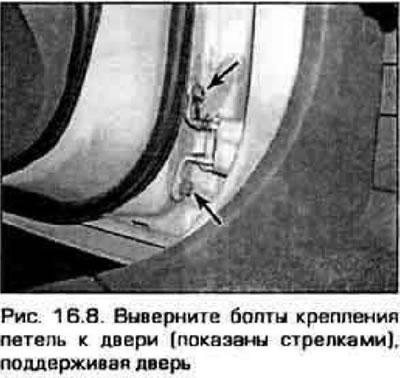
8. Ask an assistant to support the door and unscrew the bolts securing the hinges to the door (pic. 16.8). Remove the door. Note Before removing the door, mark the position of the hinges.
9. Door installation is carried out in sequence. reverse withdrawal.
Adjustment
10. Proper door adjustment is essential for the operation of all its components. Inspect the hinge pins and make sure they do not have excessive play. Fully open the door and rock it up and down (did not rock the car). Door play in the vertical direction should not exceed 1.5 mm (otherwise the hinges must be replaced).
11. The position of the door relative to the body is adjusted by moving the hinges relative to the body or door. To do this, loosen the corresponding bolts. The door must be adjusted so that its top end is parallel to the roof. The front doors should be parallel to the wings. The rear doors should be parallel to the rear fenders and the bottom edges of the doors should be parallel to the sills. If the door cannot be adjusted by moving the hinges, place shims of the correct thickness under the hinges.
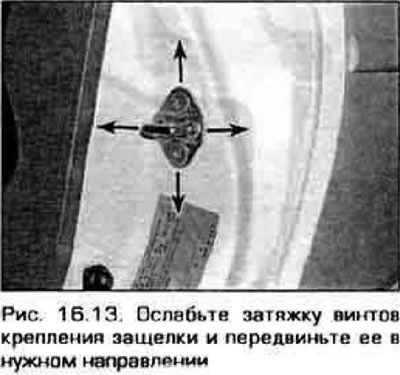
12. To adjust the door in the closed position, mark the position of the latch, then make sure that the door lock makes contact with the center of the latch. If necessary, move the latch in the desired direction.
13. Adjust the position of the door latch in the horizontal direction. In this case, the front door should be parallel to the B-pillar, and the rear door - to the rear wing. Adjustment is made by moving the door lock (pic. 16.13).