


Caution: Do not deform the catalytic converter housing, avoid strong shaking, impacts and falls, as these can damage the ceramic core. A damaged catalytic converter is the cause of unusual noise and increased concentration of toxic substances in the exhaust gases, and it must be replaced.
Ford Fiestfl/Mazda 121 with 1.3L engine
Removal
Separate the wire plug for the lambda probe. The lambda probe is installed in the exhaust manifold.
Unscrew the two bolts and remove the heat shield from the exhaust manifold.
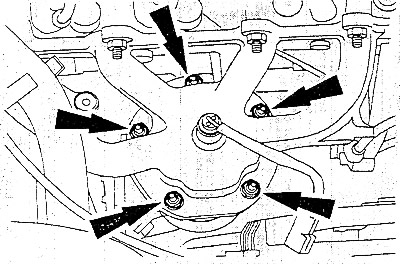
Unscrew the five nuts securing the catalytic converter to the exhaust manifold.
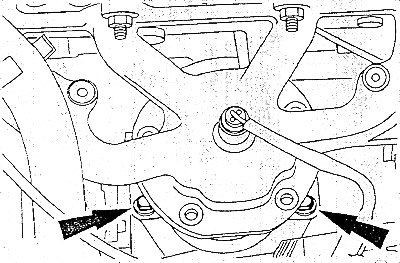
Unscrew the catalytic converter holder bolts.
Raise and support the vehicle.
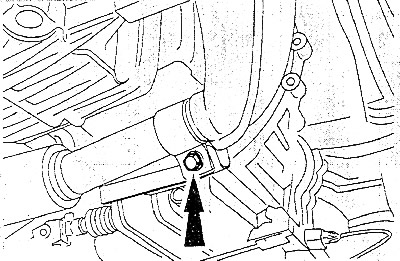
Unscrew the bolts of the rear exhaust pipe mounting flange and the lower mount (see picture), remove the catalytic converter.
Installation
Caution: Do not apply high-temperature paste to exhaust system parts before the catalytic converter. Do not use liquid sealant either, as this will contaminate the catalytic converter.
Before installation, clean the exhaust manifold and the front exhaust pipe flange, as well as the connecting flange, with a steel brush. Be sure to use new gaskets, bolts and nuts. To make it easier to unscrew the exhaust system nuts and bolts, it is recommended to lubricate them with high-temperature copper paste.
Tighten evenly to a torque of 30 Nm. Finally, tighten the nuts to a torque of 40 Nm.
Caution: Nuts and bolts (studs) removed during removal must always be replaced. Always lubricate bolts (studs) with copper paste.
Tighten the catalytic converter fasteners on the upper and lower brackets, and then on the rear flange to a torque of 50 Nm.
Install the exhaust manifold heat shield and secure it with two bolts.
Install the lambda probe plug.
Ford KA
Removal
Remove the radiator.
Remove the air filter housing.
Disconnect the lambda probe wire plug. The lambda probe is screwed into the exhaust manifold.
Remove the two bolts securing the heat shield to the exhaust manifold.
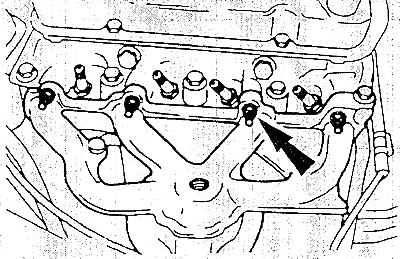
Unscrew the eight nuts securing the exhaust manifold to the cylinder head.
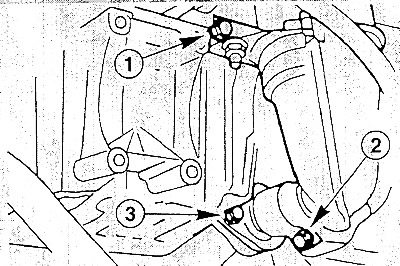
Unscrew the two bolts and remove the holder (1) from the cylinder block.
Loosen the bolt and disconnect the holder (2) from the gearbox.
Unscrew the bolts of the rear exhaust pipe flange and remove the catalytic converter downwards.
Installation
Clean the surfaces to be sealed.
Tighten the catalytic converter fasteners on the holder and then on the rear flange to a torque of 50 Nm.
Install the radiator.
Secure the exhaust manifold to the cylinder head with eight nuts, tightening them evenly to a torque of 25 Nm.
Install the heat shield for the exhaust manifold and secure it with two bolts.
Put on the lambda probe plug.
Install the air filter housing.
Ford Fiesta/Mazda 121 with 1.25/1.4 L and diesel engines
Removal
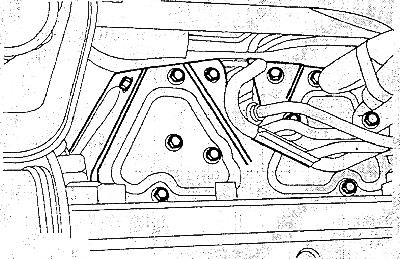
1.25/1.4L Engine: Remove twelve bolts and heat shields from exhaust manifold.
Diesel: Remove the air supply hose from the intake manifold by loosening the clamps.
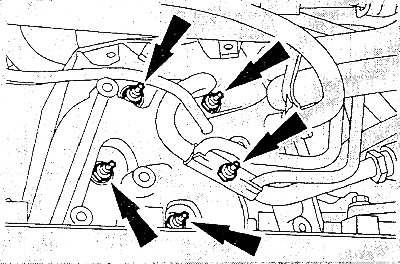
Unscrew the five nuts securing the catalytic converter to the exhaust manifold.
Disconnect the rear exhaust pipe flange.
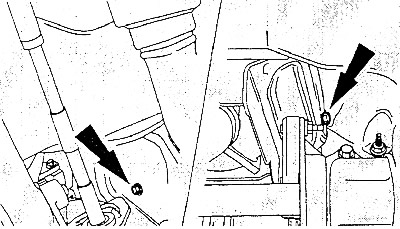
Engine 1.25/!,4 l: unscrew the two bolts securing the heat-protective casing of the catalytic converter from the bottom of the body and move the casing away from the catalytic converter.
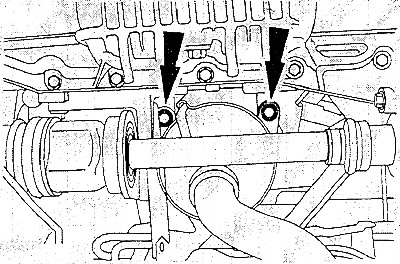
Unscrew the bolts and remove the catalytic converter mount.
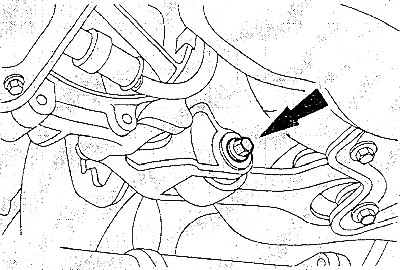
Loosen the strut bolts on the gearbox.
Diesel: Unscrew one bolt securing the stabilizer bar of the gearshift mechanism from the gearbox.
Remove the catalytic converter downwards. To have enough space for removal, you may need to push the engine slightly to the side.
Installation
Clean the surfaces to be sealed with a steel brush.
Be sure to use new gaskets, bolts and nuts.
Install the catalytic converter by slightly pressing the engine to the side. Lightly tighten all the catalytic converter bolts.
Tighten the catalytic converter fasteners on the holder and then on the rear flange to a torque of 50 Nm.
Install the spacer on the gearbox and tighten the mounting bolt to a torque of 50 Nm.
Diesel: install the gearshift mechanism stabilizer bar and tighten its mounting bolt to a torque of 50 Nm.
1.25/1.4L engine: install heat shield on the underbody.
Lower the car.
Tighten the five nuts securing the catalytic converter to the exhaust manifold evenly to 30 Nm. Then tighten the nuts to 40 Nm.
1.25/1.4L Engine: Install heat shield on exhaust manifold.
Diesel: Place the air supply hose onto the intake manifold and secure it with a clamp.