
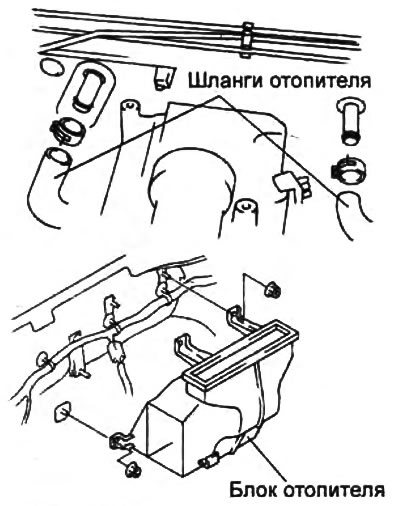
2. Drain the coolant from the cooling system.
3. Remove the toolbar.
4. Remove the heater block as shown in the figure.
Disassembly and assembly
Disassemble the heater block in the sequence of numbers shown in the figure "Disassembly and assembly of the heater unit".
Note: Installation is in the reverse order of removal.
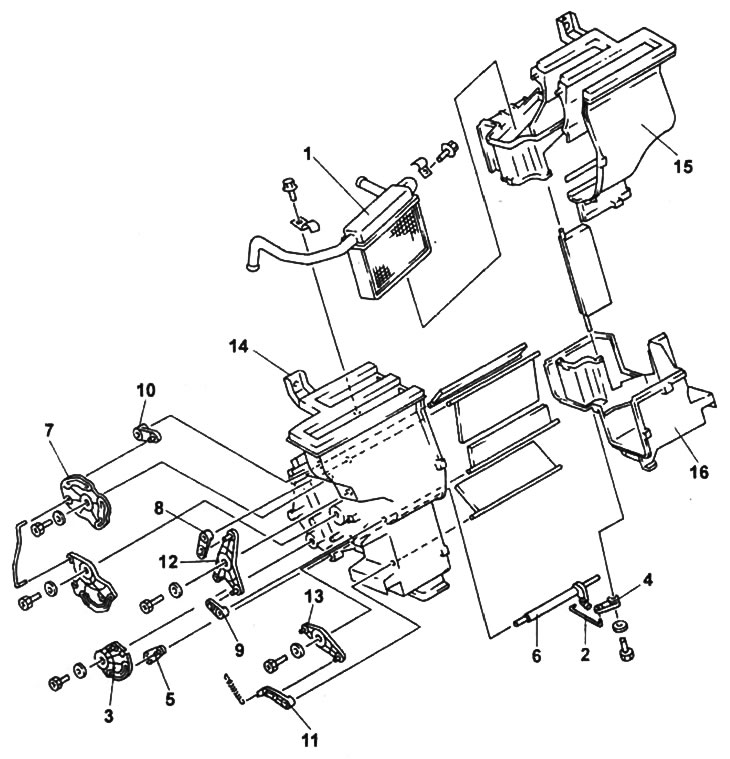
Disassembly and assembly of the heater block.
1 - heater radiator,
2 - damper lever for mixing air flows,
3 - transfer lever of the damper for mixing air flows,
4 - cranked lever of the damper for mixing air flows No. 1,
5 - cranked lever of the damper for mixing air flows No. 2,
6 - axis of the damper for mixing air flows,
7 - the main transmission lever of the damper for changing the direction of air flows,
8 - cranked lever of the damper for changing the direction of air flows No. 1,
9 - cranked lever of the damper for changing the direction of air flows No. 2,
10 - cranked lever of the damper for changing the direction of air flows No. 3,
11 - cranked lever of the damper for changing the direction of air flows No. 4,
12 - additional transmission lever for the damper for changing the direction of air flows No. 1,
13 - additional transmission lever for the damper for changing the direction of air flows No. 2,
14,15, 16 - heater block housing.
Checking the heater core
1. Check the heater core for damage and coolant leaks.
If damage or leaks are found, replace the heater core.
2. Check the heater core heat exchanger plates for bent spots.
If bent plates are found, straighten them with a slotted screwdriver.