
Removing
Raise the rear of the vehicle and secure it on stands.
Remove the fuel tank.
Mark the position of the gear adjusting wheel and nut for subsequent installation in their original position. The movement of the nut and gear wheel affects the positive toe of the rear wheels.
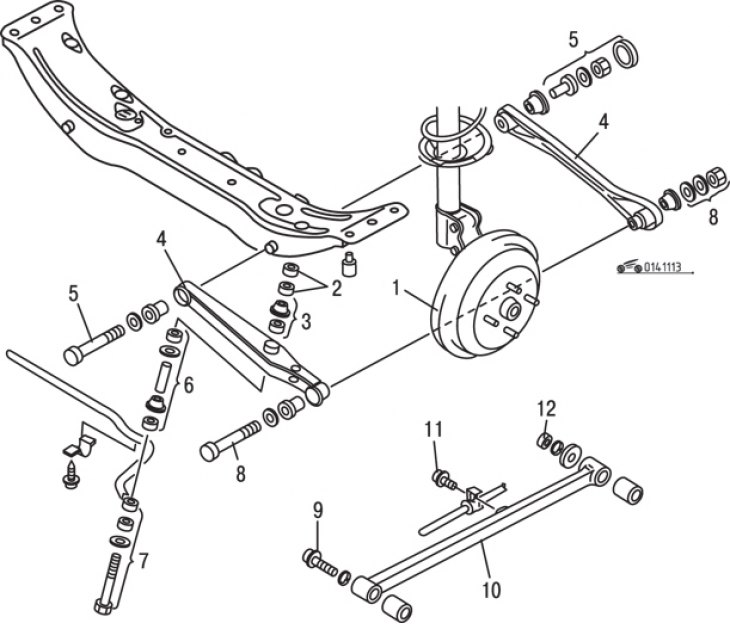
Pic. 11.13. Transverse and longitudinal rods of the rear suspension: 1 – a nave of a back wheel; 2 - nuts; 3 - bushing and retainer; 4 - transverse thrust; 5 - coupling bolt, nut and gaskets; 6 - clamps, bushing and gasket; 7 - retainer, bushing and bolt; 8 - bolt and nut; 9, 11 - bolts; 10 - longitudinal thrust; 12 - nut
Turn out bolts and nuts of fastening of cross-section drafts to a cross-beam (pic. 11.13). Turn out nuts and bolts, remove plugs and disconnect drafts of the anti-roll bar (if it is installed).
Turn out bolts of fastening of longitudinal lateral drafts from a support of a nave of a back wheel, then remove drafts from the car.
Turn out a bolt of fastening of a suspension bracket of a parking brake.
Turn out coupling bolts and remove longitudinal lateral drafts from the car.
Installation
Installation is carried out in the reverse order of removal, taking into account the following. Temporarily screw in all bolts and finally tighten them after lowering the car on wheels.
Check the positive toe of the rear wheels.