


Removal and installation
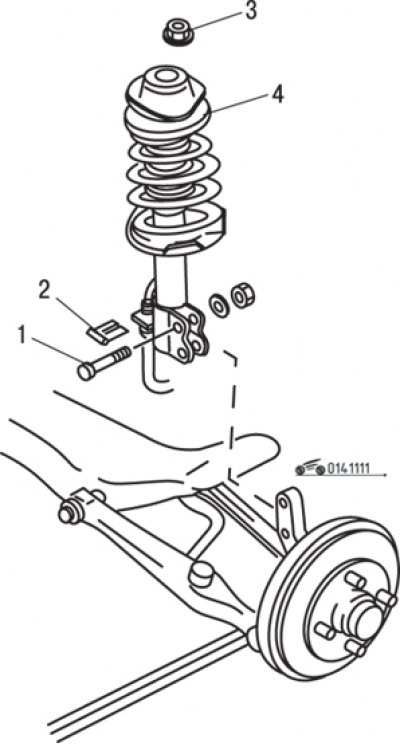
Figure 11.11. Rear suspension shock absorber strut mounting elements: 1 – bolt and nut; 2 – brake hose mounting clamp; 3 – nut; 4 – upper support of the rack
To access the rear pillar mount, remove the side trim in the luggage compartment. On models with a three-stage damping system, disconnect the control switch. Unscrew the two nuts securing the upper strut to the body (figure 11.11).
If it is necessary to disassemble the strut, loosen the rod mounting nut and secure the shock absorber rod from turning (this is not possible on models with a three-stage damping system). Do not loosen the nut completely.
Apply marks to subsequently align the top of the pillar with the body.
Raise the rear of the vehicle and support it securely on stands.
Remove the clamp and disconnect the brake hose from the strut.
Loosen the two nuts and remove the two bolts securing the lower strut to the rear wheel hub support, lower the strut down and remove it from the vehicle.
Check the strut for fluid leaks, damage to the dust covers and suspension spring.
Installation is carried out in the reverse order of removal. Align the marks you made earlier when attaching the top of the strut to the vehicle body.
Shock absorber strut repair
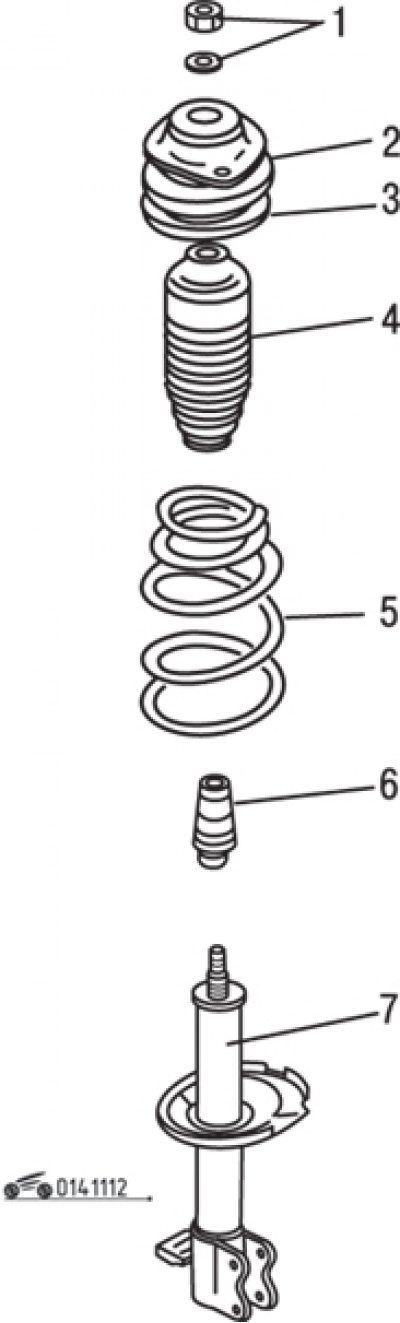
Figure 11.12. Elements of the front suspension shock absorber strut: 1 – nut and washer for mounting the rod; 2 – upper support of the rack; 3 – spring gasket; 4 – dust cover; 5 – spring; 6 – compression stroke buffer; 7 – shock absorber
Repair of the rear suspension shock absorber strut is carried out in the same way as the front suspension shock absorber strut (figure 11.12).