


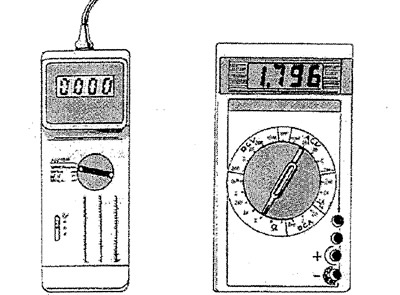
There are special combined instruments for cars (testers or multimeters), designed for measurements on parts of automotive electrical equipment. Using such devices, you can measure the number of revolutions of the engine, the angle of the closed state of the contacts and voltages up to 20 V. When measuring resistance, the kilo-ohm range is usually used, i.e. from 1 to 1000 kOhm.
In addition, there are instruments for measuring electrical and electronic parts. They allow accurate measurements of both small (Ohm), and large (megaohm) resistances, as well as voltages, which is often necessary for parts of electronic systems.
If you only need to check whether or not there is voltage, then for this there is a simple control (pro- * erochnaya) lamp (A). This is only used for those Purposes that do not have electronic parts. Electronic yatals react very sensitively to large currents. In some cases, they may fail even when a test lamp is connected.
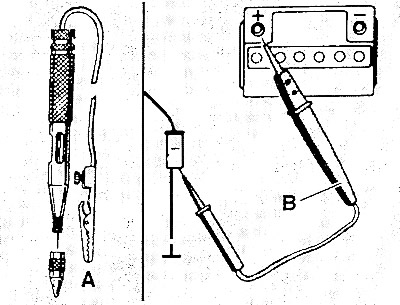
Attention: To check electronic parts (transistors, diodes, control units) high-resistance voltage probe required (IN). It works in the same way as a test lamp, but does not damage electronic parts and is suitable for all test work.
Measurement technique
Voltage measurement
Voltage can be checked with a simple test light or a voltage tester, but in this case, you can only find out if there is voltage at all or not. A voltmeter is needed to determine the voltage.
First of all, you need to determine the range of the measured voltage. Voltages in a car usually do not exceed 14 V. An exception is the ignition system: the voltage in it can reach up to 30,000 V. Such voltages are measured only with special devices.
When using a tester that is not specifically designed for measurements on a car, you need to switch it to the range for measuring DC voltage (denoted DCV and ACV denotes alternating voltage). Then the measurement limit is selected. Since the voltage in the car does not exceed 14 V (except for the ignition system), then you can confidently choose the measurement limit with an upper limit from 15 to 20 (25) B. If it is known for certain that the measured voltage will be less than (for example, about 2 V), you can switch to a lower measurement limit, which will increase the measurement accuracy. If the measured voltage is greater than the measurement limit allows, then the measuring device can be disabled.
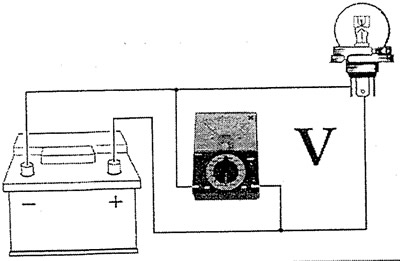
Connect the wires of the device in accordance with the figure parallel to the current consumer. In this case, the red wire is connected to the wire coming from the positive (positive) battery contact, and black - to the wire «masses» or to ground on the body or engine.
Measurement example
If the engine does not start because the starter is turning too slowly, then you need to check the voltage of the battery while the starter is running. To do this, connect the red wire of the voltmeter (tester) to the positive battery terminal. And the black wire is «mass» car. With the starter on, measure the voltage. If it is less than 10 V (at a battery temperature of about +20°С), check the battery and, if necessary, recharge it.
Current measurement
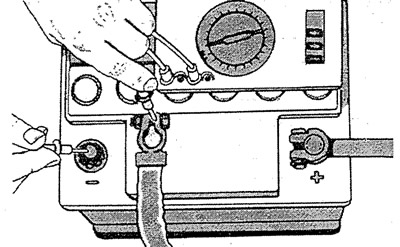
Such a measurement is rarely required in a car, but is still sometimes necessary, for example in the event of a self-discharge of a battery. To do this, you need an ammeter or a tester. Before measuring the current, you need to select the measurement limit. If the estimated current value is not known, then a maximum limit must be set and then, as necessary, lower measurement limits should be connected.
To measure the current, you need to break the current circuit and turn on the ammeter (tester) in this chain break. To do this, for example, disconnect the plug and connect the red lead of the ammeter (+) to the live wire. black wire (-) connect to the contact to which the disconnected current-carrying wire usually fits. Contact by «mass» between the plug and the consumer is provided by means of an additional wire.
Attention: Never measure the current in the wires leading to the starter with a conventional ammeter (current consumption approx. 150 A) or to diesel glow plugs (current about 60 A). Such pain-tuue currents will immediately put an ordinary device out of action. In workshops, to measure such currents, ammeters with non-contact clamps operating on the principle of induction are used.
Resistance measurement
Before measuring resistance, it is imperative to make sure that the part to which the ohmmeter will be connected is not energized. Before disconnecting the plug, always switch off the ignition, disconnect the wire or remove the entire assembly or disconnect the battery. Otherwise, the ohmmeter may be damaged (tester).
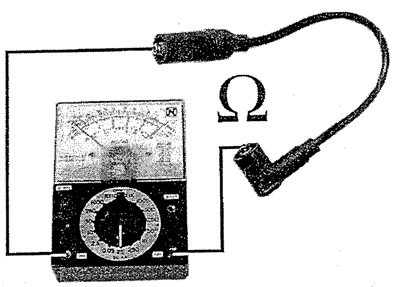
The ohmmeter is connected to two contacts of the current consumer or to two ends of the wire. In this case, the polarity of the ohmmeter connection does not matter (+/-) to contacts.
The measurement of resistance in a car is carried out mainly in two cases:
- 1. Checking the resistance or other part included in the current supply circuit.
- 2. Check for contact in an electrical wire, switch or heating coil.
This checks to see if the electrical wire in the car is broken, and because of this, some electrical device does not work. For measurements, an ohmmeter is connected to the ends of the wire or part being tested. If the resistance is about 0 Ohm, then there is a contact, i.e. wire is ok. When broken, the ohmmeter will show infinity.