
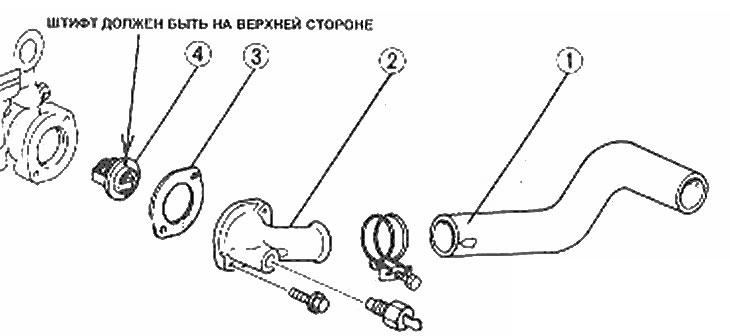
Thermostat mounting details
1. Upper radiator hose; 2. Thermostat cover; 3. Gasket; 4. Thermostat
Warning: The engine must be completely cool before starting this procedure. Be sure to disconnect the negative battery cable before working near the fan.
1. See Warning to Chapter 2.
2. Disconnect the wire from the negative pole of the battery (if it hasn't already been done).
3. Remove the distributor (Section 5), to access the thermostat housing.
4. Drain some liquid from the cooling system so that the liquid level is below the thermostat. To do this, loosen the radiator cap and open the drain hole located at its bottom. Close the hole when enough liquid has drained.
5. Disconnect from a branch pipe on the engine the top hose of a radiator.
6. Disconnect the fan thermal switch connector.
7. Remove two nuts and separate a casing of the thermostat from the engine. You may need to use a mallet to separate the casing gasket (photo).
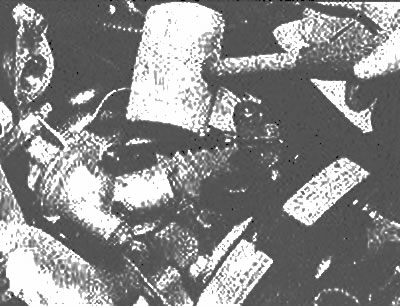
Loosen the thermostat housing gasket with a mallet
8. Remove the thermostat from the casing (photo).
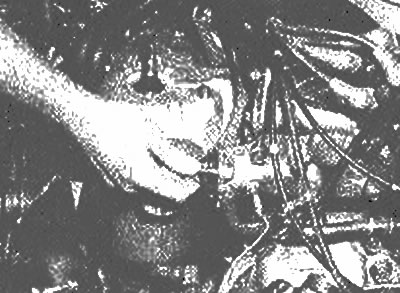
When removing the thermostat, note its correct orientation
9. Before installing the thermostat, clean the gasket-to-gasket surfaces of the nozzle and thermostat housing.
10. Apply a thin coat of sealant to both sides of the new gasket.
11. Place the thermostat in the housing, install the gasket with the labeled side facing the thermostat, and install the tube. Tighten the bolts with a torque specified specifications.
12. Connect the upper radiator hose and tighten the hose clamp securely. Make sure the arrow on the hose is aligned with the key on the housing (photo).
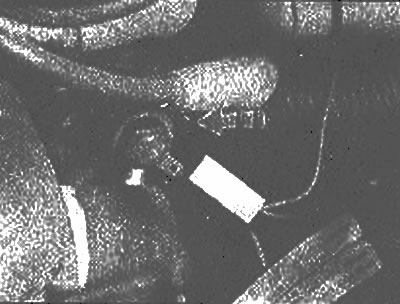
Make sure the arrow on the radiator hose lines up with the key on the shroud
13. Connect the thermal switch connector.
14. Install the distributor.
15. Fill cooling system with proper antifreeze-water mixture (see section 1).
16. Connect the battery cable and start the engine.
17. Let the engine run with the radiator cap removed until the upper radiator hose is warm, which will happen after the thermostat opens.
18. With the engine idling, pour coolant into the radiator until the level reaches the bottom of the filler neck.
19. Install the radiator cap.