


Windshield wiper
Disconnect the wire from the negative battery terminal.
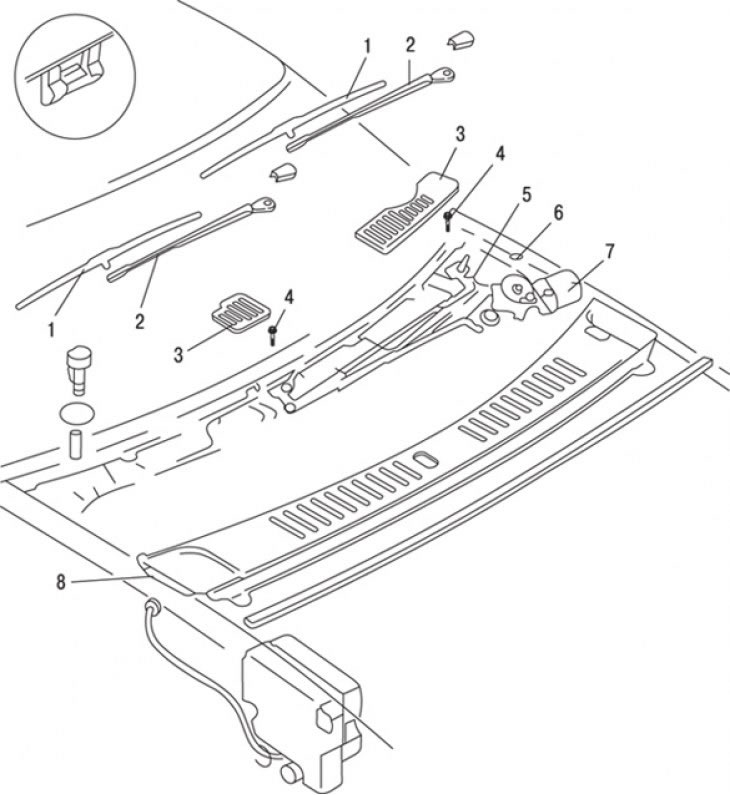
Pic. 13.53. Windscreen wiper: 1 - wiper blade; 2 – a nut and the screen wiper lever; 3 - cover; 4 – a bolt of fastening of the mechanism of screen wipers; 5 - wiper mechanism; 6 – a bolt of fastening of the electric motor of screen wipers; 7 - wiper motor; 8 - lattice
Raise levers, disconnect and remove brushes (pic. 13.53).
Turn away nuts and remove levers of screen wipers.
Remove the grille and cover at the base of the windshield.
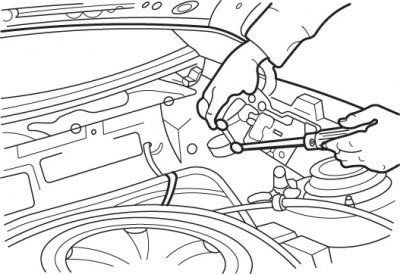
Pic. 13.54. Using a screwdriver to separate the motor from the wiper mechanism
Turn out bolts, disconnect a socket, a screw-driver separate and remove the screen wiper electric motor (pic. 13.54).
Turn out bolts and remove the mechanism of a screen wiper from the car through a hole in a body.
Installation is carried out in the reverse order of removal. Install the wiper arms so that the wiper blades are parallel to the bottom of the windshield.
Rear window wiper
Disconnect the wire from the negative battery terminal.
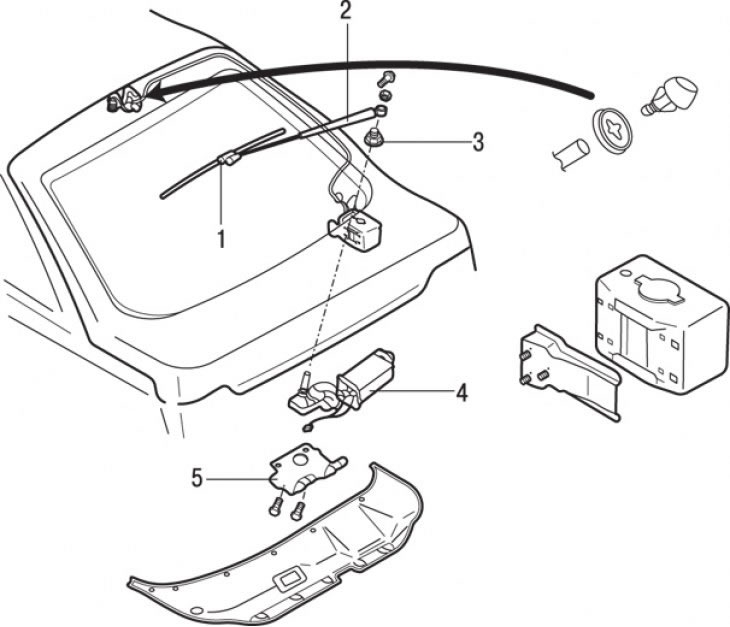
Pic. 13.55. Rear window wiper: 1 - wiper blade; 2 – the screen wiper lever; 3 - rubber seal; 4 - wiper motor; 5 - bracket
Raise the levers, disconnect and remove the brushes and rubber seal (pic. 13.55).
Open the trunk lid and remove the upholstery.
Turn out bolts, remove an arm and the screen wiper engine.
Installation is carried out in the reverse order of removal.
Washer pump
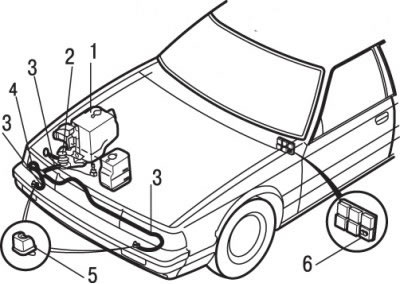
Pic. 13.56. Headlight washer: 1 - tank; 2 - pump; 3 - hoses; 4 - safety valve; 5 - jet; 6 - switch
All models have a windshield washer pump. Depending on the equipment installed, additional pumps for the rear window washer and headlight washers may be installed (pic. 13.56).
Removal of all washer pumps is carried out in the same way. Drain as much fluid as possible from the washer reservoir and have a rag ready to collect the fluid that flows out during removal.
Disconnect hoses and connector from pump. Remove the pump by pulling it out of the tank (if it is set like this) or freed from mounting clips.
Installation is carried out in the reverse order of removal.
When installing, use new seals and, if necessary, hoses.