
Switch blocks
Remove the instrument cluster.
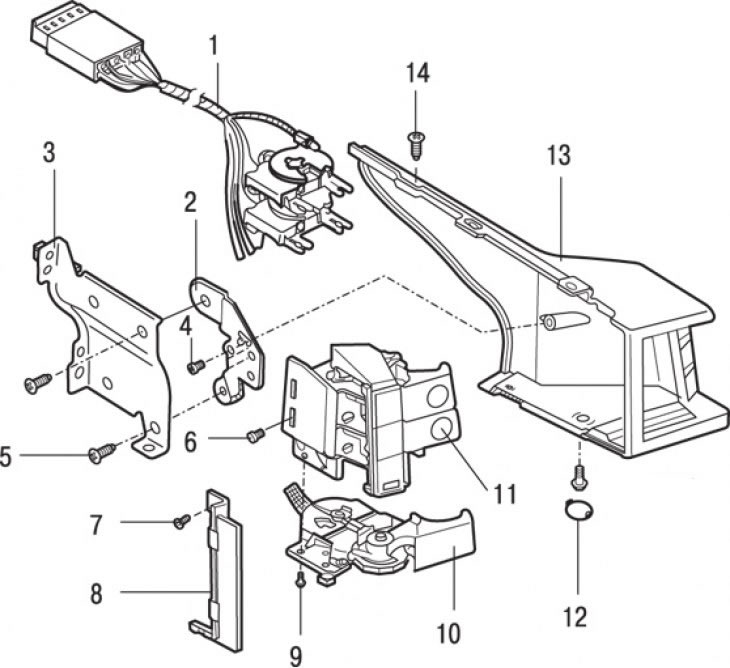
Pic. 13.46. Fastening elements of the right block of switches: 1 - wiring harness with connector; 2, 3 - brackets; 4, 5 – bracket fastening screws; 6, 7, 14 - casing fastening screws; 8 - casing; 9 – the screw of fastening of the switch of screen wipers; 10 - windshield wiper switch; 11 - windshield washer switch and one-time wiper switch; 12 - screw and plug; 13 - casing of switches
Remove the screws, disconnect the connector and remove the required switch box from the instrument cluster cover (pic. 13.46, 13.47). To disconnect the connector, use a screwdriver to depress the connector lock (pic. 13.48).
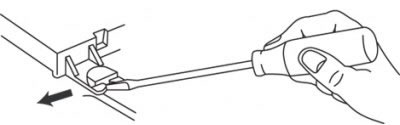
Pic. 13.48. Using a screwdriver to pry out the connector lock
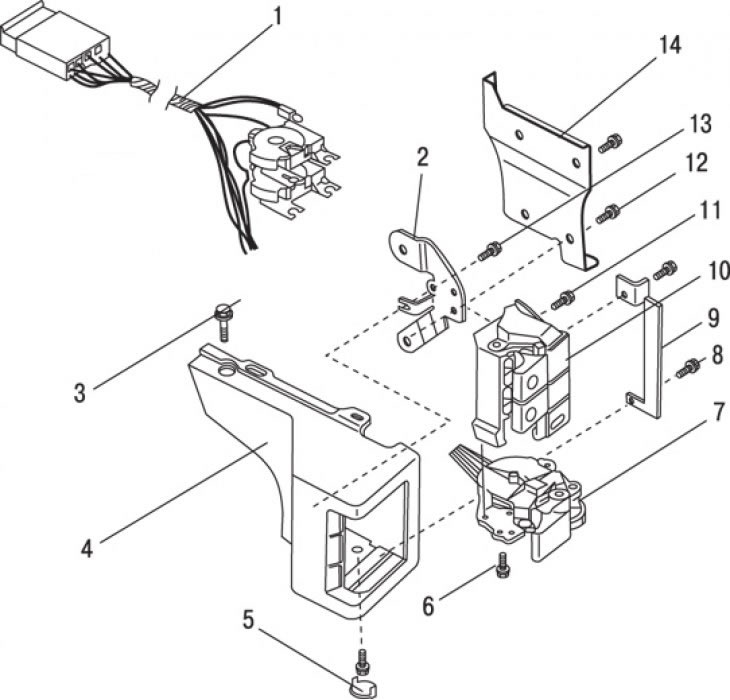
Pic. 13.47. Fastening elements of the left block of switches: 1 - wiring harness with connector; 2 - bracket; 3 – casing fastening screw; 4 - casing of switches; 5 - screw and plug; 6 – the screw of fastening of the switch of headlights; 7 - headlight switch; 8 – casing fastening screw; 9 - casing; 10 – the switch of the emergency light alarm system and a heater of back glass; 11 - screw for fastening the block of switches; 12 - bracket mounting screw; 13 - screw; 14 - bracket
Installation is carried out in the reverse order of removal.
Separate switches
Gently press the switch out of its socket, disconnect the connector and remove the switch.
Installation is carried out in the reverse order of removal.