


Contents: Installation ⇓ Adjusting the new hood ⇓
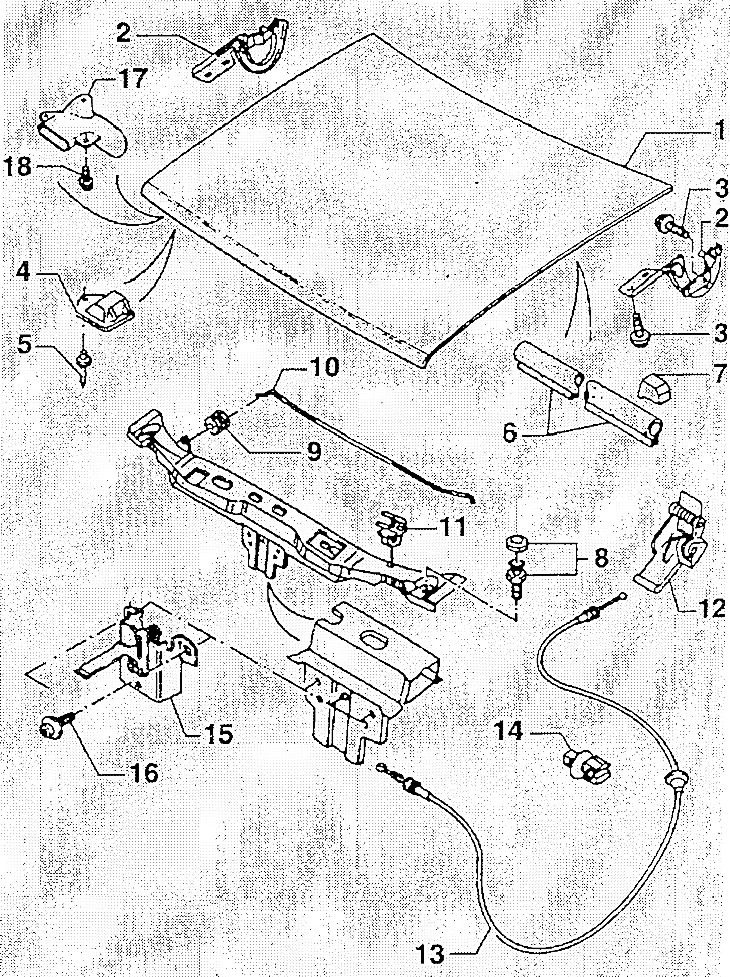
1. Hood; 2. Loop; 3. Bolt with washer; 4. Hood support holder; 5. Rivet; 6. Compaction; 7. Compaction; 8. Thrust buffer; 9. Rubber bushing; 10. Hood support; 11. Hood support clamp; 12. Hood release handle; 13. Hood cable; 14. Cable holder; 15. Hood lock; 16. Bolt with washer; 17. Air duct; 18. Bolt with washer.
Note: An assistant is required to remove the hood.
Open and prop up the hood.
Disconnect the hose from the washer nozzle.
If there is one, disconnect the plug for the washer nozzle and remove the body and hood ground wire.
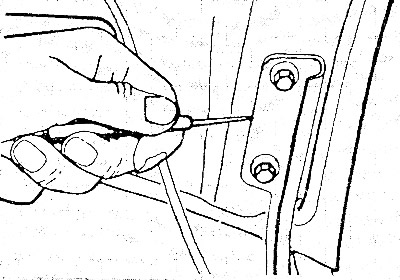
Mark the position of the hood hinge by tracing it with a scriber or felt-tip pen.
Unscrew the four mounting bolts and remove the hood with the help of an assistant. Before unscrewing the hinge bolts, place a cloth between the hood and the body to protect the paint.
Installation
Place the hood with an assistant and secure it with bolts in accordance with the marks made earlier.
Adjusting the new hood
Install the hood parts.
Loosen the hood lock bolts, but do not remove them.
Loosen the hinge bolts and move the hood in the longitudinal and transverse directions until it stands evenly and parallel to the wings.
Carefully open the hood and tighten the bolts.
If you need to adjust the height of the bonnet: screw the adjusting buffers on both sides of the car as deep as possible into the mounting cross member.
Move the lock so that the closed hood is level with the wings. After adjustment, tighten the bolts.
Finally, adjust the buffer: stick plasticine or raw rubber on both buffers and close the hood. Open the hood and measure the thickness of the compressed rubber (plasticine). Accordingly, unscrew the adjustment buffer. The hood in the closed state should be without tension on both adjustment buffers.