
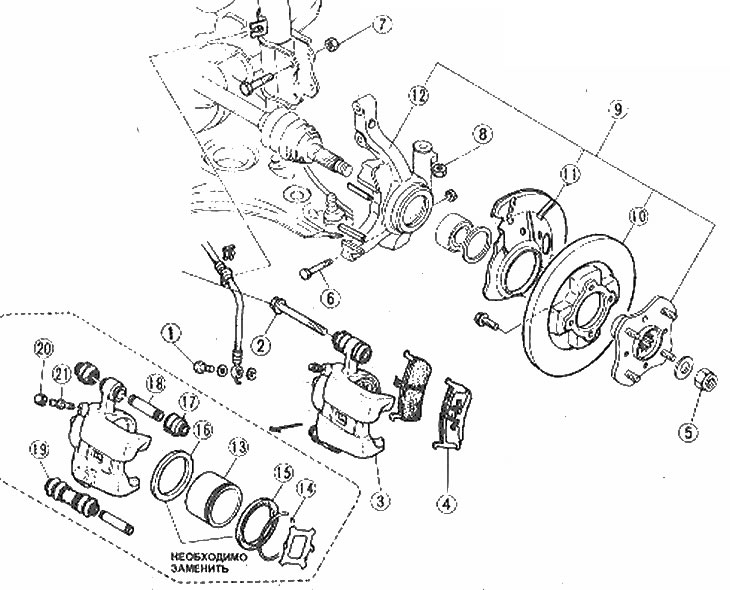
Location of front disc brake and steering knuckle components
1. Brake hose bolt; 2. Caliper mounting bolts; 3. Caliper; 4. External brake pad; 5. Hub nut; 6. Bolt and nut; 7. Bolts and nuts; 8. Nut; 9. Assembling the front wheel hub; 10. Brake disc; 11. Dust cap; 12. Swivel fist; 13. Piston; 14. Retainer; 15. Dust seal; 16. Piston seal; 17. Dust cover; 18. Pin; 19. Sleeve; 20. Rubber cap; 21. bleed valve
Note: Replace both sets of front brake pads at the same time - never change pads on only one wheel as this will result in uneven braking.
1. When working on brake components, be aware of asbestos dust generated when brake linings wear out. Do not inhale the dust - it is harmful to health.
2. Remove the lid of the additional brake fluid reservoir, pump out approximately 60 ml of fluid into a sealed container and discard it.
3. Loosen the front wheel bolts, jack up and put the front of the car on axle stands. Remove the front wheels.
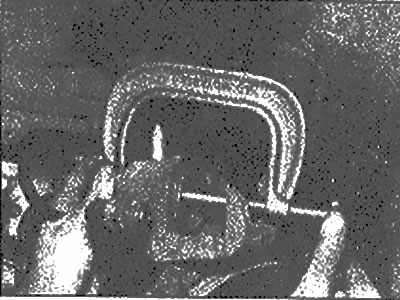
4. Remove the two caliper mounting bolts (photo).
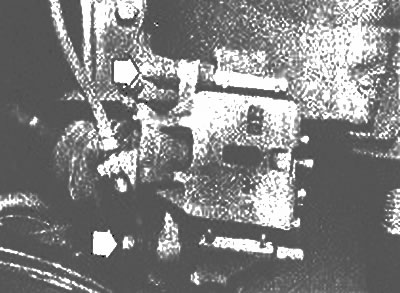
Two caliper mounting bolts (marked with arrows)
5. Move the caliper away from the disc by turning it up. Support the caliper with your hand, or tie it to the suspension post with a piece of rope. Do not let the caliper hang on the hose.
6. Release the brackets with a screwdriver and remove the outer shoe (photo). Remove the sound-absorbing pad from the back of the pad.
Remove the outer pad by prying out the brackets with a screwdriver
7. Remove the inner block, remove the sound-absorbing pad from its reverse side.
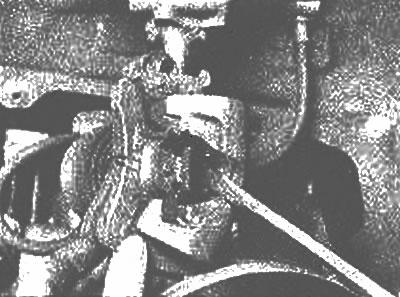
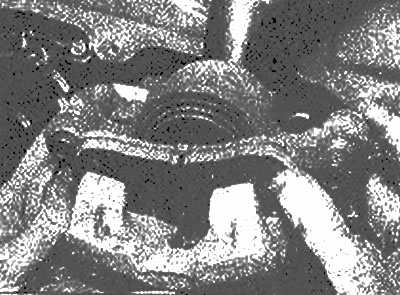
8. Inspect the caliper collar by gently retracting its edge for signs of fluid leakage (photo). If such signs are found, remove the caliper for reassembly or replacement.
Carefully retract the edge of the caliper collar and inspect it for signs of corrosion and fluid leakage
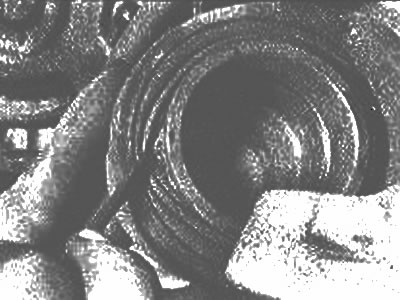
9. Push the caliper piston back until it stops using a clamp (photo).
Push the caliper piston back with a clamp
10. Install sound deadening pads on new pads (drawing).
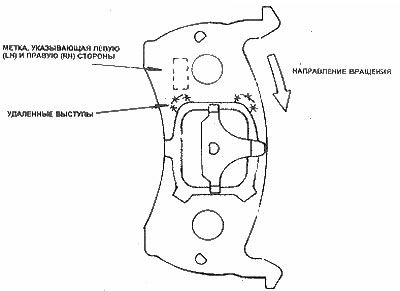
Proper installation of the sound-absorbing lining of the brake pad. On early models, the tabs may not be removed.
11. Install the inner shoe and attach it to the piston (photo).
Install the inner shoe and fix it in its original position
12. Install the outer pad and attach it to the caliper.
13. Turn the caliper into working position.
14. Install the bolts and tighten them with the tightening force specified specifications.
15. Press the brake pedal several times to bring the pads closer to the disc, then add an additional reservoir of the brake hydraulic system.
16. Install the wheels and lower the vehicle to the ground. Tighten the wheel nuts.
17. Avoid hard braking during the first few hundred kilometers when the new pads are not completely worn in.