
MazBook.ru
English Русский
Български
Беларускі
Український
Српски
Hrvatski
Română
Polski
Slovenský
Magyar
• Bookmark • Sitemap • Contacts •   
Cars Opel Cars Ford Cars Volkswagen Cars Audi Cars Kia Cars Renault Cars Peugeot


Familia Capella Mazda3 Mazda6 CX-? Others Articles
Capella 3 (1982-1992, petrol) Capella 3 and 4 (1982-1992) Capella 4 (1987-1992) Capella 5 (1991-1997) Capella 6 (1997-2005, petrol)

Drum brake master cylinder — removal, overhaul and installation (Mazda Capella GC)

  • Home
  • Mazda Capella
  • Capella GC (1982-1992)
  • Chassis
  • Brake system
  • Drum brake master cylinder — removal, overhaul and installation
0
Contents: Removal ⇓ Bulkhead ⇓ Installation ⇓

Removal


1. Jack up and securely support the rear of the vehicle on axle stands.

2. Remove the brake pad assembly (Chapter 6).

3. Carefully clean away any dirt that has accumulated around the wheel cylinder.

4. Disconnect and plug the supply pipe and remove the brake master cylinder mounting bolts (photo).
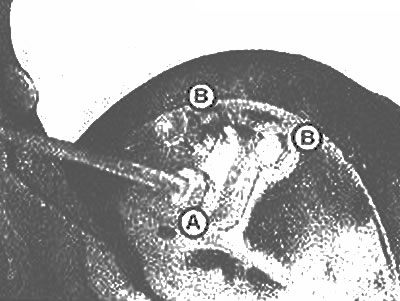
Brake master cylinder feed pipe (A) and mounting bolts (B)

Brake master cylinder feed pipe (A) and mounting bolts (B)


5. Remove the wheel cylinder from the brake backing plate and place it on a clean work bench.

Bulkhead


6. Purchase a repair kit to rebuild the wheel brake cylinder.

7. Remove the bleeder nipple and steel ball. You may need to tap the body of the wheel cylinder with a wooden block to remove the ball.

8. Remove the dust boots and pistons from the cylinder bore and separate the boots from the pistons.

9. Push the piston seals, spring seats and spring out of the cylinder.

10. Flush the slave cylinder with brake fluid, denatured alcohol or brake system cleaner. Do not use solvents such as gasoline or kerosene for this purpose.

11. Using compressed air, remove excess fluid from the working cylinder and blow out its holes.


12. Inspect the cylinder bore for signs of corrosion and wear. Minor corrosion can be removed with fine abrasive paper. If wear is significant or if corrosion cannot be removed with sandpaper, replace the cylinder.

13. Lubricate the new seals and cylinder bore with clean brake fluid.

14. Install the spring, spring seats and piston seals into the cylinder bore. Make sure the seals are installed correctly (open ends facing inward).

15. Install new boots on the pistons. Lubricate the pistons with clean brake fluid. If the repair kit includes a package of special lubricant, apply it to the inside surface of the covers (or where it says in the kit instructions).

16. Install the piston boots into the cylinder.

17. Install the steel ball and bleeder nipple.

Installation


18. Install the wheel cylinder in place and tighten the supply pipe nut by hand.

19. Install the mounting bolts onto the pistons and tighten them securely.

20. Securely tighten the feed pipe nut and install the brake shoe assembly.

21. Install the brake drum and adjust the hub bearings (Section 1). Install the wheel, then install the wheel nuts.

22. Bleed the brakes (Chapter 15) and lower the car to the ground.

23. Tighten the wheel nuts to the specified tightening torque Specifications.
This article is available at: russian, bulgarian, belarusian, ukrainian, serbian, croatian, romanian, polish, slovak, hungarian
This text was checked by: Evdokia Filimonova
Share with friends on social networks:

Previous
Capella 3 » Brake system
Next

Drum brake shoes — replacement
Brake disc — inspection, removal and installation
Disc brake caliper — rebuild
Disc Brake Caliper — removal and installation
Disc brake pads — replacement
Master cylinder — removal, overhaul and installation
Brake hoses and tubes — inspection and replacement
Parking brake — checking operation and adjustment
Brake pedal assembly — removal and installation
Parking brake assembly — removal and installation
More articles on repairing other Mazda models
Brake master cylinder and vacuum booster Mazda Familia 5 (1985-1989)
Master Brake Cylinder — Description Mazda3 BK (2003-2009)
Master Brake Cylinder — Description Mazda6 GG (2002-2008)
Master brake cylinder Mazda CX-5KE (2012-2017)
Removal and installation the master brake cylinder Mazda BT-50 (1) (2006-2011)
Link in different formats to this article
Comments and feedback from visitors
No comments yet


How much will 14 + 37 ?


Capella 6 (1997-2005, petrol) 
  • General information
  • Introduction to guide
  • User manual
  • Troubleshooting
  • Maintenance
  • Power unit
  • 4-cylinder engines
  • 6-cylinder engines
  • Engine overhaul
  • Cooling and ventilation
  • Power and exhaust systems
  • Engine electrics
  • Control system
  • Transmission
  • Mechanical gearbox
  • Automatic gearbox
  • Clutch and drive shafts
  • Chassis
  • Brake system
  • Car suspension
  • Steering
  • Body
  • Exterior (external elements)
  • Interior (internal elements)
  • Doors, windows and locks
  • Electrical equipment
  • Equipment and devices
  • Electrical circuits
Capella 5 (1991-1997) 
  • General information
  • User manual
  • Maintenance
  • Helpful hints
  • Power unit
  • Petrol engines 1.6 and 1.8
  • Petrol engines 2.0
  • 2.5 petrol engines
  • Overhaul engines 1.6 and 1.8
  • Overhaul engines 2.0 and 2.5
  • Diesel engine 2.0
  • Engine electrics
  • Cooling system
  • Air conditioner
  • Carburetor Nikki 30/34
  • Power system (1.6 and 1.8)
  • Power system (2.0 and 2.5)
  • Control system
  • Transmission
  • Mechanical gearbox
  • Automatic gearbox
  • Clutch and axles
  • Chassis
  • Brake system
  • Suspension and wheels
  • Steering
  • Body
  • Exterior (external elements)
  • Interior (internal elements)
  • Doors and windows
  • Electrical equipment
  • Equipment and devices
  • Electrical circuits
Capella 4 (1987-1992) 
  • General information
  • Introduction to manual
  • Vehicle specifications
  • Power unit
  • Engine repair
  • Lubrication system
  • Cooling system
  • Fuel system (carburetor)
  • Fuel injection (FE)
  • Fuel injection (DOHC)
  • Fuel system (diesel)
  • Ignition system
  • Transmission
  • Clutch
  • Gearbox
  • Drive shafts
  • Chassis
  • Front suspension
  • Rear suspension
  • Steering system
  • Brake system
  • Electrical equipment
  • Equipment and devices
  • Electrical circuits
Capella 3 and 4 (1982-1992) 
  • General information
  • User manual
  • Maintenance
  • Power unit
  • Gasoline engine
  • Engine overhaul (gasoline)
  • Diesel engine
  • Cooling and heating
  • Supply system
  • Ignition system
  • Emission reduction
  • Transmission
  • Clutch
  • Mechanical gearbox
  • Automatic gearbox
  • Drive shafts
  • Chassis
  • Brake system
  • Suspension and wheels
  • Steering
  • Body
  • Exterior (external elements)
  • Interior (internal elements)
  • Electrical equipment
  • Equipment and devices
  • Power devices
  • Electrical circuits
Capella 3 (1982-1992, petrol) 
  • General information
  • User manual
  • Maintenance
  • Troubleshooting
  • Late models
  • Power unit
  • Engine in car
  • Engine overhaul
  • Cooling and heating system
  • Fuel and exhaust system
  • Engine electrical system
  • Emission control system
  • Transmission
  • Mechanical gearbox
  • Automatic gearbox
  • Clutch and drive shafts
  • Chassis
  • Brake system
  • Suspension and wheels
  • Steering
  • Body
  • Exterior (external elements)
  • Interior (internal elements)
  • Electrical equipment
  • Equipment and devices
  • Lighting and lamps
  • Electrical circuits
MazBook.ru © 2018–2026 · Mobile version · Articles and news · Sitemap: EN BG BY UA RS HR RO PL SK HU · Feedback · Site search · Add to bookmarks Familia 5 (BF) · Familia 6 (BG) · Capella 3 (GC) · Capella 3 and 4 (GC) · Capella 4 (GD) · Capella 5 (GE) · Capella 6 (GF) · Mazda3 BK · Mazda6 GG · CX-5KE · Mazda 121 (3) · Mazda BT-50 (1) ·
By continuing to use the site, you agree to the use of cookies 🔐