
Note: For detailed photos of brake system components, see Section 9.
1. Brakes should be inspected each time a wheel is removed or whenever a failure is suspected.
Signs of a brake system failure are:
- deviation of the car to the side when braking;
- creaking brakes;
- excessive free play of the brake pedal;
- pedal pulsation;
- a fluid leak, usually noticeable on the inside of the wheel.
Disc brakes
2. In order to inspect the front disc brake, only the wheel needs to be removed.
3. Raise the vehicle and place it securely on axle stands. Remove wheels.
4. The disc brake calipers, which contain the pads, are now visible. Each caliper has outer and inner pads. Both pads must be inspected.
5. Estimate the thickness of the pad linings through the inspection hole in the caliper body (photo). If the pads are worn down to 1 mm or they are even thinner, the pads must be replaced. Remember that the overlay is attached to a metal base whose thickness is not included in this measurement.
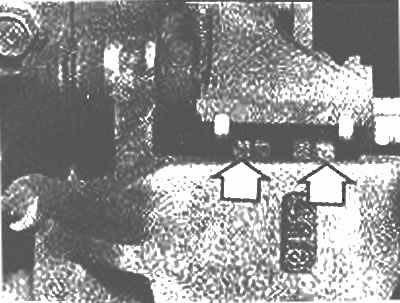
Assess pad thickness (arrows) through the inspection hole in the caliper body
6. If it is difficult to measure the exact thickness of the lining and the condition of the pad is in doubt, remove the pads and inspect them.
7. Before installing the wheels, check the brake hoses and their connections for leaks and damage (cracks, splitting, etc.). Replace hoses or connections as needed (see Section 9).
8. Inspect the brake disc for scratches and burn marks. If these damages are found, remove the hub/disc assembly and perform the necessary maintenance procedures (Section 9).
Drum brakes
9. Remove the brake drum assembly/hub (Chapter 27). If this fails, make sure the parking brake is released. see also paragraph 4 of Chapter 6 of Section 9.
10. Carefully remove all deposits of dirt and dust from the brake components.
Warning: Do not blow off dust with compressed air. Try not to inhale the dust, as it contains asbestos which is hazardous to your health.
11. Measure the thickness of the pads on the rear brake pads (photo). If the distance between the rivet heads and the lining surface is 1 mm or less, replace the pads. If the pads look worn but you can't determine their exact thickness, compare them to new ones. The pads also need to be replaced, they are cracked, their pads are rubbed (have a shiny surface) or contaminated with brake fluid.
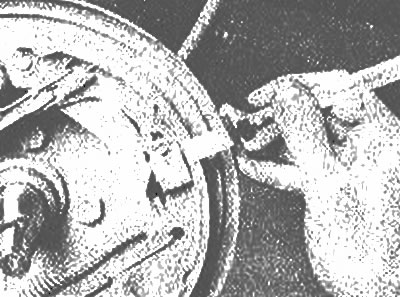
Remove the brake drum and measure the lining thickness
12. Check up a condition of all springs of assembly of a brake.
13. Check brake components for signs of fluid leaks. Using your fingers, carefully remove the rubber caps from the working brake cylinder located at the upper ends of the brake pads. Any leakage indicates that the working brake cylinders should be rebuilt immediately (Section 9). Also check hoses and connections for signs of leaks.
14. Wipe the inside of the drum with a clean cloth soaked in denatured alcohol. Be careful not to inhale dangerous asbestos dust.
15 Inspect the inside of the drum for cracks, deep scratches, and discoloration spots. If the detected defects cannot be removed with a fine emery cloth, the drum must be re-sharpened, for which contact a specialist. Also check the condition of the wheel bearing seal and replace it if necessary (Chapter 27).
16 If the inspection shows that all parts are in good condition, install the hub/brake drum (see chapter 27). Install the wheel and lower the car to the ground.
Parking brake
17 Tighten the parking brake lever with a force of approximately 10 kg and make sure that the lever moves the number of clicks specified in the Specifications. If not, adjust the parking brake (Section 9).
18 The easiest way to check the operation of the parking brake is to park the vehicle on a steep hill with the parking brake applied and the transmission in neutral. If the parking brake cannot hold the vehicle, it must be adjusted (see Section 9).
Brake booster
19. Press the brake pedal several times (engine off), to release the residual vacuum in the brake booster assembly.
20. Firmly press the brake pedal to the stop and, holding it in this position, start the engine. If the brake booster unit is working properly, the brake pedal will move down noticeably when starting.
21. If the brake booster unit is not working, check the vacuum hose and one-way valve before replacing the vacuum booster unit itself (Section 9).