


2. Although some sources recommend changing the oil filter every other oil change, the low cost of an oil filter and the relative ease of changing it make it feasible to install a new filter at every oil change.
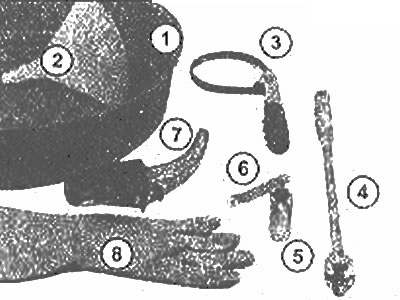
3. The tools needed to change the oil and filter are a wrench to install the drain plug into the bottom of the pan; a special wrench for removing the old filter; a container with a capacity of at least 7 liters to drain the old oil, and a funnel to pour in the new oil (photo).
Tools needed to replace the filter:
- 1. Drain container
- 2. Funnel
- 3. Special key for removing the filter
- 4. Key for working in hard-to-reach places
- 5. Nest
- 6. Knife for opening oil cans
- 7. Oil drain/fill port
- 8. Rubber gloves
4. Also, prepare a clean rag and old newspapers to wipe up any spills. Access to the underside of the vehicle will be greatly improved if the vehicle is lifted with a winch or supported on axle stands.
Warning: Do not work under a vehicle supported only by a jack.
5. If you are changing the oil for the first time, get under the car and locate the oil drain plug and oil filter. If a skid plate is installed, it may need to be removed.
6. Warm up the engine to normal operating temperature. Use the warm-up time to gather everything you need for the job, see models and oil types. v "Recommended lubricants and fluids" at the beginning of this guide.
7. Warming up the engine (warm motor oil will drain easier and faster, and it will also remove more sediment), jack up the vehicle and support it securely on axle stands.
8. Place all necessary tools, rags and newspapers under the car. Place a container under the drain plug. Keep in mind that the oil will initially flow out of the pan with some force.
9. Without touching any hot exhaust system components, remove the drain plug with a wrench (photo). You may need to wear gloves when loosening the last few turns.
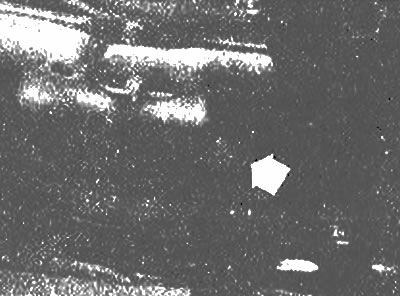
Location of drain plug (arrow)
10. Allow the old oil to drain into a container. It may be necessary to move the container under the engine when the jet pressure decreases.
11. After all the oil has drained, wipe the drain plug with a clean rag. Small metal particles could have stuck to the cork, which
would contaminate the new oil.
12. Clean the area around the drain hole and install the plug. Tighten the plug securely with a wrench.
13. Move the drain container under the oil filter.
14. Use a special wrench to loosen the oil filter. A chain or metal bar wrench may deform the filter canister, but this shouldn't be a concern since the filter will be replaced (photo). If the oil cooler is installed, hold it still while removing the filter.
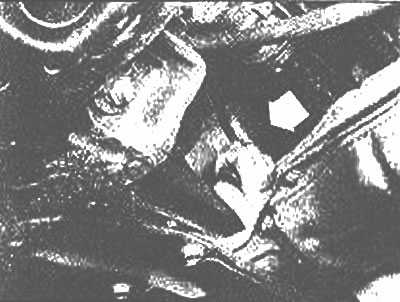
The strip wrench for removing the oil filter is convenient to use even in hard-to-reach places
15. Sometimes the oil filter is clamped so tightly that it is impossible to unscrew it, or it is installed in a hard-to-reach place. In this case, you can drive a metal rod or a long screwdriver directly into the wall of the filter canister and use it as a lever to unscrew the filter. Be prepared for oil to splash out of the canister when it is punctured.
16 Unscrew the old filter completely. Be careful, it's filled with oil. Drain the oil from the filter into a drain container.
17. Compare the old filter with the new one to make sure they are identical.
18. Use a clean rag to remove all oil, dirt and sludge from where the oil filter attaches to the engine. Inspect the old filter to ensure that its rubber seal is not still attached to the engine. If the gasket is stuck to the engine, remove it using a flashlight if necessary.
19. Apply a thin layer of oil around the entire periphery of the rubber gasket of the new oil filter.
20. Install the new filter on the engine following the instructions printed on the filter canister or packaging box. Most filter manufacturers do not recommend using a filter wrench to remove the filter, as it is easy to overtighten the filter (damage the seal). If there are no installation instructions, tighten the filter by hand three-quarters of a turn from the point where the rubber gasket contacts the engine surface.
21. Remove all tools, rags, etc. from under the vehicle. Be careful not to spill oil from the drain container, then lower the vehicle to the ground.
22. Locate the oil filler plug on the camshaft cover in the engine compartment (photo).
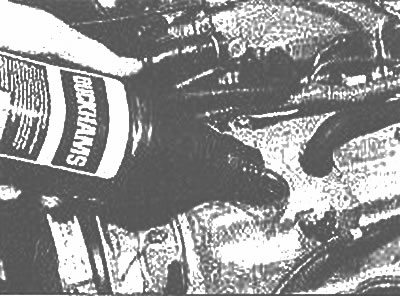
Oil is poured through the hole in the camshaft cover
23. If using an oil drain/fill attachment, insert it into the neck of the oil canister and pour fresh oil through the filler hole. A funnel can also be used.
24. Pour 3.5 liters of fresh oil into the engine. Wait a few minutes to allow the oil to drain into the pan, then check the oil level with the dipstick (see Chapter 4, if necessary). If the oil level approaches the "F" mark, start the engine to allow the new oil to circulate.
25. Let the engine run for about a minute, then turn it off. Immediately check the oil pan drain plug and the area around the oil filter for leaks. If there are leaks, tighten the plug or filter slightly. On models with an oil cooler, also check the area between the oil cooler and the filter for leaks. If leaks are found, remove the oil cooler (Section 2) and replace the oil seal.
26. Check the oil level again using the dipstick and add enough oil to bring the level up to the "F" mark on the dipstick.
27. During the first few days after changing the oil, frequently check the drain plug and filter for leaks and monitor the oil level.
28. Old oil drained from the engine cannot be reused.