
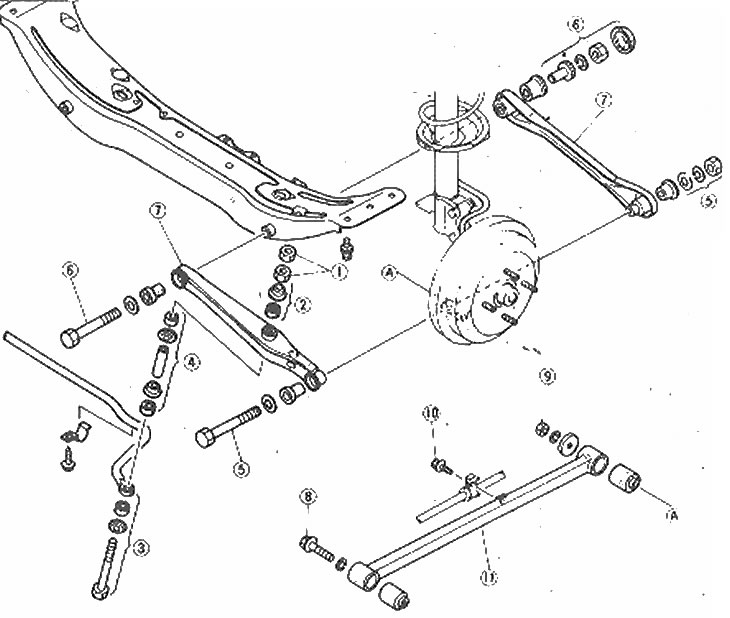
Installation details of the side and longitudinal balancer of the rear suspension
1. Nuts; 2. bushings and retainer; 3. Retainer. bushing and bolt; 4. Clips, bushing and gasket; 5. Bolt and nut; 6. Coupling bolt, nut and gasket; 7. Lateral connections; 8. Bolt; 9. Nut; 10. Bolt; 11. Longitudinal balancer
1. Raise the rear of the vehicle and support it securely on the jack stands.
2. Remove the fuel tank (Section 4).
3. Mark the position of the adjustment star and wheel nut to set to the same position. Moving the nut and wheel sprocket will affect the toe of the rear wheels, which is quite important.
4. Remove the cross member-to-chassis side connection mounting bolt, nuts and bushings, and disconnect the anti-roll bar connection (if equipped).
5. Unscrew the side connections from the stub axle fastener, then remove them from the vehicle.
6. Remove the parking brake suspension bolt.
7. Remove the tie bolts and the lower longitudinal balancer from the vehicle.
8. Assembly is carried out in the reverse order. Install all bolts temporarily and then lower the weight of the vehicle onto the wheels before tightening them to the specified torque specification.
9. Have the rear wheel alignment checked by your dealer or a properly equipped workshop.