


Contents: Removal ⇓ Installation ⇓
Removal
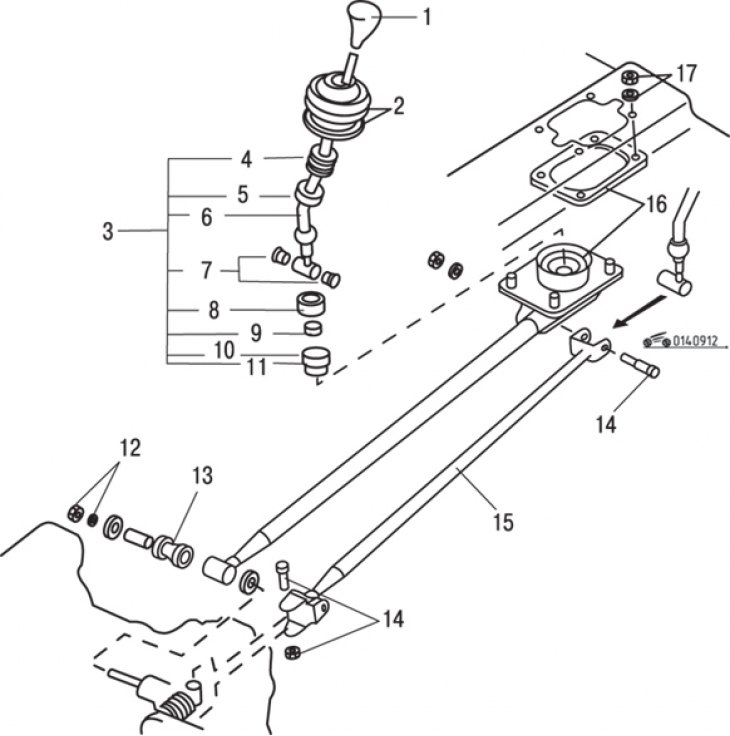
Figure 9.12. Gear shift lever elements: 1 – gear shift lever handle; 2 – case; 3 – gear shift lever parts; 4 – spring; 5 – upper ball seat; 6 – gear shift lever; 7 – bushing; 8 – lower ball seat; 9 – holder; 10 – plate; 11 – case; 12 – nut and washer; 13 – bushing; 14 – bolts and nuts; 15 – shift rod; 16 – extension rod and suspension unit; 17 – suspension unit mounting nuts
Inside the vehicle, remove the gearshift knob, gearshift boot, and front and rear struts (figure 9.12).
Raise the front of the vehicle and support it securely on stands.
Remove the lock nuts and bolts and lower the shift rod away from the vehicle.
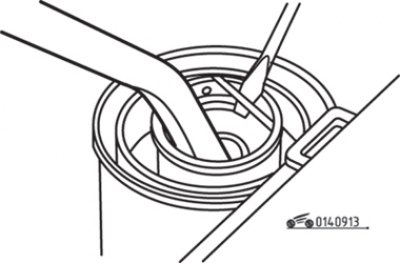
Figure 9.13. Using a screwdriver to release the gear shift lever spring clamp
Use a screwdriver to release the gear shift lever spring clamp and remove the gear shift lever assembly from the vehicle (figure 9.13).
Loosen the extension rod mounting nuts and bolts, remove the extension rod, suspension and gaskets.
Installation
Installation is carried out in the reverse order of removal, taking into account the following.
(The article is copied from the website: MAZBOOK.RU)
Apply lithium grease to the moving and rubbing parts of the gear shift lever.