
Conditions for adjustment
If your vehicle is equipped with a constant idle speed control system, you must turn off all vehicle electrical equipment and mount the front wheels straight ahead before adjusting the idle speed or fuel mixture (or before adjusting the ignition timing or the duration of the closed state of the breaker contacts). Otherwise, the stabilization system will be active and the adjustment will be incorrect.
Disconnect vacuum hose from idle air compensator at high engine temperature (if installed) and plug the pipe on the carburetor.
Adjustment of the crankshaft speed when idling the engine and the amount of fuel mixture idling (SO)
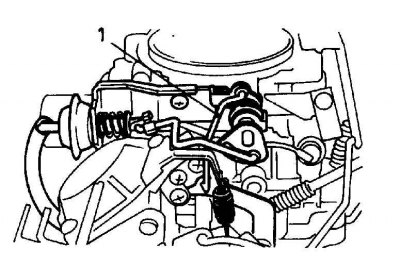
Idle adjustment screws
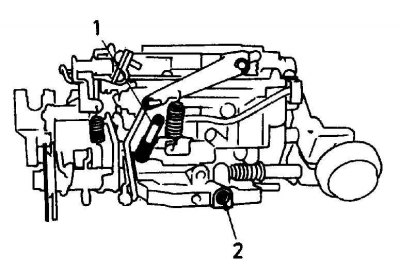
1. Screw for adjusting the speed of the crankshaft when the engine is idling
2. Idle mixture adjustment screw
1. Increase the engine speed to 3000 rpm and hold it at this level for 30 seconds to clear the intake manifold of fuel vapors, then leave the engine to idle.
2. Using the idle speed adjustment screw, adjust the engine speed when the engine is idling (see subsection 5.1.1).
3. Check CO level; if it differs from the specified (see subsection 5.1.1), remove the seal and adjust the idle mixture adjustment screw to obtain the correct CO level. Screw rotation clockwise (twisting) reduces the level of CO, turning the screw counterclockwise (twisting) increases CO levels. If you do not have a CO sensor, the operation of adjusting the amount of idle mixture without using a CO sensor is described in the appropriate chapter.
4. Repeat the steps above until both adjustments are correct.
5. Clean the intake manifold every 30 seconds while making adjustments by raising the engine speed to 3000 rpm for 30 seconds.
6. Raise the engine speed to 2000 rpm and measure the CO level. The value obtained must be less than half of the CO level when the engine is idling.
7. Place a new seal on the mixture adjustment screw when the adjustment is complete.
Setting the fuel level in the float chamber / adjusting the float stroke
Float chamber window
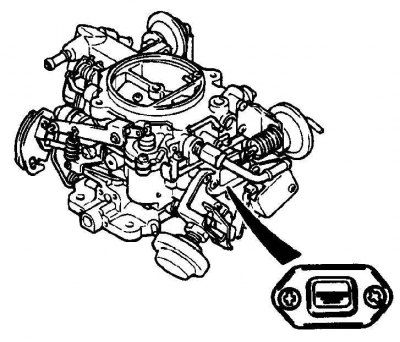
The fuel level in the float chamber can be checked without removing the carburetor. When the engine is running, the fuel level can be checked through the sight glass on the float chamber. If the fuel level does not match the mark, adjustment is necessary.
1. Remove the carburetor cap following the instructions in subsection 5.1.3.
2. Turn the carburetor cap over so that the float is facing up and the needle valve is closed.
3. measure distance "H" (float height) between carburetor cover and plastic float (without gasket). Check that the float installation height is as specified in subsection 5.1.1.
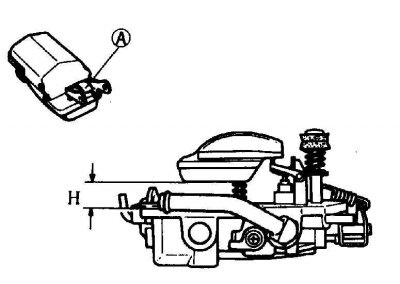
H. Float installation height
4. Adjust the float height by bending the float lever "A".
5. Turn the carburetor cap over and check that the float is lowered as far as the restrictive tab allows it.

6. measure distance "L" (float stroke) between the carburetor cover and the underside of the float. Compare the resulting value with the value specified in subsection 5.1.1.
7. Adjust the float stroke by bending the stop tab "IN".
Mechanical choke adjustment
Before adjusting the choke, check that the idle speed and idle mixture are correctly adjusted.
Remove the air filter. Disconnect the crankcase ventilation hose. Vacuum hoses must remain connected (or disconnect them and plug the holes).
Fast idle adjustment - carburettor removed from engine
Checking the position of the air damper when the engine is running in fast idle mode
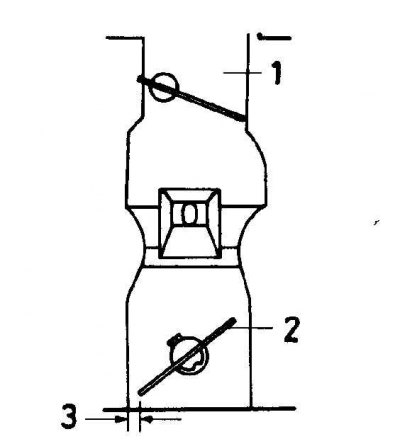
1. Air damper
2. Throttle valve - primary chamber
3. Clearance
1. To adjust the fast idle system, the carburetor must be removed from the engine.
2. Turn the carburetor over and use the choke lever to fully close the choke.
3. The adjusting screw will open the throttle valve, leaving a small gap.
4. Using a drill shank, measure the gap between the carburetor chamber wall and the edge of the throttle (see fig. Checking the position of the air damper when the engine is running in fast idle mode). Compare the resulting value with the value specified in subsection 5.1.1.
5. Adjust the gap by bending the connecting rod at point 1.
Automatic choke
The conditions for adjusting the automatic choke have been specified (see subsection 5.1.1).
Fast idle adjustment - engine running
1. Open the throttle slightly and place the fast idle lever on the top prong of the fast idle cam.
2. Start the engine without depressing the accelerator pedal and note the engine speed at fast idle. Compare the received frequency with the value specified in subsection 5.1.1.
3. Adjust the engine speed by turning the fast idle speed adjustment screw in the desired direction.
Fast idle adjustment (models with semi-automatic choke) - carburettor removed from engine
Fast idle adjustment
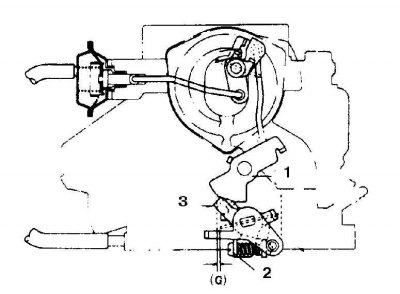
1. Fast idle cam
2. Adjusting screw
3. Fast idle lever
1. Turn the carburetor over, then open the throttle slightly and place the fast idle lever on the second prong of the fast idle cam. The adjusting screw will open the throttle valve, leaving a small gap.
2. Check that the air damper is completely closed. Using a drill shank, measure the gap "G" between the wall of the carburetor chamber and the edge of the throttle valve (see fig. Fast idle adjustment). Compare the resulting value with the value specified in subsection 5.1.1.
3. Adjust the gap by turning the adjusting screw in the desired direction.
Fast idle adjustment (models with automatic choke) - carburettor removed from engine
Aligning the marks on the fast idle cam and the lever
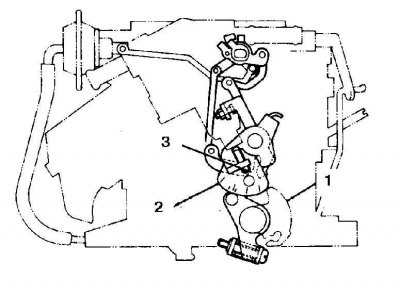
1. Throttle lever
2. Quick idle lever
3. Adjusting screw
1. Wait until the carburetor temperature drops to 25°C and keep the carburetor at this temperature for at least an hour.
2. Check that the mark "25°" on the fast idle cam is aligned with the center of the fast idle lever.
3. Adjust the mark position by turning the adjusting screw in the desired direction.
4. Turn the carburetor over and use the drill shank to measure the gap between the carburetor chamber wall and the edge of the throttle (see fig. Checking the position of the air damper when the engine is running in fast idle mode). Compare the resulting value with the value specified in subsection 5.1.1.
5. Adjust the gap by turning the adjusting screw in the desired direction.
Choke opening at full throttle
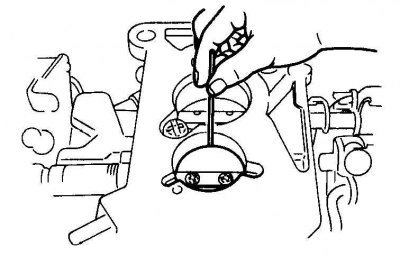
1. Fully open the throttles and use the drill shank to measure the gap "R" between the upper edge of the air damper and the air intake duct. Compare the resulting value with the value specified in subsection 5.1.1.
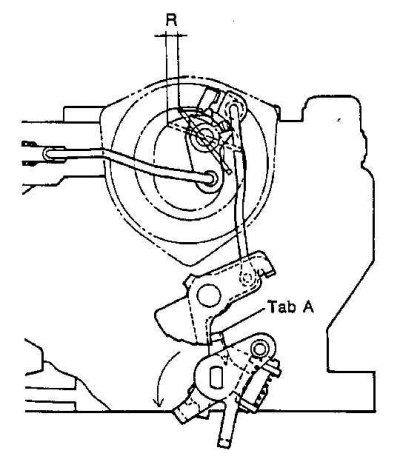
2. Adjust the gap (R), by bending the tongue "A".
Opening the air damper (all carburetors)
Checking the throttle opening diaphragm, measuring the gap
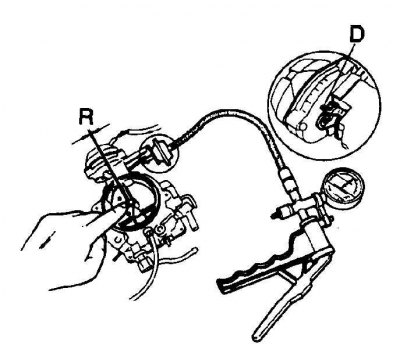
D. Adjustment lever - automatic choke
R. Clearance
1. Disconnect the vacuum hose and connect a vacuum pump to each air damper opening diaphragm in turn. Pump out air to get a vacuum of 400 mmHg; the diaphragm must fully open the air damper and the vacuum must be maintained for at least 30 seconds. Replace the diaphragm if it is defective.
2. Maintain a vacuum of 400 mmHg to push the choke diaphragm rod all the way up.
3. Using a drill shank, measure the gap between the top edge of the air damper and the wall of the air intake duct. Compare the obtained gap value with the value specified in subsection 5.1.1.
4. Adjust the clearance by bending the rod (mechanical air damper) or lever (automatic air damper) at the end of the diaphragm rod.
5. Some models have two air damper opening diaphragms. Check both diaphragms. The thermal vacuum valve of the second opening diaphragm must be opened when the coolant temperature is above 19±3°C.