
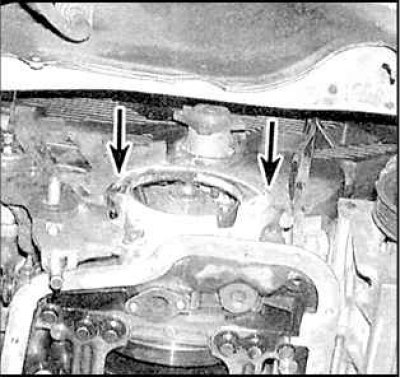
Crankshaft timing marks
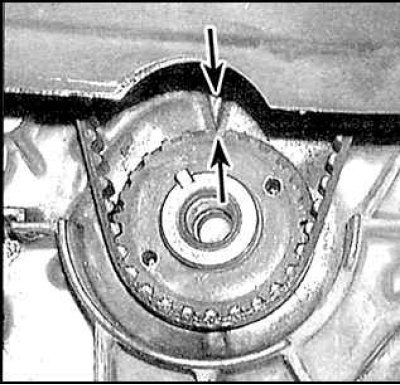
The marks are indicated by arrows.
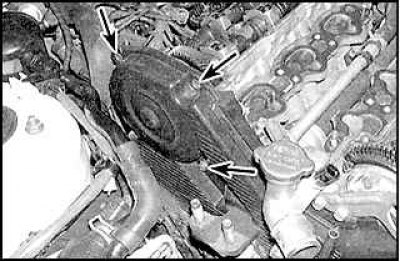
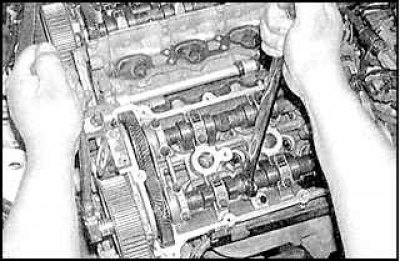
Camshaft timing marks - front row of cylinders
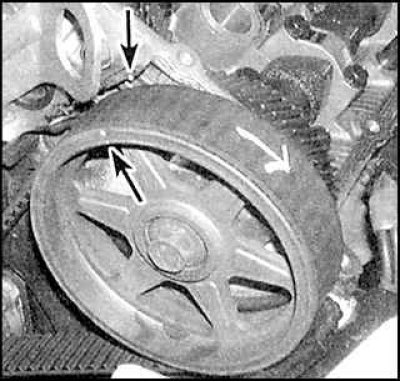
The marks are indicated by arrows.
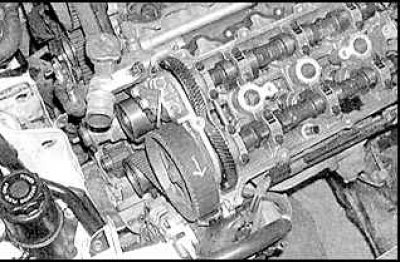
Camshaft timing marks - rear row of cylinders
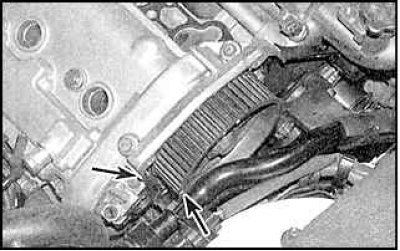
The marks are indicated by arrows.
Removing
1. Disconnect the negative battery cable.
2. Loosen the water pump pulley bolt. Remove the power steering pump drive belt and alternator drive belt. Remove the water pump pulley.
3. Set piston N1 to TDC.
4. Loosen the front right wheel bolts.
5. Put the car on the handbrake and block the rear wheels. Raise and secure the front of the vehicle. Remove the right front wheel.
6. Remove the mudguard of the right front fender.
7. Place a jack under the engine, raise it slightly and remove the right engine mount.
8. Screw in the spark plugs.
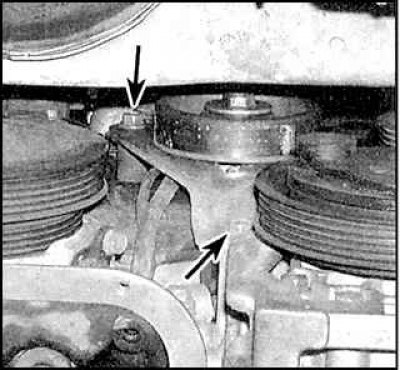
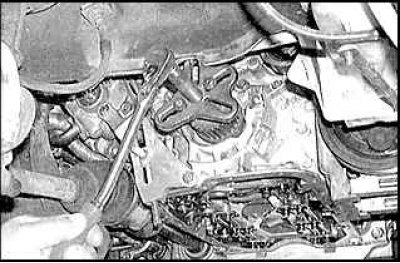
9. Remove the two drive belt tensioner bracket bolts (indicated by arrows) and remove the tensioner.
10. Disconnect the wires from the crankshaft sensor and temperature sensor.
11. Remove the crankshaft pulley.
12. Remove the power steering pump pulley.
13. Unscrew the lower bolts of the timing belt cover (indicated by arrows).
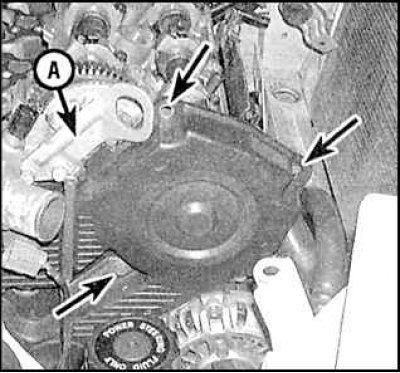
14. Remove engine lift bracket (A) and unscrew the three bolts of the timing belt cover (indicated by arrows).
15. After unscrewing the remaining bolts (indicated by arrows), remove the cover and gasket. Remove the dipstick tube to measure the oil level.
16. If you are going to reuse the timing belt, make a mark on it indicating the direction of rotation.
17. Align the timing marks of the crankshaft sprocket and the timing marks of the camshaft sprocket (see fig. Synchronization labels of a cranked shaft, fig. Camshaft timing marks - front row of cylinders, fig. Camshaft timing marks - rear row of cylinders).
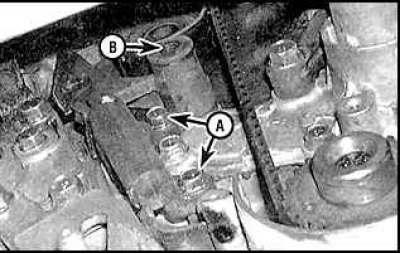
18. Remove the two timing belt tensioner bolts (A) and remove the tensioner. Loosen tensioner pulley bolt (IN).
19. Remove the timing belt.
20. If the camshaft sprockets are damaged, you can now remove them and replace them.
21. Remove the crankshaft sprocket and replace it if damaged.
Examination
1. Check the timing belt (see subsection 3.1.8).
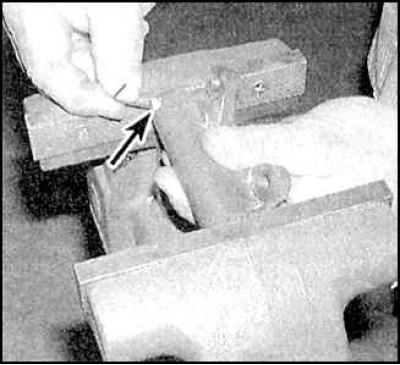
2. Using a vise, compress the tensioner piston so that you can insert a 1.5 mm thick rod into the second bottom hole of the tensioner.
3. Check that the intermediate pulleys rotate freely.
Installation
1. Thoroughly clean the timing belt installation area at the front of the engine.
2. Install the crankshaft sprocket.
3. Temporarily install the crankshaft pulley bolt and turn the crankshaft counterclockwise to align the mark on the crankshaft sprocket with the mark on the crankcase.
4. Install the timing belt.
5. Install the tensioner (with a compressed piston and with a rod inserted into the lower hole) and tighten its bolts.
6. Remove the rod from the tensioner hole. Rotate the crankshaft two full turns (720°). Check if the sprocket timing marks are still aligned (see fig. Crankshaft timing marks, fig. Camshaft timing marks - front row of cylinders, fig. Camshaft timing marks - rear row of cylinders).
Attention! Do not start the engine until you are absolutely sure that the timing belt is installed correctly. If the belt is installed incorrectly, the engine may be seriously damaged.
7. Tighten the tensioner pulley bolt.
8. Install the remaining parts in reverse order.