


Note. The models described in this manual are equipped with an airbag system. Before working in close proximity to shock sensors, steering column or front panel, disconnect the wire from the negative battery terminal, then the wire from the positive battery terminal, then wait at least 3 minutes. Accidental airbag deployment can cause injury (see chapter 12). The airbag wiring harness through the dash and center console is yellow. Do not connect a tester or car system wires to these wires.
Warning. If the car radio installed in your car has an anti-theft code, make sure you have the code to unlock it before disconnecting the battery.
1. Disconnect the wire from the negative battery terminal (see Note and Warning at the beginning of this paragraph).
2. Remove the bezel trim panels (see paragraph 28) and central console (see paragraph 27).
3. Remove the instrument cluster (see chapter 12) and a glove box (see paragraph 28).
4. Disconnect the passenger airbag unit (if it exists) and take it off (see chapter 12).
5. Remove the car radio (see chapter 12).
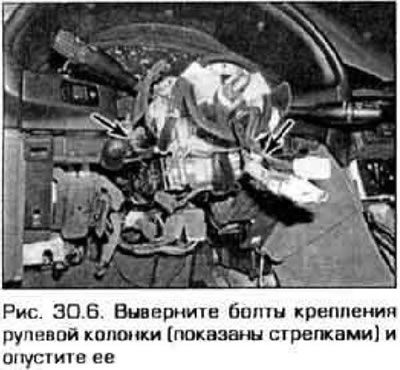
6. Remove the lower trim panel from the driver's side (see paragraph 28) Remove the steering column mounting bolts and lower it (pic. 30.6).
7. To remove the instrument panel, disconnect the wiring connectors (their number depends on the car model). Most models use one connector. If there are multiple connectors, label them for ease of reassembly.
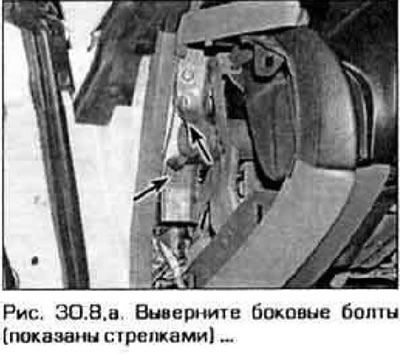
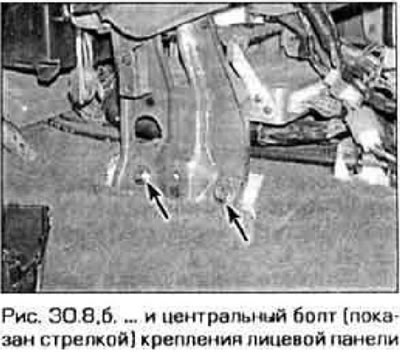
8. Turn out all bolts of fastening of the panel of devices to a body (pic. 30.8, a, b) After that, lift the panel in order to disconnect from the three latches (they are located behind the front panel), then slide the bezel back and out through the driver's door.
 |  |
9. Installation is made in sequence, return to removal.