
Note. It is very important that the headlights are correctly installed. Incorrect adjustment may result in dazzling the driver of an oncoming vehicle or in insufficient illumination of the roadway. Headlight beams should be adjusted every 12 months, when changing bulbs or after any work on the front of the car. Please note that the adjustment described below is only a temporary measure. Fine adjustment of the headlights must be carried out at a specialized service station.
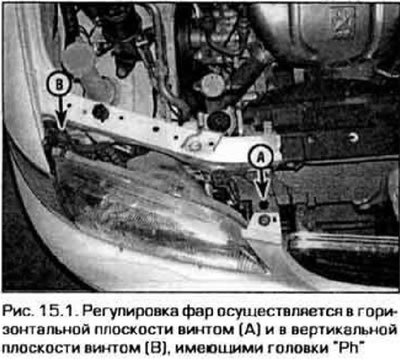
1. Each headlight has two adjustment screws. On the Probe, these screws can only be accessed after the headlight bezel has been removed (see fig. 14.4). On the Mazda MX-6 model, one of the screws is accessed from the back of the headlight, and the second is accessed from the front. In the Mazda 626, the adjusting screws are located on top (pic. 15.1).
2. Mazda 626 is equipped with a headlight leveling device. If the direction of the headlights after adjustment remains unsatisfactory, this may be due to damage to the front of the body. Headlight adjustment is described below.
3. You will need a level ground and a vertical wall for adjustment. Place the vehicle perpendicular to the wall Draw a vertical line on the wall through the center of the vehicle and vertical lines through the centers of the headlights (pic. 15.3).
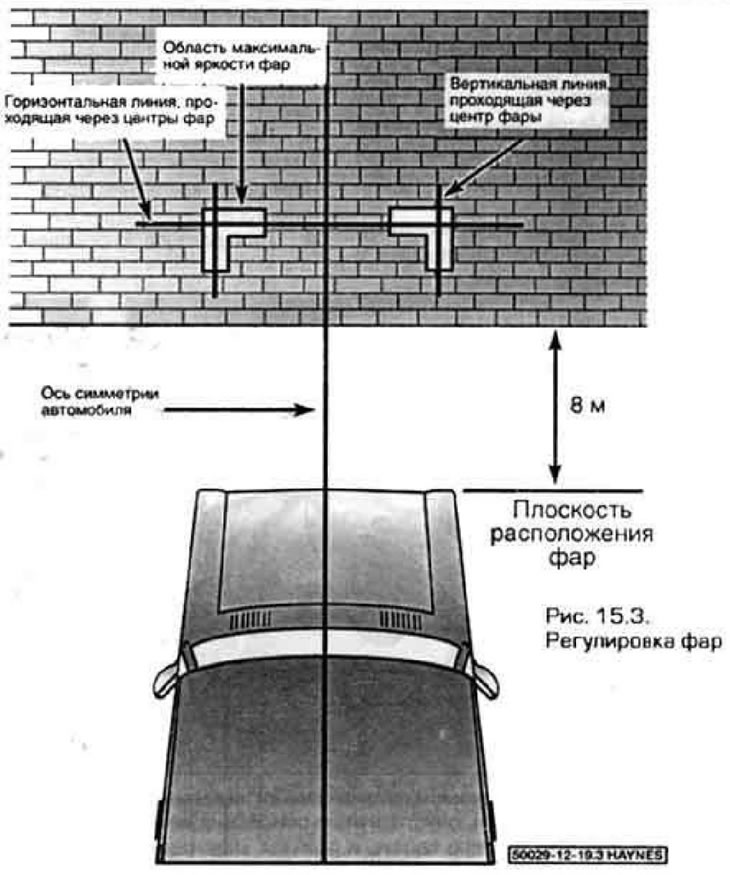
4. Draw a horizontal line on the wall, the height of which is equal to the height of the headlight centers above the floor level.
Note. To make it easier to mark the wall, park the car as close to the wall as possible.
5. Install the car at a distance of 10 feet from the wall, and make sure that the fuel tank is half-clothed and there are no foreign objects in the car.
6. Turn on the low beam headlights. The zone of maximum brightness should be located 5 cm below and 5 cm to the right of the headlight centers. The headlights are adjusted by turning the adjusting screws. Turning the screw clockwise raises the headlight, and turning it counterclockwise lowers it. Similarly, the headlights are adjusted in a horizontal plane.
7. Turn on the high beam headlights. The zone of maximum brightness should be located directly below the horizontal line passing through the centers of the headlights.
Note. You may not be able to adjust both low beam and high beam headlights at the same time. In this case, the dipped beam should be adjusted more carefully, since it is used much more often and is of greater importance for traffic safety.
8. After adjustment, try to contact the service station as soon as possible for fine adjustment.