
Warning. Lamps remain very hot for 20 minutes after being turned off. Before removing the pump, make sure that the corresponding circuit is turned off and the lamp has cooled down.
External lighting lamps
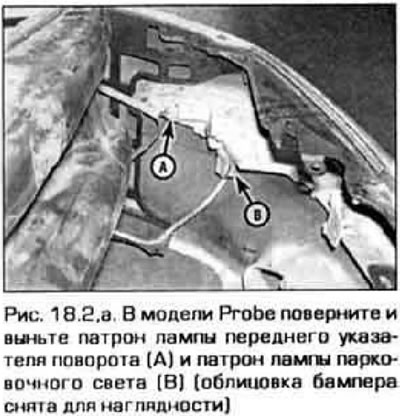
Front turn signal/parking light bulb
1. On the Probe model, to access the two lamps of the flashlight, remove the screws and lower the front of the locker down (see chapter 11).
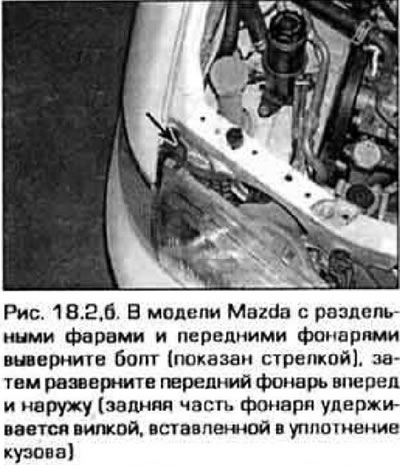
2. Turn the lamp socket counterclockwise and remove it from the lamp (pic. 18.2, a, b).
Note. In some Mazda models, the headlight is made in the form of a single unit with the headlight. The headlight assembly must be removed to replace the bulbs. Removal and installation of the headlight is described in paragraph 16.
 |  |
3. Remove the pampa from the cartridge.
4. Installation is made in sequence, return to removal.
Rear direction indicators, brake lights and parking lights
5. Open the trunk lid/tailgate.
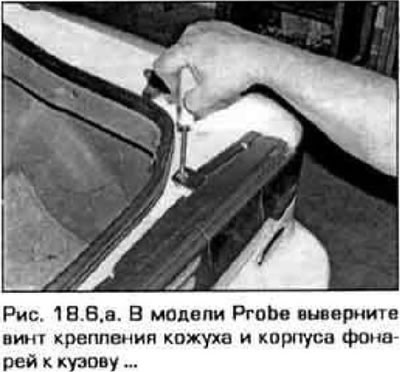
6. On the Probe, remove the top screw securing the lamp housing shroud and lamp housing to the body, then rotate the lamp housing down to access the lamp sockets (pic. 18.6, a, b).
 |  |
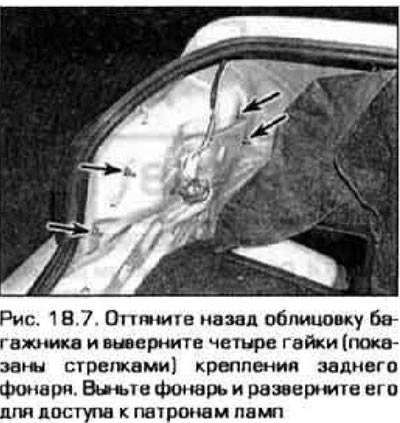
7. On the Mazda model, to access the four nuts securing the rear light housing, pull back the trunk lining. The taillights are fitted with brake lights, parking lights, direction indicators and reversing lamps (pic. 18.7).
8. To replace your bulbs, turn the appropriate socket 1/8 turn counterclockwise, remove it from the housing, then remove the bulb from the socket.
9. Installation is carried out in the reverse order of crushing.
Upper brake lights
10. Open the trunk lid/tailgate.
11. On the Probe, the upper brake lights are installed at the bottom of the tailgate glass. On the Mazda model, the upper brake lights are mounted on the rear shelf.
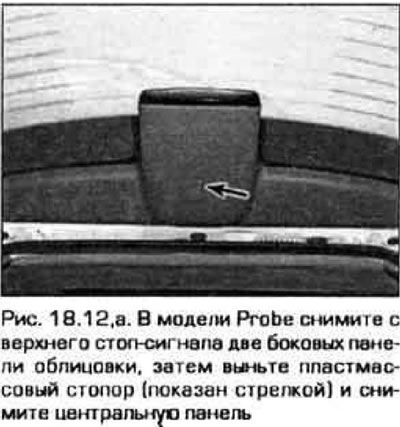
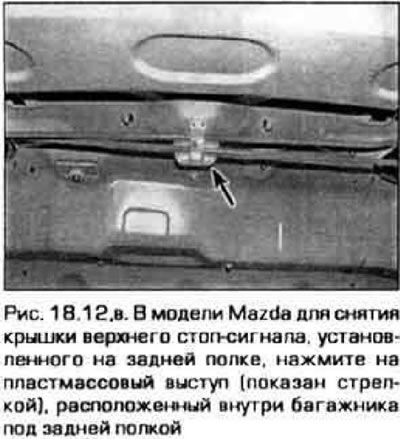
12. To access the lamps, remove the cover from the housing of the upper brake lights (pic. 10.12, a-c).
 |  |
13. Turn the cartridge counterclockwise and remove it. Remove the lamp from the socket.
14. Installation is made in sequence, return to removal.
Number plate lamps
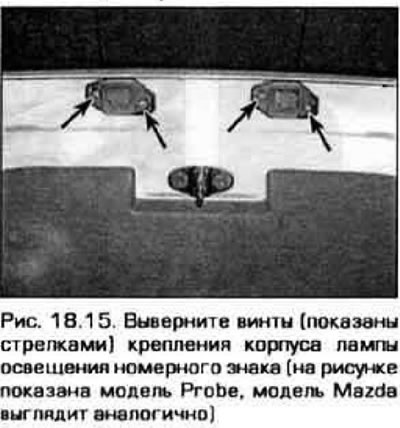
15. Remove the screws securing the license plate light to the trunk lid/tailgate (pic. 18.15).
16. Remove the lamp from the socket.
17. Installation is carried out in sequence. reverse withdrawal.
Interior lighting lamps
Interior lamps
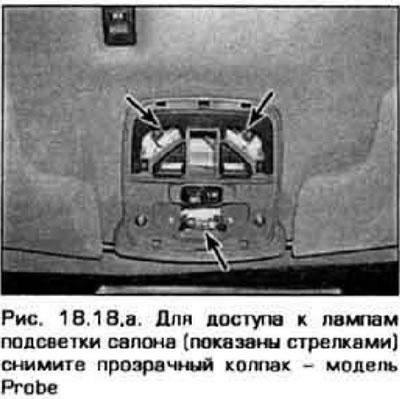
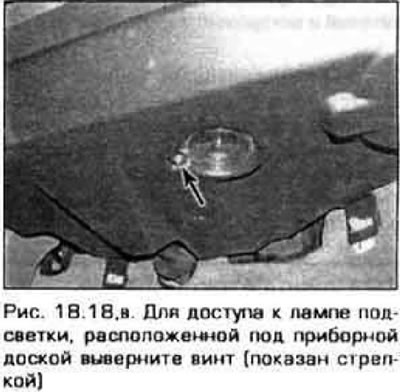
18. To replace the lamps in the ceiling lights, remove the covers of the ceiling lights and remove the pumps (pic. 18.18, a-c).
 | 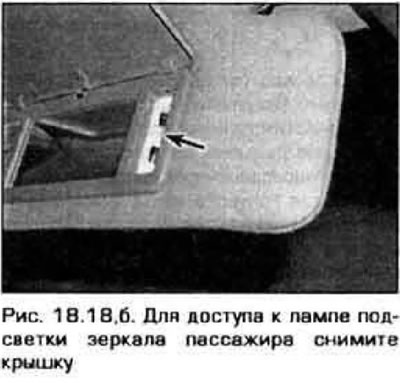 |
Note. When replacing the interior lights, you must disconnect the battery or at least close the car doors. Otherwise, the backlights will be on (and get very hot).
19. When installing a new pin lamp (the terminals of such a lamp are located at its ends and the lamp is inserted between two spring and contacts) wear gloves or wrap the lamp with a clean cloth. Grease that is on your fingers will damage this type of lamp.
Dashboard lights
20. To access the instrument panel illumination lamps, first remove the instrument panel (see paragraph 11).
21. Turn the lamp socket counterclockwise and remove it from the dashboard (pic. 18.21).