Warning. The models described in this manual are equipped with an airbag system. Before working in close proximity to shock sensors, steering column or food panel, disconnect the wire from the negative terminal of the battery, then the wire from the positive terminal of the battery. then wait at least 3 minutes. Accidental airbag deployment can cause injury (see paragraph 28).
Bezel Light Switch
Examination
1. The front panel light switch is located to the left of the dashboard, next to the steering wheel. By turning the dimmer knob, you can change the brightness of the backlight.
2. Remove the switch, then reconnect the electrical connector and turn on the headlights (the ignition key must be in the off position). Measure the voltage between the orange and red wires of the connector. This voltage must be equal to the battery voltage. If so, connect the control pump to the green wire with yellow stripes (for Probe model) or gray wire (for Mazda model) and car body. The brightness of the glow of the pump should change as you turn the knob. If it's not. replace the switch. Before installing the switch, disconnect the wiring connector from it and make sure that there is contact between the black wire of the connector and ground.
Replacement
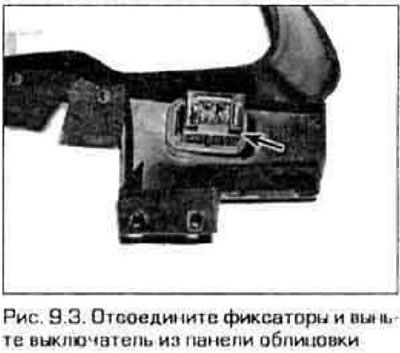
3. Remove trim panel with switch (see chapter 11). On the reverse side of the panel, disconnect the latches and remove the switch from it (pic. 9.3).
Hazard switch
Examination
4. On the Probe, the hazard switch is located in the multifunction steering column switch (checking and replacing the switch is described in paragraph 7). On the Mazda model, this switch is located on the front panel. To check the switch, it must be removed (see below).
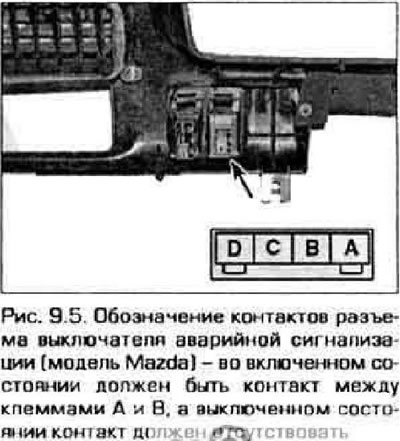
5. Make sure there is contact between the switch terminals (pic. 9.5). If the switch is defective, replace it.
Replacement
6. Remove the dashboard trim (see chapter 11).
7. Models manufactured prior to 1997 have the switch located above the car radio. Models manufactured since 1998 have the switch located to the right of the steering wheel. On the reverse side of the switch, squeeze the latches and disconnect the electrical wiring connector from it, then remove the switch from the dashboard.
Switches for rear window defroster, fog lamps, rear window wiper/washer, headlamp shutters
Examination
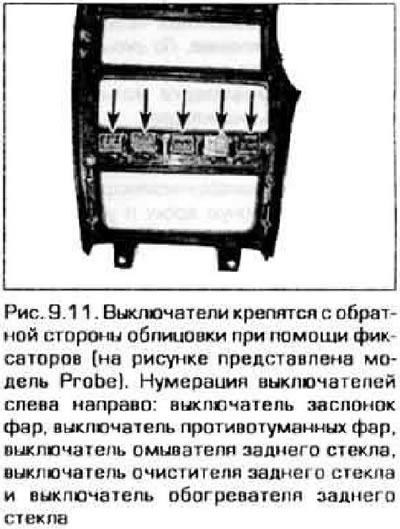
8. On Mazda model, rear defroster switch, fog light switch (if it exists) and rear window wiper/washer switches are located on the dashboard. On the Probe model, the switches are located on a trim mounted in the center of the front panel (1993 Probe model additionally equipped with a headlight damper switch).
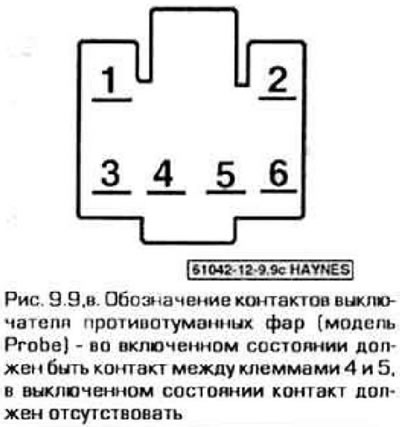
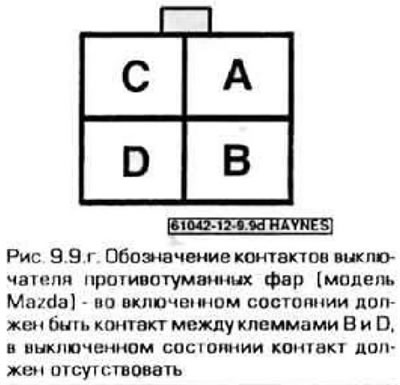
9. To check, you need to remove the appropriate switch and make sure that there is contact between the connector terminals (pic. 9 9,a-g). If the switch is defective, replace it.
 |  |
 |  |
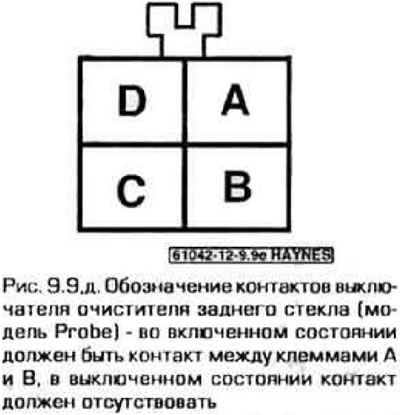 | 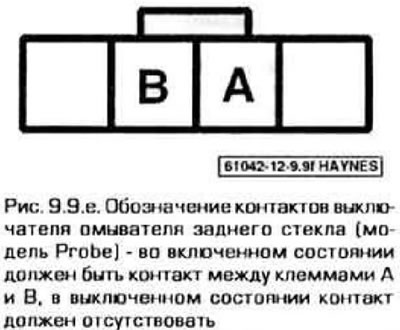 |
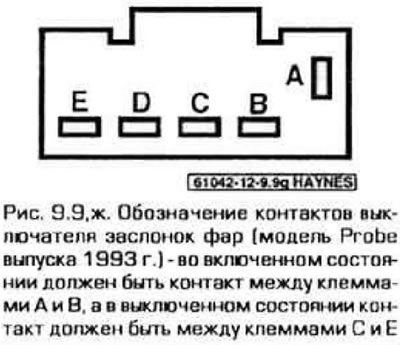
Note. Before checking the circuit breaker or its wiring, check that the appropriate fuse is good.
Replacement
10. Remove the dashboard trim (Mazda model) or the center section of the front panel cladding (Probe model) (see chapter 11).
11. All switches are attached to the cladding with clamps. Disconnect the electrical wiring connector from the corresponding switch (on the back side), unfasten the clips and remove the switch from the panel (pic. 9.11).