
Basic information
1. Relays are installed in many purposes of the car to transfer power to the component (such targets include: fuel injection system, horns, starter, cooling fan, fog lights, etc). The relay uses two circuits: one low current circuit (control circuit), which turns on or off the second circuit with a large load (power circuit). If the relay is faulty, the component it controls will not work. Some relays are installed in the engine compartment fuse box, and some relays are installed individually. To check the relay, it must be removed and checked as follows, or contact a service station. A defective relay must be replaced as a whole.
Examination
2. Most relays have two outputs for the control circuit (these conclusions are connected to the electromagnet of the relay, which, when turned on, closes the contacts of the power circuit). The rest of the pins refer to the power circuit that the relay controls.
3. On some turnips there is a marking that makes it easier to identify the conclusions. If the relay is unmarked, refer to the appropriate wiring diagram at the end of this chapter and identify the terminals by the color of the connected wires.
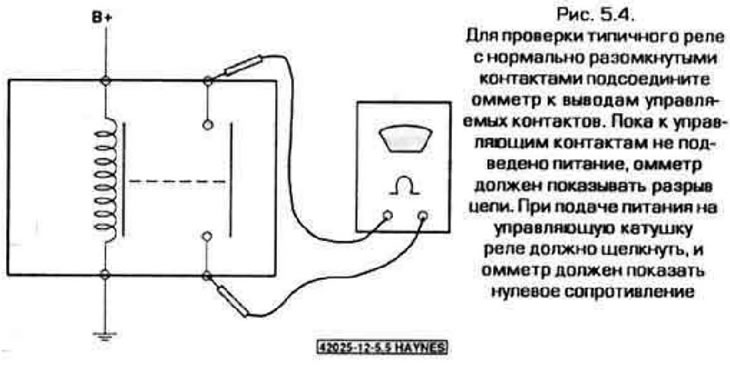
4. To test the relay, connect an ohmmeter to the outputs of the controlled circuit. The ohmmeter should show infinite resistance (pic. 5.4). Now connect the positive terminal of the batteries to the output of the control winding of the relay using a wire with a fuse. Connect the second output of the control winding to the vehicle ground. The relay should turn on (a click will be heard), and the ohmmeter should read zero. In some relays, the polarity of its connection matters. If you don't hear a click, change the brightness of the control circuit lead connection.
5. If the relay is defective, replace it.