
Removing
1. Disconnect the negative cable from the battery.
Warning. If your car's audio system is equipped with an anti-theft protection, make sure you know the unlock code before disconnecting the battery.
2. Disconnect from the distributor electric sockets and everything that is attached to it. Mark the wires and hoses so that they can be reinstalled in the future.
3. See if there is a label in the form of a number or letter on the distributor cap. This mark corresponds to the position of the output of the high-voltage wire of the spark plug of cylinder No. 1. If there is no such mark, find wire 1 from the cylinder and mark yourself.
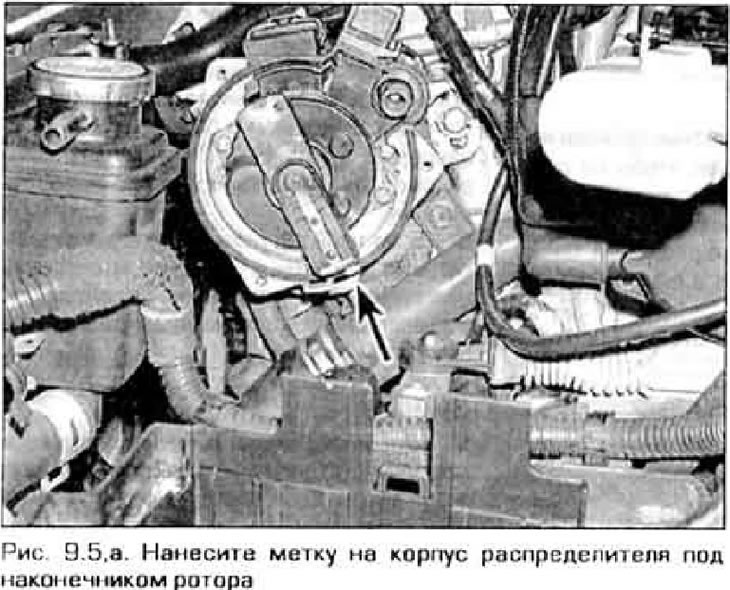
4. Remove the distributor cap and rotate the engine until the distributor rotor turns towards the high voltage output of cylinder #1 (see procedure for determining TDC in chapter 2A or 2B).
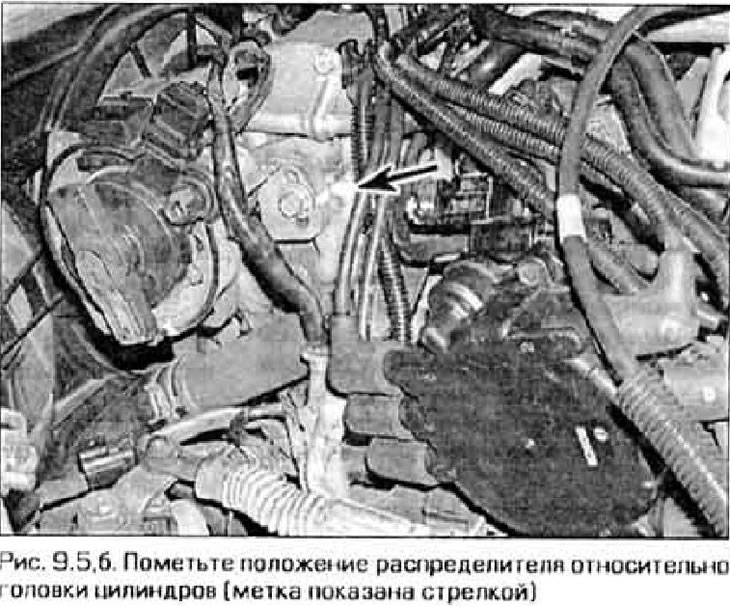
5. Place a mark on the distributor body opposite the rotor tip (pic. 9.5,a). Also mark the position of the distributor relative to the cylinder head for subsequent correct installation of the distributor (pic. 9.5b).
6. Disconnect the electrical connector from the distributor (if it hasn't already been done).
7. Turn out a clamping bolt (bolts) and remove the distributor.
Warning! While the distributor is removed, do not turn a camshaft.
Installation
Note. If at the time when the distributor was removed from the engine, the crankshaft was turned for some reason, you must again set it to the TDC position of the 1st cylinder. This can be done by turning the crankshaft and placing a finger on the spark plug hole of the 1st cylinder. When you feel increasing pressure in the cylinder, tighten the crankshaft until the TDC marks are aligned.
8. Establish on the distributor case a new sealing ring.
9. Insert the distributor into the cylinder head in exactly the same position that it occupied before removal.
Note. At the end of the distributor there are protrusions that enter the cutouts of the cylinder head in only one position.
10. Make sure that the alignment marks on the distributor and cylinder head match, and that the tip of the rotor is opposite the mark on the distributor housing.
11. Screw in the clamping bolt by hand (s) distributor.
12. The rest of the installation is carried out in the reverse order of removal. Check the initial ignition timing, then tighten the bolt (s) distributor mountings.