
Attention! The models described in this manual are equipped with airbags. When working in the cushion area, always turn them off (see chapter 12) to avoid accidental operation that could result in injury. The yellow wire harness running through the console and instrument panel is related to this system. Do not tamper with the airbag wiring or attempt to test it with any test equipment.
Removing
1. Remove the center console (see chapter 11).
2. Remove the heater fan assembly (see chapter 3).
3. Remove the four screws securing the selector position indicator (see fig. 3.2). Remove the indicator from the console.
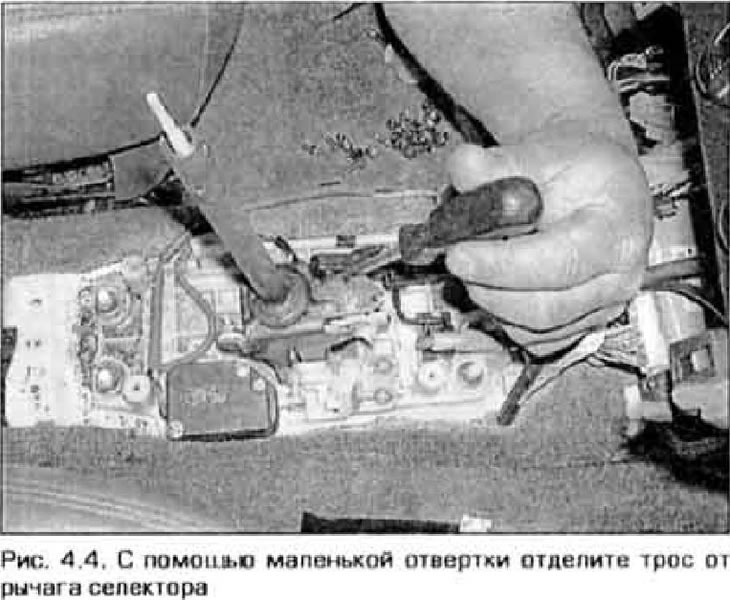
4. Using a small screwdriver, disconnect the control cable from the selector lever (pic. 4.4).
5. Squeeze the tabs on the cable retainer and separate the cable from the base of the arm.
6. Remove the air cleaner (see chapter 4).
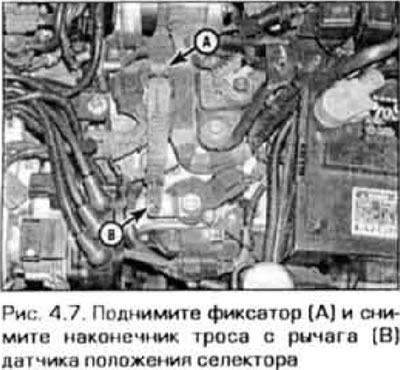
7. On the transmission: raise the lock (pic. 4.7) and disconnect the cable from the selector position sensor lever.
8. Squeeze the tabs. pull the cable through the bracket and release it from the mounting on the transmission.
9. Unfasten the control cable retainer from the engine bulkhead.
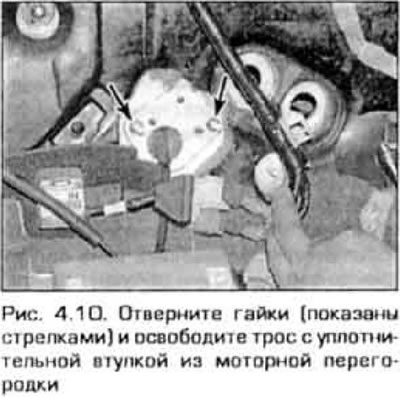
10. Unscrew the two nuts securing the plate that fixes the sealing sleeve of the cable in the motor bulkhead (pic. 4.10).
11. Remove cable from vehicle.
Installation
12. Insert the cable into the hole in the engine baffle.
13. Inside: retract the cable until the cable retainer engages in the bracket on the selector lever base. Insert the tip of the cable into the selector lever.
14. Install the retainer cover.
15. In the engine compartment, put the tip of the cable on the lever of the selector position sensor. Attach the cable to the bracket.
16. Install the air cleaner (see chapter 4).
17. Install the cable grommet plate onto the engine bulkhead studs and securely tighten the plate with nuts.
18. Attach the cable to the engine bulkhead.
19. In the passenger compartment, install the selector position indicator and securely fasten it with screws.
20. Install heater fan assembly (see chapter 3).
21. Adjust the control cable (see paragraphs. 24-31).
22. Install the center console (see chapter 11).
23. Alternately move the selector lever to each position and make sure it works correctly.
Adjustment
24. Remove the center console (see chapter 11).
25. Move the selector lever to the PARK position.
26. Remove the four screws securing the position indicator (see fig. 3.2). Lift the indicator from the lever support.
27. Slide back the latch cover (pic. 4.27) and unfasten the latch.
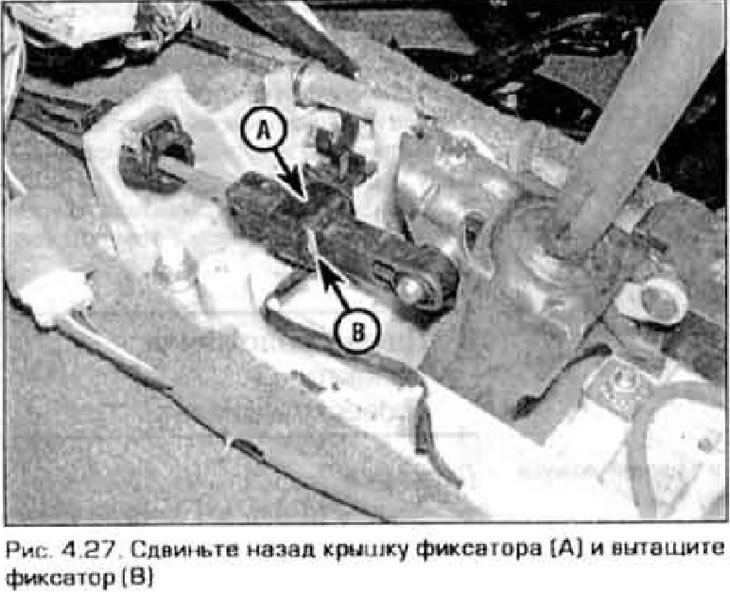
28. Set the selector lever to the exact PARK position. Temporarily install the lever position indicator and make sure it aligns with the letter "R" on the indicator. After that, remove the indicator again and fix the position of the lever by sliding the lock (IN) (see fig. 4.27).
29. Slide the latch cover forward to secure it in the closed position.
30. Replace the lever position indicator and secure it with screws.
31. Start the engine and check if the selector lever moves to all positions.