
MazBook.ru
English Русский
Български
Беларускі
Український
Српски
Hrvatski
Română
Polski
Slovenský
Magyar
• Bookmark • Sitemap • Contacts •   
Cars Opel Cars Ford Cars Volkswagen Cars Audi Cars Kia Cars Renault Cars Peugeot


Familia Capella Mazda3 Mazda6 CX-? Others Articles
Capella 3 (1982-1992, petrol) Capella 3 and 4 (1982-1992) Capella 4 (1987-1992) Capella 5 (1991-1997) Capella 6 (1997-2005, petrol)

Steering knuckle and hub — removal and installation (Mazda Capella GC)

  • Home
  • Mazda Capella
  • Capella GC (1982-1992)
  • Chassis
  • Steering
  • Steering knuckle and hub — removal and installation
0
1. Raise the front of the vehicle, secure it securely on the jack stands and remove the front wheel.

2. Lock the hub from rotating by inserting a screwdriver or similar tool through the brake caliper and into the rotor. Release the clamp and remove the front hub lock nut. This nut is tightened very tightly. Use a new nut for assembly.

3. Unscrew the brake caliper and remove it.

4. Remove the strut-to-steering knuckle mounting bolts and nuts.

5. Remove the nut that secures the tie rod to the steering knuckle.

6. Disconnect the connecting rod from the steering knuckle (Chapter 16).

7. Remove the mounting nut and bolt, and separate the ball joint from the steering knuckle.

8. Using an extractor, remove the knuckle/hub assembly from the drive shaft to disengage it from the drive shaft slots if necessary and remove it from the vehicle.

9. Inspect the hinge for damage and corrosion, inspect the bearings for looseness and grease leaks. Disassembling the hub requires a press and special techniques, so you should contact your dealer or a properly equipped workshop.

10. Install the steering knuckle in position on the drive shaft and lower control arm, and the strut, install the strut, ball joint nuts and bolts, tighten them with the tightening torque specified in the Specification.

11. Install the new hub lock nut (drive shaft) and clamp it with your hand only.

12. Apply a dynamometer to the front wheel strut and measure the force required to rotate the hub. Note the reading on the scale.

13. Temporarily install the brake caliper. Lock the hub and tighten the hub lock nut (drive shaft) with the tightening torque specified in the Specification, then remove the brake caliper. Measure the hub turning force again. If the force exceeds (Step 12) 4.4 lbs, check the bearings.


14. If all is well, insert the lock nut bearing into the groove on the drive shaft using a blunt flat chisel or a hammer drill (photo).
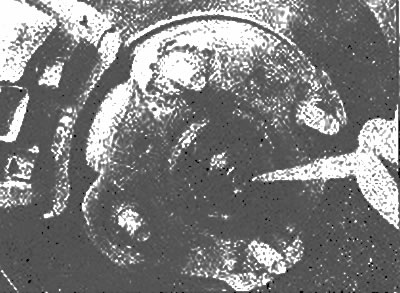
Rivet the hub locknut into the drive shaft groove with a flat chisel

Rivet the hub locknut into the drive shaft groove with a flat chisel


15. Install the connecting rod and tighten the nut with the specified tightening force Specification.

16. Install the brake caliper and wheel. Lower the vehicle and tighten the lug nuts.
This article is available at: russian, bulgarian, belarusian, ukrainian, serbian, croatian, romanian, polish, slovak, hungarian
This text was checked by: Evdokia Filimonova
Share with friends on social networks:

Previous
Capella 3 » Steering
Next

Steering column — removal and installation
Steering wheel — removal and installation
Steering system — general description
Steering specifications
End of connecting rod — removal and installation
Rack and pinion boot seals — replacement
Steering rack and pinion assembly — removal and installation
Power steering pump — removal and installation
Bleeding the power steering system
More articles on repairing other Mazda models
Checking/replacing the wishbone/steering knuckle support Mazda Familia 6 (1989-1994)
Central steering column switch for exterior lighting Mazda3 BK (2003-2009)
Central steering column switch for exterior lighting Mazda6 GG (2002-2008)
Front axle of the car — checking from the wheel hub with the steering… Mazda CX-5KE (2012-2017)
Front wheel hub and steering knuckle — device Mazda BT-50 (1) (2006-2011)
Link in different formats to this article
Comments and feedback from visitors
No comments yet


How much will 35 + 13 ?


Capella 6 (1997-2005, petrol) 
  • General information
  • Introduction to guide
  • User manual
  • Troubleshooting
  • Maintenance
  • Power unit
  • 4-cylinder engines
  • 6-cylinder engines
  • Engine overhaul
  • Cooling and ventilation
  • Power and exhaust systems
  • Engine electrics
  • Control system
  • Transmission
  • Mechanical gearbox
  • Automatic gearbox
  • Clutch and drive shafts
  • Chassis
  • Brake system
  • Car suspension
  • Steering
  • Body
  • Exterior (external elements)
  • Interior (internal elements)
  • Doors, windows and locks
  • Electrical equipment
  • Equipment and devices
  • Electrical circuits
Capella 5 (1991-1997) 
  • General information
  • User manual
  • Maintenance
  • Helpful hints
  • Power unit
  • Petrol engines 1.6 and 1.8
  • Petrol engines 2.0
  • 2.5 petrol engines
  • Overhaul engines 1.6 and 1.8
  • Overhaul engines 2.0 and 2.5
  • Diesel engine 2.0
  • Engine electrics
  • Cooling system
  • Air conditioner
  • Carburetor Nikki 30/34
  • Power system (1.6 and 1.8)
  • Power system (2.0 and 2.5)
  • Control system
  • Transmission
  • Mechanical gearbox
  • Automatic gearbox
  • Clutch and axles
  • Chassis
  • Brake system
  • Suspension and wheels
  • Steering
  • Body
  • Exterior (external elements)
  • Interior (internal elements)
  • Doors and windows
  • Electrical equipment
  • Equipment and devices
  • Electrical circuits
Capella 4 (1987-1992) 
  • General information
  • Introduction to manual
  • Vehicle specifications
  • Power unit
  • Engine repair
  • Lubrication system
  • Cooling system
  • Fuel system (carburetor)
  • Fuel injection (FE)
  • Fuel injection (DOHC)
  • Fuel system (diesel)
  • Ignition system
  • Transmission
  • Clutch
  • Gearbox
  • Drive shafts
  • Chassis
  • Front suspension
  • Rear suspension
  • Steering system
  • Brake system
  • Electrical equipment
  • Equipment and devices
  • Electrical circuits
Capella 3 and 4 (1982-1992) 
  • General information
  • User manual
  • Maintenance
  • Power unit
  • Gasoline engine
  • Engine overhaul (gasoline)
  • Diesel engine
  • Cooling and heating
  • Supply system
  • Ignition system
  • Emission reduction
  • Transmission
  • Clutch
  • Mechanical gearbox
  • Automatic gearbox
  • Drive shafts
  • Chassis
  • Brake system
  • Suspension and wheels
  • Steering
  • Body
  • Exterior (external elements)
  • Interior (internal elements)
  • Electrical equipment
  • Equipment and devices
  • Power devices
  • Electrical circuits
Capella 3 (1982-1992, petrol) 
  • General information
  • User manual
  • Maintenance
  • Troubleshooting
  • Late models
  • Power unit
  • Engine in car
  • Engine overhaul
  • Cooling and heating system
  • Fuel and exhaust system
  • Engine electrical system
  • Emission control system
  • Transmission
  • Mechanical gearbox
  • Automatic gearbox
  • Clutch and drive shafts
  • Chassis
  • Brake system
  • Suspension and wheels
  • Steering
  • Body
  • Exterior (external elements)
  • Interior (internal elements)
  • Electrical equipment
  • Equipment and devices
  • Lighting and lamps
  • Electrical circuits
MazBook.ru © 2018–2026 · Mobile version · Articles and news · Sitemap: EN BG BY UA RS HR RO PL SK HU · Feedback · Site search · Add to bookmarks Familia 5 (BF) · Familia 6 (BG) · Capella 3 (GC) · Capella 3 and 4 (GC) · Capella 4 (GD) · Capella 5 (GE) · Capella 6 (GF) · Mazda3 BK · Mazda6 GG · CX-5KE · Mazda 121 (3) · Mazda BT-50 (1) ·
By continuing to use the site, you agree to the use of cookies 🔐