


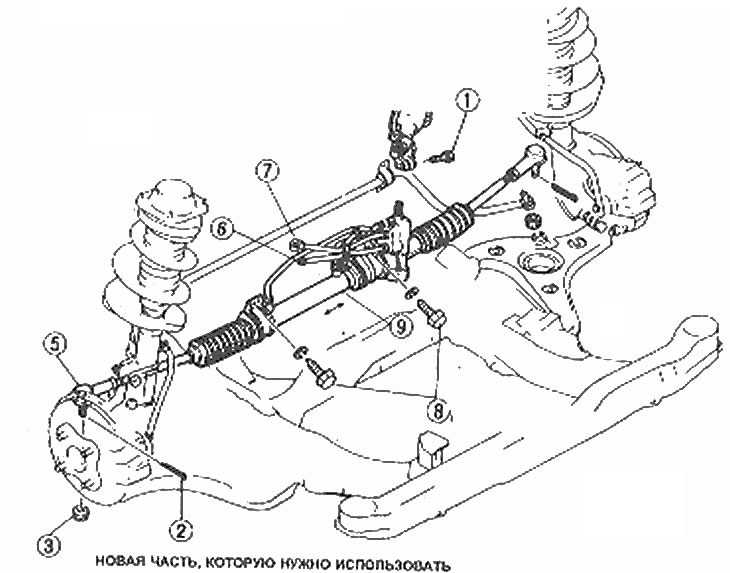
Steering rack and pinion installation details
1. Tie bolt; 2. Cotter pins; 3. Nuts; 4. Mudguard; 5. Connections of the steering knuckle and rod; 6. Power steering return hose; 7. Power steering pressure hose; 8. Bolts; 9. Steering gear and traction
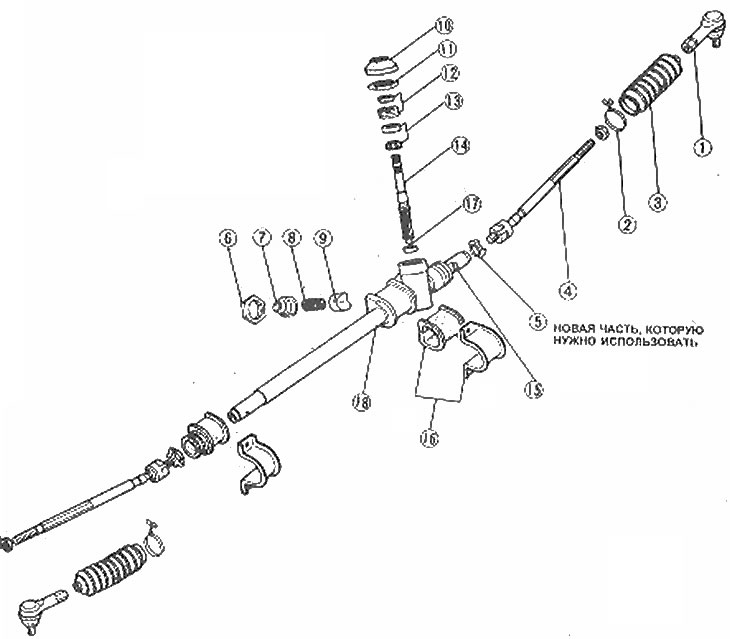
Rack and Pinion Adjustment Assembly Layout Guide
1. End of the connecting rod; 2. Cover clamps; 3. Case; 4. Connecting rods; 5. Washers; 6. Lock nut; 7. Adjustment cover; 8. Spring; 9. Pressure shoe; 10. Dust cover; 11. Lock nut; 12. Rear cover and seal; 13. Upper bearing; 14. Gear; 15. Rail; 16. Mounting brackets and bushing; 17. Lower bearing; 18. Gear casing
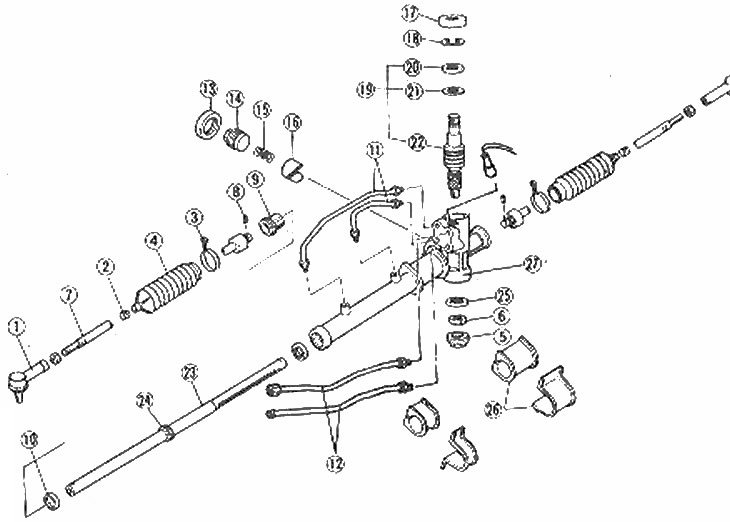
Location of steering rack and pinion components
1. Tie rod ends; 2. Case clips; 3. Cover clamps; 4. Cover seals; 5. Gear plug; 6. Locknuts; 7. Connecting rods; 8. Spring pins; 9. Rack bushings in assembly; 10. Seal; 11. Liquid pipes; 12. Liquid pipes and O-rings; 13. Lock nut; 14. Cork; 15. Spring; 16. Rack holder; 17. Dust cover; 18. Thrust ring; 19. Control valve, seal and bearing assembly; 20. Seal; 21. Bearing; 22. Control valve assembly; 23. Rack assembly; 24. O-ring; 25. Bearing; 26. Mounting brackets and fasteners; 27. Gear casing
(The primary source is the website MAZbook.ru)
1. Remove the tie bolt that secures the intermediate shaft to the rack and pinion shaft.
2. Raise the front of the car, support it on the jack stands and remove both front wheels.
3. Remove the cotter pins and nuts, and separate the ends of the connecting rod from the steering knuckles (Chapter 16).
4. On models equipped with power steering, turn off the switch, disconnect the hoses and wrap rags around them to catch any escaping fluid (photo).
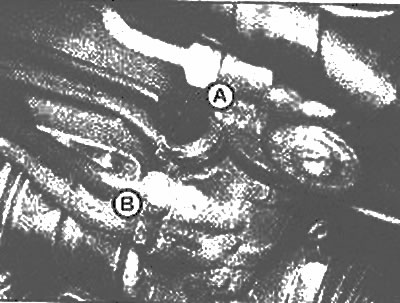
Power steering switch (A) and pressure line connections (B)
5. Remove the mounting bolt and the rack and pinion assembly through the left wheel well (photo).
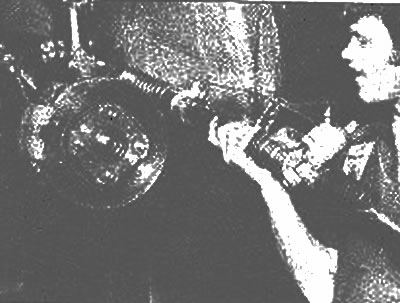
Carefully remove the rack and pinion assembly through the left wheel well
6. If the rack and pinion needs to be repaired, there are several possible methods. You can buy a new rack and pinion assembly as a unit and install it. This is, however, the most expensive route. If there is a workshop nearby that restores the rack and pinion assembly, it will be significantly cheaper to do the repairs there. Rack and pinion in good condition can also be found among salvage cars. The final way is to restore them yourself, although this is somewhat difficult and will require a press. Due to space limitations in this book, we are unable to give you a step-by-step procedure, but we include a disassembled view of both slats.
7. Assembly is carried out in reverse order. If the vehicle is equipped with power steering, after assembly add the specified fluid to the reservoir and bleed the air from the system (Chapter 20).
8. On all models, after installation, check the alignment and adjust if necessary.