


Removal and installation the instrument cluster
Disconnect the cable from the negative battery terminal.
Lower the steering column or remove the steering wheel. Remove the steering column cover.
In the engine compartment, unscrew the coupling sleeve and disconnect the speedometer drive cable from the gearbox. Remove the cable from the mounting brackets and push it as far as possible through the engine compartment bulkhead.
Loosen the screws securing the instrument cluster trim panel, remove it from the instrument panel and disconnect the connectors from the switches.
Remove the screws and pull the instrument cluster out as far as possible to access the rear side.
Disconnect the connectors and speedometer drive cable, remove the instrument cluster.
Installation is carried out in the reverse order of removal.
Instrument cluster repair
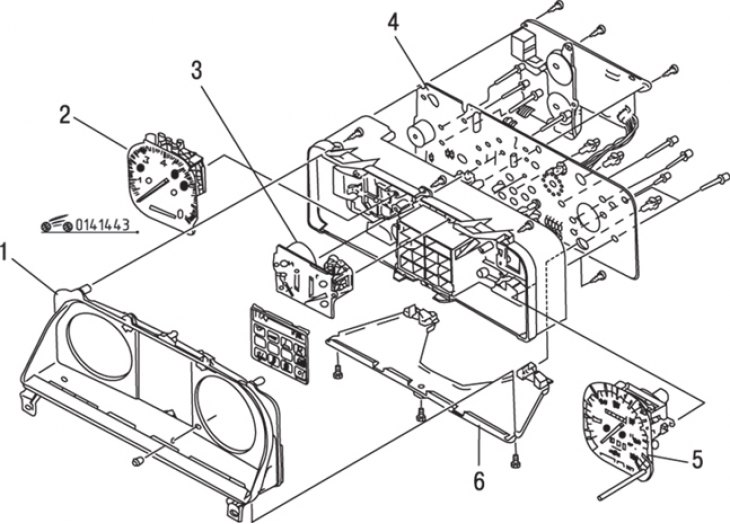
Figure 14.43. Elements of the analog instrument cluster: 1 – front panel; 2 – tachometer; 3 – coolant temperature and fuel level indicators; 4 – printed circuit board; 5 – speedometer; 6 – lighting panel
Disassembly of the instrument panel is similar to that described in section. 13 "Electrical equipment". Removing analog instrument cluster components (figure 14.43) carry out in the following order:
- pCB;
- lighting panel;
- front panel;
- speedometer;
- tachometer;
- coolant temperature and fuel level indicators.
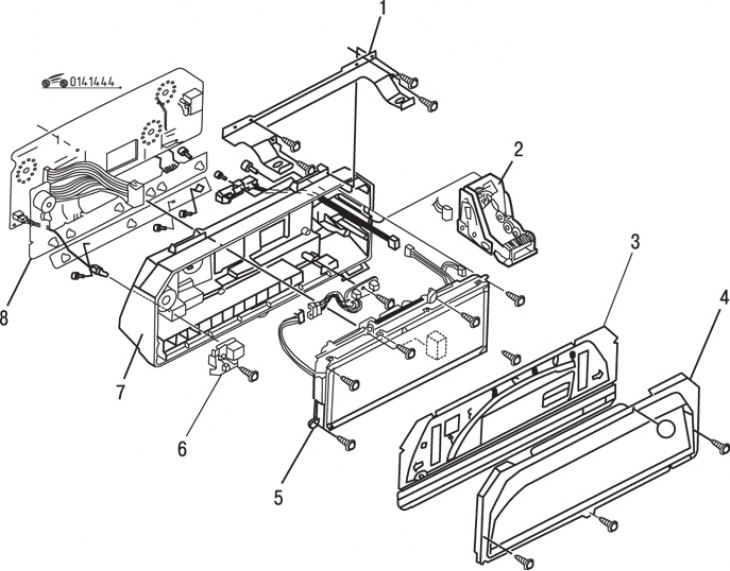
Figure 14.44. Elements of the digital instrument cluster: 1 – bracket; 2 – mileage counter; 3 – glass; 4 – frame; 5 – block of indicators; 6 – speedometer; 7 – body; 8 – printed circuit board
Remove the elements of the digital instrument cluster in the following order: (figure 14.44):
(The original article is posted on: «Mazbook»)
- bracket;
- frame;
- glass;
- block of pointers;
- speedometer;
- odometer;
- pCB;
- frame.