
Degree of wear of drive belts

1. Acceptable wear
2. Transverse cracks on belt ribs
3. Unacceptable wear
4. There are no adjacent sections of the belt ribs longer than 1 cm
5. Cracks parallel to belt ribs
Examination
1. Inspect the entire length of the drive belt on both sides for cracks or signs of wear.

2. Check the tension of the drive belt by pushing the belt halfway between the two pulleys and measure the deflection of the belt (1) using a ruler (4). Make sure the ruler is perpendicular (2) rail (3).
Tension adjustment
1. To adjust the tension of the drive belt of the power steering pump and the air conditioning compressor on models with a four-cylinder engine, unscrew the pump pinch bolt and lock bolt, then tighten the adjusting bolt, loosening or tightening the belt tension.
2. On models with a four-cylinder engine, to adjust the tension of the water pump and alternator drive belt, loosen the alternator mounting bolts and tighten the adjusting nut.
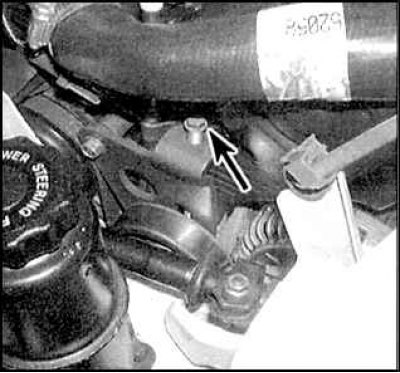
3. On models with a six-cylinder engine, to adjust the tension of the drive belt of the pump of the hydraulic power steering system and the air conditioning compressor, loosen the upper tensioner nut and tighten the adjusting bolt (indicated by an arrow).

4. On models with a six-cylinder engine, to adjust the tension of the water pump and alternator drive belt, loosen the lower nut (1) tensioner and tighten the adjusting bolt (2).
Replacement
1. Loosen the drive belt and remove it from the pulleys.
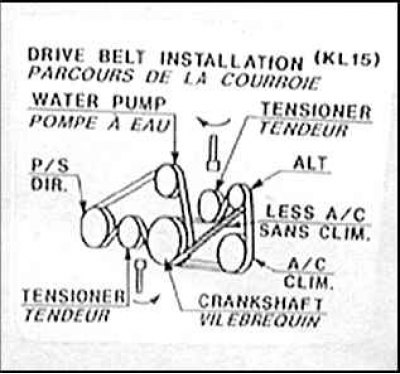
2. If one belt needs to be replaced, it is recommended that the remaining belts be replaced as well. The belt installation diagram is usually given on a plate located in the engine compartment or on the hood.
3. Installing a new belt is carried out in the reverse order of removal.