
MazBook.ru
English Русский
Български
Беларускі
Український
Српски
Hrvatski
Română
Polski
Slovenský
Magyar
• Bookmark • Sitemap • Contacts •   
Cars Opel Cars Ford Cars Volkswagen Cars Audi Cars Kia Cars Renault Cars Peugeot


Familia Capella Mazda3 Mazda6 CX-? Others Articles
Capella 3 (1982-1992, petrol) Capella 3 and 4 (1982-1992) Capella 4 (1987-1992) Capella 5 (1991-1997) Capella 6 (1997-2005, petrol)

Rocker arms and camshafts — removal, inspection and installation (Mazda Capella GE)

  • Home
  • Mazda Capella
  • Capella GE (1991-1997)
  • Power unit
  • Petrol engines 1.6 and 1.8
  • Rocker arms and camshafts — removal, inspection and installation
0
Contents: Removal ⇓ Examination ⇓ Installation ⇓

Removal


1. Remove the valve cover.

2. Remove the ignition distributor.

3. Remove the timing belt covers, the timing belt itself and the camshaft sprocket.
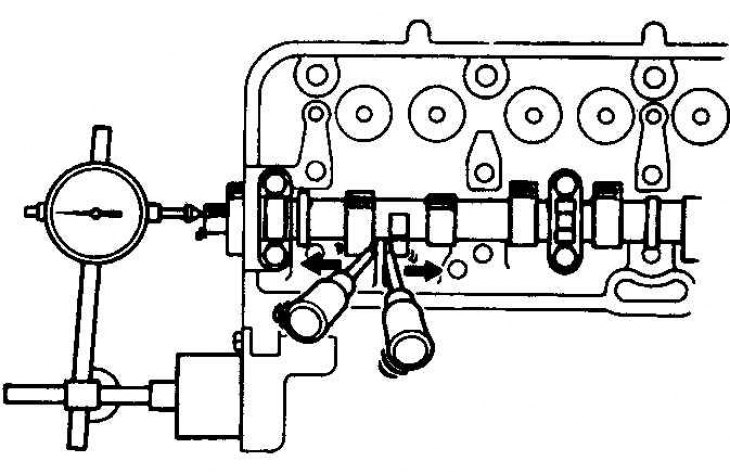
3. Remove the timing belt covers, the timing belt itself and the camshaft sprocket.


4. Measure the camshaft free play using a special device; if necessary, replace the camshaft thrust plate, camshaft and cylinder head.

1.6L models

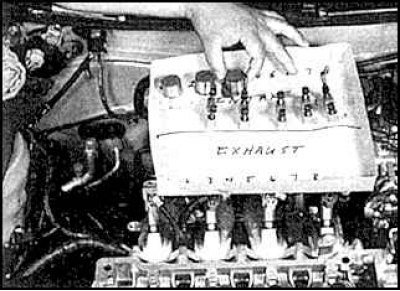
5. Before removing, number all parts.
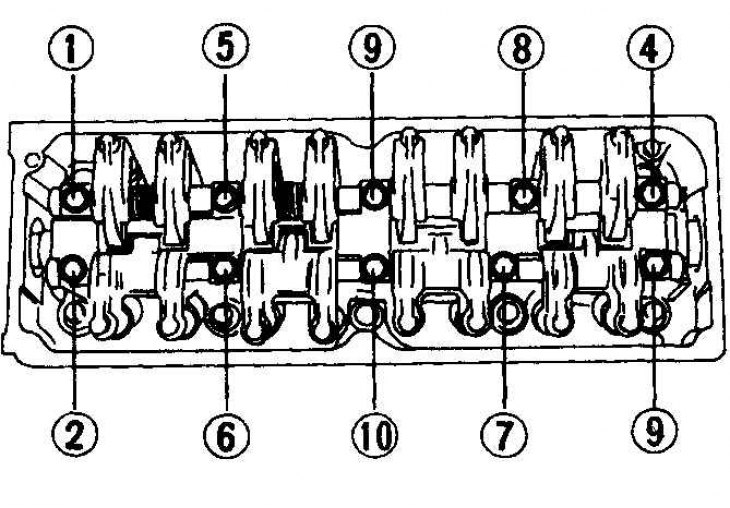
5. Before removing, number all parts.


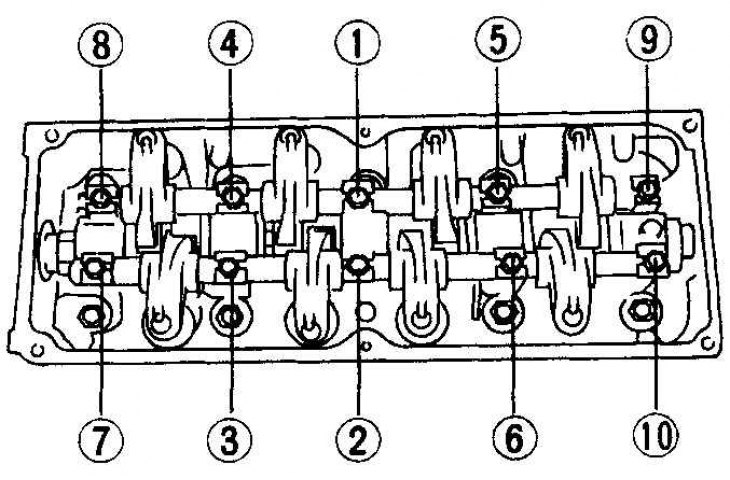
6. Loosen the rocker arm bolts in the sequence shown (SOHC).

7. Remove the rocker arm shafts together with the rocker arms.

8. Remove the air filter and fuse box.
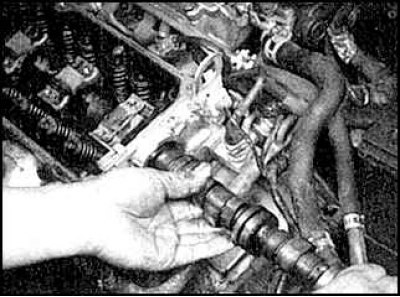
8. Remove the air filter and fuse box.


9. Remove the camshaft from the cylinder head. Remove the oil seal.


1.8L models

10. Unscrew the camshaft sprocket bolts and remove the sprockets.
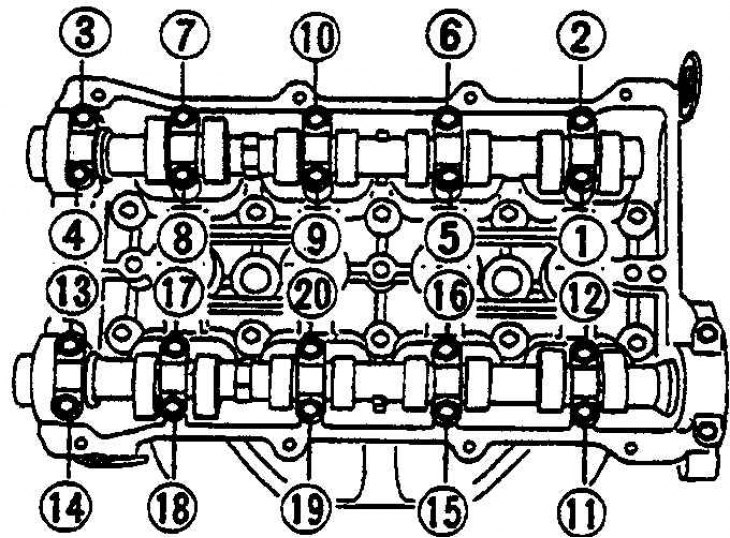
10. Unscrew the camshaft sprocket bolts and remove the sprockets.


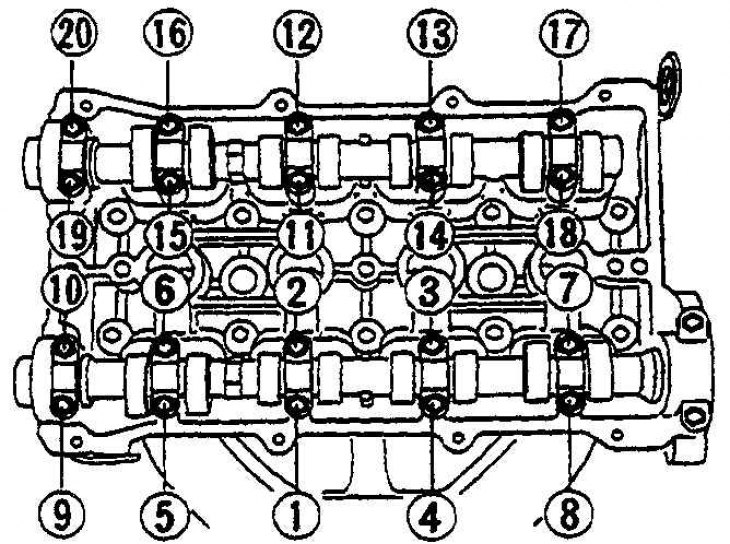
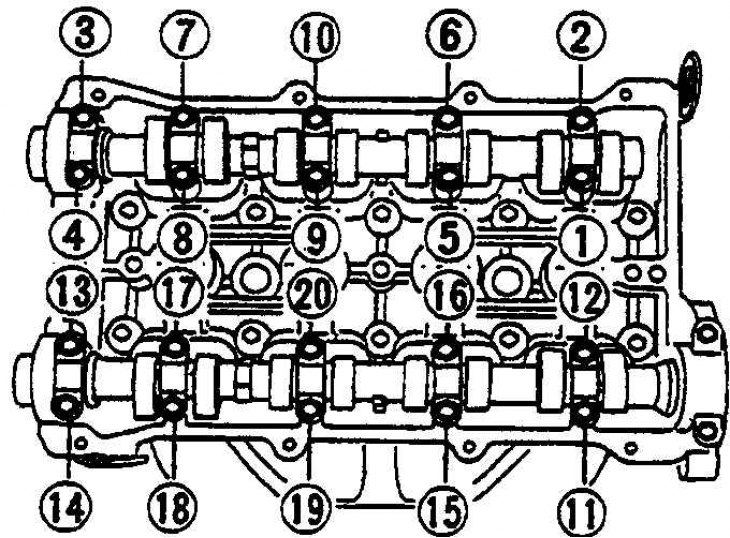
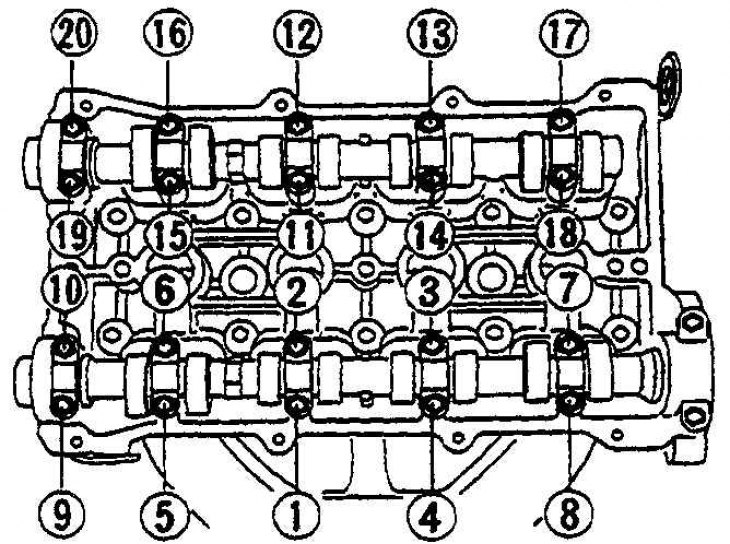
11. Loosen the bearing cap bolts in the sequence shown (1.8L DOHC). Remove the lids.

12. Take into account the installation location of the oil seals.

13. Remove the camshafts and seals.
13. Remove the camshafts and seals.


14. Remove the hydraulic valve adjusters or lifters and place them in separate numbered boxes.

Examination


1. Inspect all parts for scratches and damage.

1.6L models

2. Inspect the surface of the rocker arms that contacts the camshaft lobes for severe wear and scratches. Replace rocker arms if necessary.
2. Inspect the surface of the rocker arms that contacts the camshaft lobes for severe wear and…


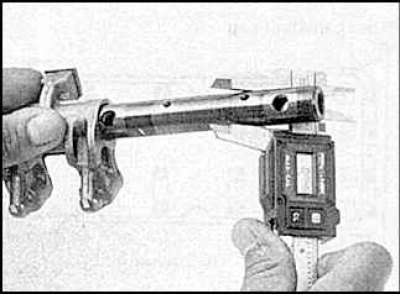
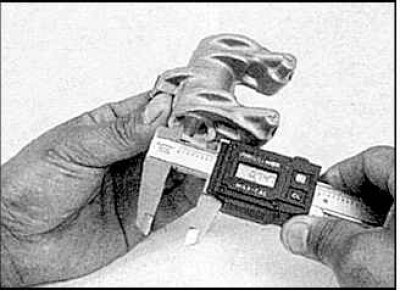
3. Inspect the surface of the rocker arm shaft and the inner surface of the rocker arm holes. If possible, measure the rocker arm hole diameter and the rocker arm shaft diameter.


3. Inspect the surface of the rocker arm shaft and the inner surface of the rocker arm holes. If…


4. Calculate the gap. Replace axles and rocker arms if necessary.
4. Calculate the gap. Replace axles and rocker arms if necessary.


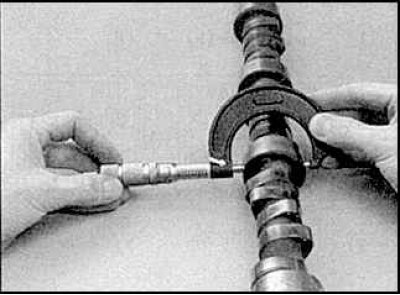
5. Measure the inner and outer diameters of the camshaft bearings and calculate the lubrication gap.
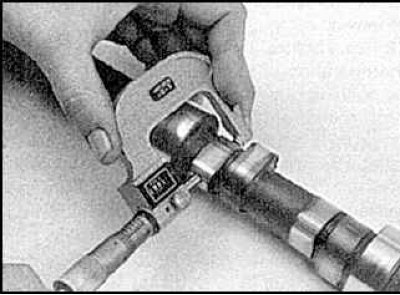
5. Measure the inner and outer diameters of the camshaft bearings and calculate the lubrication gap.


6. Measure the camshaft lobes.

1.8L models

7. Check the lubrication clearance of each camshaft bearing. Clean bearings and bearing caps with solvent. Install the shafts into place.
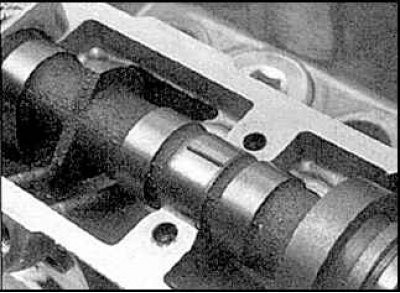


7. Check the lubrication clearance of each camshaft bearing. Clean bearings and bearing caps with…


8. Place a strip of measuring plastic on each bearing.
8. Place a strip of measuring plastic on each bearing.


9. Install the bearing caps. Tighten the cover bolts in the sequence shown.
9. Install the bearing caps. Tighten the cover bolts in the sequence shown.


10. Unscrew the bolts in the sequence shown and remove the covers.
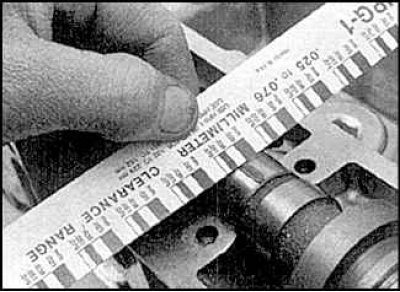
10. Unscrew the bolts in the sequence shown and remove the covers.


11. Compare the width of the compressed strip with the measurement table.


12. Replace the camshaft or cylinder head if necessary. Clean off any remaining plastic.

13. Check the hydraulic valve lifters (1.8L), replace them if necessary.
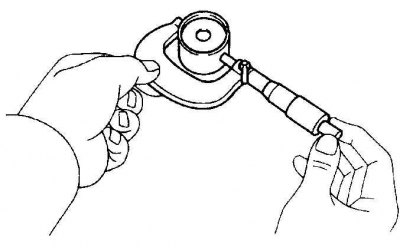
13. Check the hydraulic valve lifters (1.8L), replace them if necessary.


14. Measure the outside diameters of the tappets or hydraulic lifters and the diameters of their bores. Replace worn parts if necessary.

15. Inspect the cams and shaft bearings.
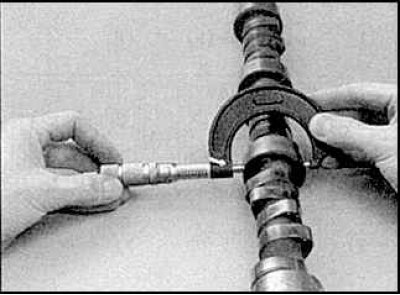
15. Inspect the cams and shaft bearings.


16. Measure the diameters of the shaft bearings. Replace the shaft if necessary.
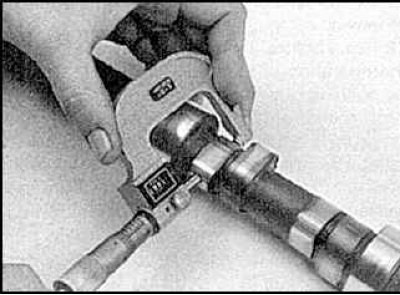
16. Measure the diameters of the shaft bearings. Replace the shaft if necessary.


17. Measure the height of each cam. Replace the shaft if necessary.


18. Replace all parts whose characteristics do not meet technical requirements.

Installation


1.6L models

1. Lubricate the camshaft oil seal with engine oil.

2. Install the seal.
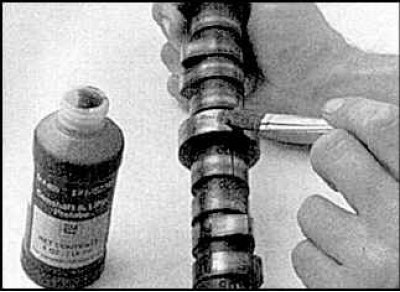
2. Install the seal.


3. Apply grease to the cams and shaft bearings.
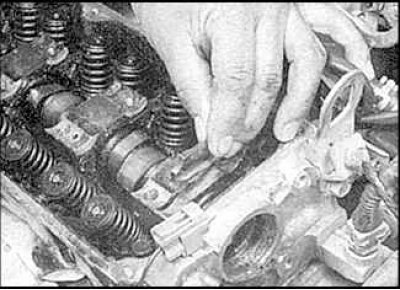
3. Apply grease to the cams and shaft bearings.


4. Install the camshaft into the cylinder head.
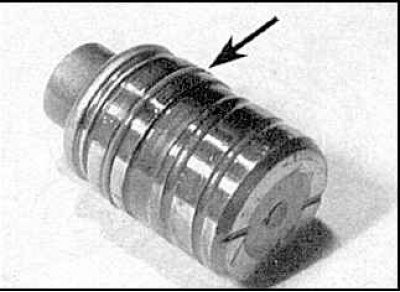
4. Install the camshaft into the cylinder head.


5. Lubricate the hydraulic regulator O-rings with oil.
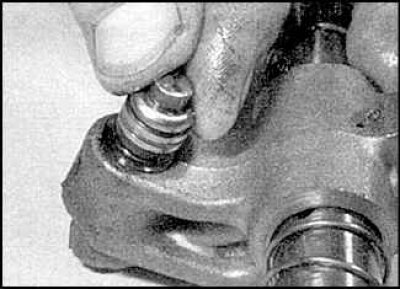


5. Lubricate the hydraulic regulator O-rings with oil.


6. Install the adjusters into the rocker arms.
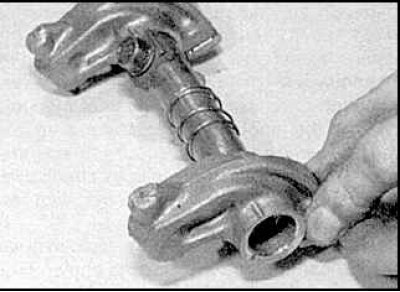
6. Install the adjusters into the rocker arms.


7. Place the rocker arms on the axles.
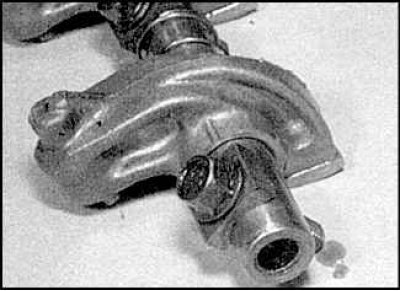
7. Place the rocker arms on the axles.


8. Insert the mounting bolts.
8. Insert the mounting bolts.


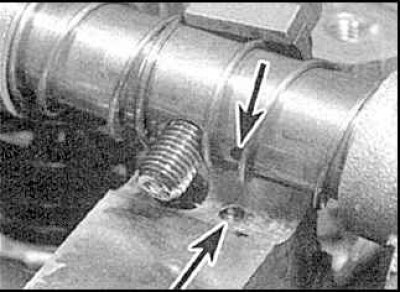
9. Align the rocker arm shaft oil holes with the cylinder head oil holes.


9. Align the rocker arm shaft oil holes with the cylinder head oil holes.


10. Tighten the rocker arm mounting bolts in the sequence shown.

11. Install the camshaft sprocket and tighten the bolt.

12. Put on the timing belt.

13. Install the remaining parts.

1.8L models

14. Lubricate the tappets with engine oil and install them in place.

15. Lubricate the bearings and camshaft lobes. Install the shafts. Install the chain and align the timing marks on the shaft sprockets with the marked links on the chain.

16. Apply silicone sealant to the shaded areas.
16. Apply silicone sealant to the shaded areas.


17. Install the bearing caps and tighten the bolts in the sequence shown.

18. Lubricate the new seals with oil and install them in place.

19. Install the shaft sprockets.

20. Put on the timing belt.

21. Install the remaining parts and test the engine operation.
This article is available at: russian, bulgarian, belarusian, ukrainian, serbian, croatian, romanian, polish, slovak, hungarian
This text was checked by: Evgeny Mereshnikov
Share with friends on social networks:

Previous
Capella 5 » Petrol engines 1.6 and 1.8
Next

Camshaft oil seals
Timing belt and sprockets
Exhaust manifold — removal and installation
Intake manifold — removal and installation
Valve cover — removal and installation
Valve springs, fasteners and gaskets
Cylinder head — removal and installation
Oil pan — removal and installation
Front cover — removal and installation
Oil pump — removal, inspection and installation
More articles on repairing other Mazda models
Replacing the silent blocks of the suspension arms Mazda Familia 5 (1985-1989)
Installing camshafts Mazda3 BK (2003-2009)
Adjusting the windshield wiper arms with brushes Mazda6 GG (2002-2008)
Checking camshafts Mazda CX-5KE (2012-2017)
Removal and installation rocker arms Mazda BT-50 (1) (2006-2011)
Link in different formats to this article
Comments and feedback from visitors
No comments yet


How much will 22 + 11 ?


Capella 6 (1997-2005, petrol) 
  • General information
  • Introduction to guide
  • User manual
  • Troubleshooting
  • Maintenance
  • Power unit
  • 4-cylinder engines
  • 6-cylinder engines
  • Engine overhaul
  • Cooling and ventilation
  • Power and exhaust systems
  • Engine electrics
  • Control system
  • Transmission
  • Mechanical gearbox
  • Automatic gearbox
  • Clutch and drive shafts
  • Chassis
  • Brake system
  • Car suspension
  • Steering
  • Body
  • Exterior (external elements)
  • Interior (internal elements)
  • Doors, windows and locks
  • Electrical equipment
  • Equipment and devices
  • Electrical circuits
Capella 5 (1991-1997) 
  • General information
  • User manual
  • Maintenance
  • Helpful hints
  • Power unit
  • Petrol engines 1.6 and 1.8
  • Petrol engines 2.0
  • 2.5 petrol engines
  • Overhaul engines 1.6 and 1.8
  • Overhaul engines 2.0 and 2.5
  • Diesel engine 2.0
  • Engine electrics
  • Cooling system
  • Air conditioner
  • Carburetor Nikki 30/34
  • Power system (1.6 and 1.8)
  • Power system (2.0 and 2.5)
  • Control system
  • Transmission
  • Mechanical gearbox
  • Automatic gearbox
  • Clutch and axles
  • Chassis
  • Brake system
  • Suspension and wheels
  • Steering
  • Body
  • Exterior (external elements)
  • Interior (internal elements)
  • Doors and windows
  • Electrical equipment
  • Equipment and devices
  • Electrical circuits
Capella 4 (1987-1992) 
  • General information
  • Introduction to manual
  • Vehicle specifications
  • Power unit
  • Engine repair
  • Lubrication system
  • Cooling system
  • Fuel system (carburetor)
  • Fuel injection (FE)
  • Fuel injection (DOHC)
  • Fuel system (diesel)
  • Ignition system
  • Transmission
  • Clutch
  • Gearbox
  • Drive shafts
  • Chassis
  • Front suspension
  • Rear suspension
  • Steering system
  • Brake system
  • Electrical equipment
  • Equipment and devices
  • Electrical circuits
Capella 3 and 4 (1982-1992) 
  • General information
  • User manual
  • Maintenance
  • Power unit
  • Gasoline engine
  • Engine overhaul (gasoline)
  • Diesel engine
  • Cooling and heating
  • Supply system
  • Ignition system
  • Emission reduction
  • Transmission
  • Clutch
  • Mechanical gearbox
  • Automatic gearbox
  • Drive shafts
  • Chassis
  • Brake system
  • Suspension and wheels
  • Steering
  • Body
  • Exterior (external elements)
  • Interior (internal elements)
  • Electrical equipment
  • Equipment and devices
  • Power devices
  • Electrical circuits
Capella 3 (1982-1992, petrol) 
  • General information
  • User manual
  • Maintenance
  • Troubleshooting
  • Late models
  • Power unit
  • Engine in car
  • Engine overhaul
  • Cooling and heating system
  • Fuel and exhaust system
  • Engine electrical system
  • Emission control system
  • Transmission
  • Mechanical gearbox
  • Automatic gearbox
  • Clutch and drive shafts
  • Chassis
  • Brake system
  • Suspension and wheels
  • Steering
  • Body
  • Exterior (external elements)
  • Interior (internal elements)
  • Electrical equipment
  • Equipment and devices
  • Lighting and lamps
  • Electrical circuits
MazBook.ru © 2018–2026 · Mobile version · Articles and news · Sitemap: EN BG BY UA RS HR RO PL SK HU · Feedback · Site search · Add to bookmarks Familia 5 (BF) · Familia 6 (BG) · Capella 3 (GC) · Capella 3 and 4 (GC) · Capella 4 (GD) · Capella 5 (GE) · Capella 6 (GF) · Mazda3 BK · Mazda6 GG · CX-5KE · Mazda 121 (3) · Mazda BT-50 (1) ·
By continuing to use the site, you agree to the use of cookies 🔐