
2. Remove the retainer and disconnect the brake hose from the rack (pic. 9.2). If the vehicle is equipped with an anti-lock braking system, disconnect the wheel speed sensor wiring bracket from the strut.
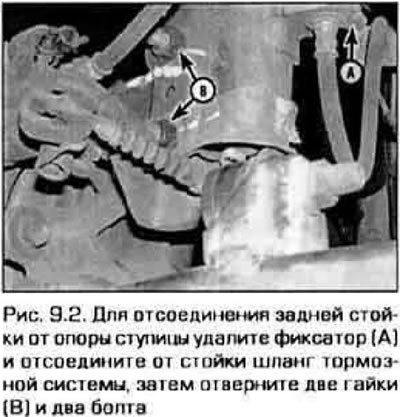
3. Turn away nuts of fastening of a rack to □pore of a nave (see fig. 9.2) and knock out the bolts with a hammer and punch.
4. Disconnect the rack from the hub support. Secure the hub support so as not to break the brake line.
5. For access to nuts of the top fastening of a rack remove a facing part in a luggage space.
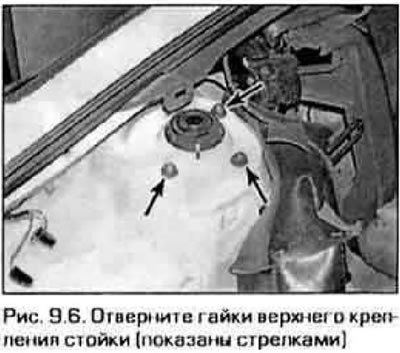
6. Have an assistant support the strut and unscrew the three nuts on the top of the strut (pic. 9.6). Remove the stand.
Examination
7. Checking the rack is described in paragraph 2. If the rack needs to be disassembled to notice the faulty parts, refer to paragraph 3.
Installation
8. Insert the strut into the wheel arch, then insert the strut top studs into the holes in the body. You will need a helper for this job as the stand is very large and heavy. Screw on the nuts, but do not tighten them.
9. Attach the step support to the rack, insert two bolts and tighten the fastening nuts to the required torque.
10. Attach the brake hose to the strut and secure it with the retainer. If the car has an anti-lock braking system, attach the bracket with the speed sensor wires to the flock.
11. Establish a wheel and screw nuts of its fastening, lower the car and tighten nuts the demanded moment.
12. Tighten nuts of the top fastening of a rack the demanded moment.