


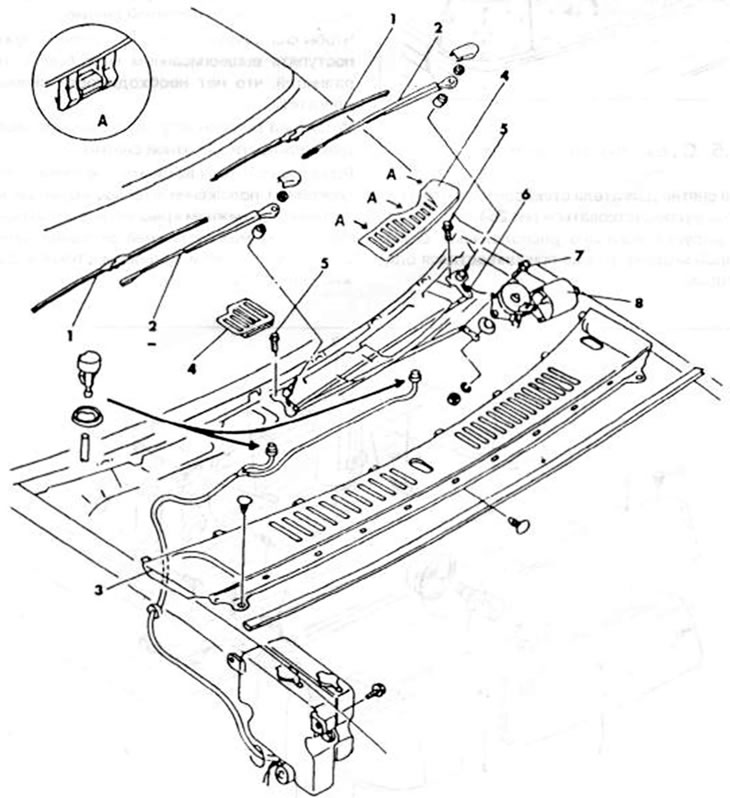
Figure 264. Details of removal and installation of the windshield wiper. Carry out the work in the specified sequence. 1. Windshield wiper blade; 2. Wiper nut and arm; 3. Fairing shield; 4. Shields; 5. Bolts and washers; 6. Windshield wiper arms; 7. Bolts; 8. Windshield wiper motor
- The picture shows the layout of an older model, but the principle remains the same.
- Disconnect the battery.
- Remove the windshield wiper arms (2). To do this, you need to push the lever back, press the critic and release the nut. Remove the lever.
- Remove the cover from the wiper supports, remove the nuts located underneath them and push both spindles inward.
- Remove the fairing shield rivet (3) and remove the shield.
- Remove both shields (4).
- Remove bolts and washers (5).
- Remove the wiper arms through the holes in the windshield.
- Release the windshield wiper motor mounting bolts from the body.
- Place a screwdriver on the engine trailing arm as shown in Figure 265 and press the arm away from the engine.
- Remove the engine and pull out the wiring harness plug. Installation is carried out in the reverse order of removal.
[Original version of the article on the website: MAZBOOK.RU]
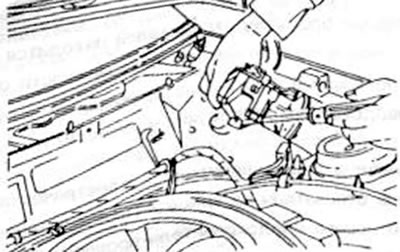
Figure 265. Using a screwdriver, press the longitudinal lever away from the windshield wiper arms, and then partially remove the motor
To remove the windshield wiper arms, you need to follow the method described above, with the difference that there is no need to remove the engine.
The levers are installed in the reverse order of removal.
Insert the wiper arms so that when the wiper is in the rest position, they are at the lower edge of the windshield. The distance between the bottom of the wiper blade and the windshield should be 15-20 mm.