
2. The car owner can remove and disassemble the head, do an initial cleaning and inspection, then reassemble and present the head to a service station or car workshop.
3. Service department or automotive mechanic shop, will remove valves and springs, repair or replace valves and valve seats, repair valve guides, measure and replace valve springs, spring retainers, replace valve stem seals with new ones, reassemble valve components and adjust gaps. The cylinder head gasket surface will also be leveled if it is distorted.
4. After carrying out the work, the head is ready for installation in the car. Before installing it on the engine, re-inspect it and clean it to remove any metal particles that may still be present. Blow out all oil holes and passages with compressed air.
Lapping of valves
5. If the valves and seats are slightly distorted, or if new valves are installed on guides and seats in good condition, then the valves should be lapped into their seats as follows.
6. Place a small amount of coarse paste on the valve head seal area. Insert the valve into the guide and rotate the head in the seat in a motion "hither and thither". For this purpose, you can use an electric drill. Raise the valve from the seat periodically to check the progress of the process and the presence of the paste.
7. If the paste is evenly distributed over the entire surface of the valve head and seat, then wipe off the crust and repeat the procedure with a fine-grained paste.
8. When all valves are lapped into their seats, thoroughly clean all traces of paste using kerosene, rags and compressed air. Paste residue on the cylinder head can cause rapid wear.
9. It should also be noted that excessive grinding of old valves can reduce the edge of the valve head to an unacceptable limit (see chapter 8).
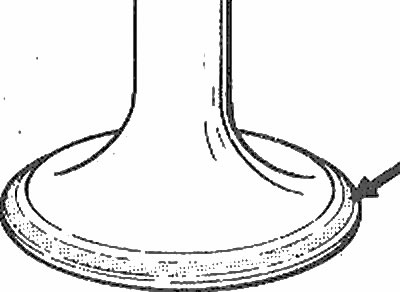
Edge Width (arrow) on each valve must comply with the Specifications. Otherwise, the valve must be replaced (Chapter 8)