MazBook.ru
English Русский
Български
Беларускі
Український
Српски
Hrvatski
Română
Polski
Slovenský
Magyar
• Bookmark • Sitemap • Contacts •   
Cars Opel Cars Ford Cars Volkswagen Cars Audi Cars Kia Cars Renault Cars Peugeot


Familia Capella Mazda3 Mazda6 CX-? Others Articles
Capella 3 (1982-1992, petrol) Capella 3 and 4 (1982-1992) Capella 4 (1987-1992) Capella 5 (1991-1997) Capella 6 (1997-2005, petrol)

Engine block — inspection (Mazda Capella GC)

  • Home
  • Mazda Capella
  • Capella GC (1982-1992)
  • Power unit
  • Engine overhaul
  • Engine block — inspection
0
1. Thoroughly clean the engine block as described in Chapter 13, and double check to make sure the ridge on the top of each cylinder has been completely removed.

2. Visually inspect the block for cracks, rust and corrosion. Check if the threads in the screw holes are worn out. It would be a good idea to have the block checked for hidden cracks at a workshop that has the special equipment for this job. If defects are found, take a refurbished unit or replace it.

3. Check the cylinder bores for jamming and wear.

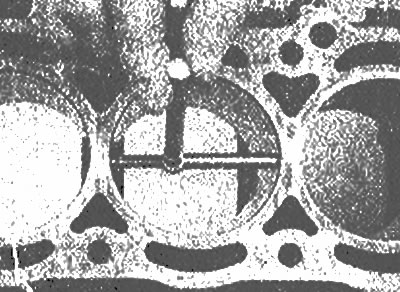
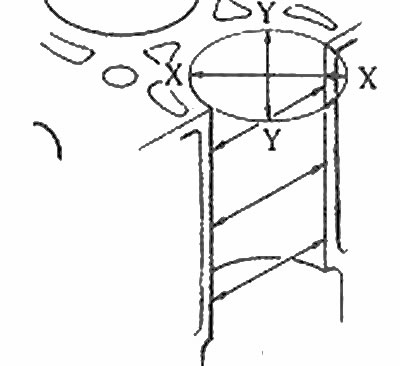
4. Measure the diameter of each cylinder at the top (just under the ridge), in the center and at the base of the cylinder bore, parallel to the crankshaft axis (photo). Then, measure the diameter of each cylinder at the same three locations across the crankshaft axis. Compare results with Specifications. If the cylinder walls are seized or worn, or if the ovality or taper is outside the limits given in Specifications, the engine cylinder block must be bored in an auto mechanic's shop. If the cylinder is bored during engine repair, larger pistons and rings will be required.

A telescopic template is used to measure the cylinder bore diameter

A telescopic template is used to measure the cylinder bore diameter
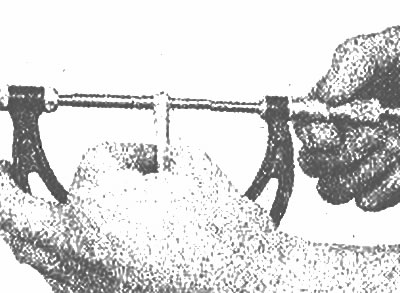
After the telescopic template is installed according to the cylinder diameter, it is removed and…

After the telescopic template is installed according to the cylinder diameter, it is removed and measured with a micrometer to determine the size of the hole and cone


Measure the diameter of each cylinder just below the wear ridge (X and Y), at the center and base

Measure the diameter of each cylinder just below the wear ridge (X and Y), at the center and base


5. If the cylinders are in good condition and not worn, there is no need to bore the cylinder. Sharpen only what is necessary.

6. Before turning the cylinders, install the main bearing caps (without bearings) and tighten the bolts with the specified tightening force Specification.

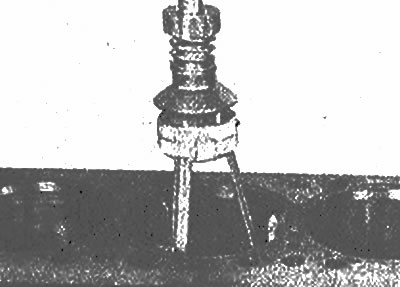
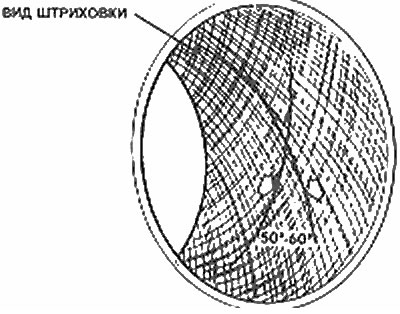
7. To perform boring, you will need a tool of the appropriate size (with small stones), lots of fine or sharpening oil, rags and an electric drill. Place the tool in the drill, clamp it, and insert it into the first cylinder (photo). Lubricate the cylinder thoroughly, turn on the drill, and move it up and down the cylinder until a crosshatch pattern is created on the cylinder walls, with the lines intersecting at approximately a 60° angle. Make sure to use plenty of lubricant. Do not remove the bore from the cylinder while the drill is running. Next, turn off the drill and continue moving the boring bar up and down in the cylinder until it stops completely, then squeeze the stones and pull it out. Wipe the oil out of the cylinder and repeat the procedure on the remaining cylinders. If you don't have the tools or don't want to bore it, take it to a car repair shop where they can do it for a reasonable fee. An acceptable result can also be achieved by using a hard wheel on the flap in a power drill or by using sandpaper by hand.


Cylinders should always be rebored before installing new rings to give the bore surface the proper…

Cylinders should always be rebored before installing new rings to give the bore surface the proper smoothness for the ring seating surface
The cylinder bore should leave dashed lines intersecting at approximately 60°

The cylinder bore should leave dashed lines intersecting at approximately 60°

8. After this work is done, use a small file to file down the ridge formed at the top of the cylinder bores so that the rings do not hit it.

9. The engine block should then be thoroughly washed again with warm soapy water to remove all traces of the hard sand left behind during boring. Make sure all lubrication holes and passages are clean and thoroughly flushed with water. After this, rinse it, dry the block and apply anti-corrosion oil to all surfaces. Wrap the block in a plastic bag to keep it clean and install it on the stand.
This article is available at: russian, bulgarian, belarusian, ukrainian, serbian, croatian, romanian, polish, slovak, hungarian
This text was checked by: Evdokia Filimonova
Share with friends on social networks:

Previous
Capella 3 » Engine overhaul
Next

Engine block — cleaning
Crankshaft — removal
Cylinder block, crankshaft, bearings and connecting rod parts
Piston/connecting rod assembly — removal
Cylinder head — overhaul
Camshaft — inspection
Piston/connecting rod assembly — inspection
Crankshaft — inspection
Main and connecting rod bearings — inspection
Piston rings — installation
More articles on repairing other Mazda models
Main technical characteristics of the engine Mazda Familia 5 (1985-1989)
Engine number Mazda3 BK (2003-2009)
Engine number Mazda6 GG (2002-2008)
Emergency engine start Mazda CX-5KE (2012-2017)
Starting the engine from an auxiliary battery Mazda 121 (3) (1996-2003)
Link in different formats to this article
Comments and feedback from visitors
No comments yet


How much will 21 + 15 ?


Capella 6 (1997-2005, petrol) 
  • General information
  • Introduction to guide
  • User manual
  • Troubleshooting
  • Maintenance
  • Power unit
  • 4-cylinder engines
  • 6-cylinder engines
  • Engine overhaul
  • Cooling and ventilation
  • Power and exhaust systems
  • Engine electrics
  • Control system
  • Transmission
  • Mechanical gearbox
  • Automatic gearbox
  • Clutch and drive shafts
  • Chassis
  • Brake system
  • Car suspension
  • Steering
  • Body
  • Exterior (external elements)
  • Interior (internal elements)
  • Doors, windows and locks
  • Electrical equipment
  • Equipment and devices
  • Electrical circuits
Capella 5 (1991-1997) 
  • General information
  • User manual
  • Maintenance
  • Helpful hints
  • Power unit
  • Petrol engines 1.6 and 1.8
  • Petrol engines 2.0
  • 2.5 petrol engines
  • Overhaul engines 1.6 and 1.8
  • Overhaul engines 2.0 and 2.5
  • Diesel engine 2.0
  • Engine electrics
  • Cooling system
  • Air conditioner
  • Carburetor Nikki 30/34
  • Power system (1.6 and 1.8)
  • Power system (2.0 and 2.5)
  • Control system
  • Transmission
  • Mechanical gearbox
  • Automatic gearbox
  • Clutch and axles
  • Chassis
  • Brake system
  • Suspension and wheels
  • Steering
  • Body
  • Exterior (external elements)
  • Interior (internal elements)
  • Doors and windows
  • Electrical equipment
  • Equipment and devices
  • Electrical circuits
Capella 4 (1987-1992) 
  • General information
  • Introduction to manual
  • Vehicle specifications
  • Power unit
  • Engine repair
  • Lubrication system
  • Cooling system
  • Fuel system (carburetor)
  • Fuel injection (FE)
  • Fuel injection (DOHC)
  • Fuel system (diesel)
  • Ignition system
  • Transmission
  • Clutch
  • Gearbox
  • Drive shafts
  • Chassis
  • Front suspension
  • Rear suspension
  • Steering system
  • Brake system
  • Electrical equipment
  • Equipment and devices
  • Electrical circuits
Capella 3 and 4 (1982-1992) 
  • General information
  • User manual
  • Maintenance
  • Power unit
  • Gasoline engine
  • Engine overhaul (gasoline)
  • Diesel engine
  • Cooling and heating
  • Supply system
  • Ignition system
  • Emission reduction
  • Transmission
  • Clutch
  • Mechanical gearbox
  • Automatic gearbox
  • Drive shafts
  • Chassis
  • Brake system
  • Suspension and wheels
  • Steering
  • Body
  • Exterior (external elements)
  • Interior (internal elements)
  • Electrical equipment
  • Equipment and devices
  • Power devices
  • Electrical circuits
Capella 3 (1982-1992, petrol) 
  • General information
  • User manual
  • Maintenance
  • Troubleshooting
  • Late models
  • Power unit
  • Engine in car
  • Engine overhaul
  • Cooling and heating system
  • Fuel and exhaust system
  • Engine electrical system
  • Emission control system
  • Transmission
  • Mechanical gearbox
  • Automatic gearbox
  • Clutch and drive shafts
  • Chassis
  • Brake system
  • Suspension and wheels
  • Steering
  • Body
  • Exterior (external elements)
  • Interior (internal elements)
  • Electrical equipment
  • Equipment and devices
  • Lighting and lamps
  • Electrical circuits
MazBook.ru © 2018–2026 · Mobile version · Articles and news · Sitemap: EN BG BY UA RS HR RO PL SK HU · Feedback · Site search · Add to bookmarks Familia 5 (BF) · Familia 6 (BG) · Capella 3 (GC) · Capella 3 and 4 (GC) · Capella 4 (GD) · Capella 5 (GE) · Capella 6 (GF) · Mazda3 BK · Mazda6 GG · CX-5KE · Mazda 121 (3) · Mazda BT-50 (1) ·
By continuing to use the site, you agree to the use of cookies 🔐