


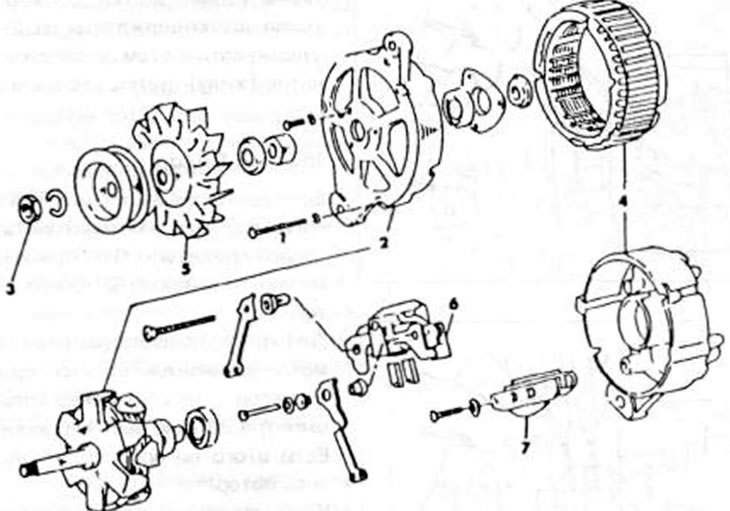
Figure 246. Assembly drawing of a brushless reversible current generator. 1. Mounting bolt; 2. Generator front cover and rotor; 3. Nut; 4. Generator rear cover and stator; 5. Fan wheel and belt pulley; 6. Brush holder; 7. Rectifier diodes
- Unscrew the nut from the rotor shaft and remove the belt drive pulley from the shaft, as well as the fan and spacer sleeve. The belt drive pulley may be held in place by the old V-belt when the nut is released. A double-arm puller might be needed to remove the belt pulley.
- Remove the woodruff key from the shaft.
- Remove the rear cover mounting nuts and remove the cover.
- Unscrew the tie bolts from the housing and separate the housing from the front bearing cover. To do this, you can lightly tap the front bearing cover with a plastic hammer or insert a screwdriver into the cutout on the connector surface and push out the bearing shield. Do not put pressure on the wiring wires.
- Place the generator cover and rotor under a press and press the rotor out of the bearing. If the bearing is removed from the generator cover, press it out after the bolts have been released.
- Remove the rear rotor bearing from the rotor shaft using a suitable puller.
- Release the diode stand mount, terminals and insulation and remove the stator with the diode stand from the generator cover on the slip ring side.
(Based on website data MazBook)