


Contents: Removal ⇓ Installation ⇓
Caution! The models described in this manual are equipped with air bags. When working in the airbag area, always turn them off (see chapter 12) to avoid accidental activation. which may result in injury.
Caution! The air conditioning system is under excess pressure. Do not disconnect the system lines until the system is discharged. The refrigerant must be properly removed and sent for regeneration to a service station or a specialized station with the appropriate equipment. Protect your eyes when disconnecting refrigerant lines.
Removal
1. Discharge the air conditioning system (to do this, contact a specialized station).
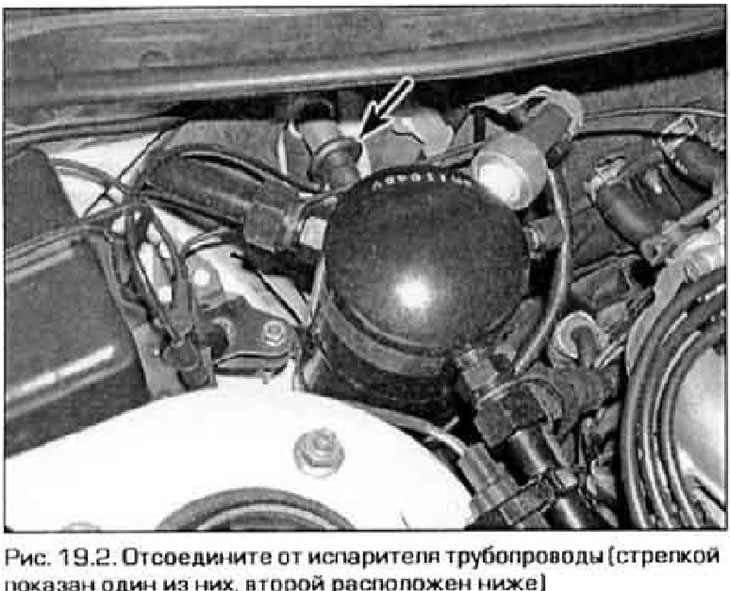
2. Disconnect the refrigerant lines from the evaporator at the engine bulkhead (figure 19.2). Depending on the model, this may require either standard open-end wrenches or a special tool for spring-clamp couplings. Immediately plug the openings to protect the system from dirt and moisture.
3. On Mazda models, remove the glove compartment and lower dashboard trim on the passenger side. On the Probe model, remove the instrument panel (see chapter 11).
4. Disconnect all electrical connectors from the evaporator and fan housings. On the Probe model, also disconnect the cable from the throttle control lever.
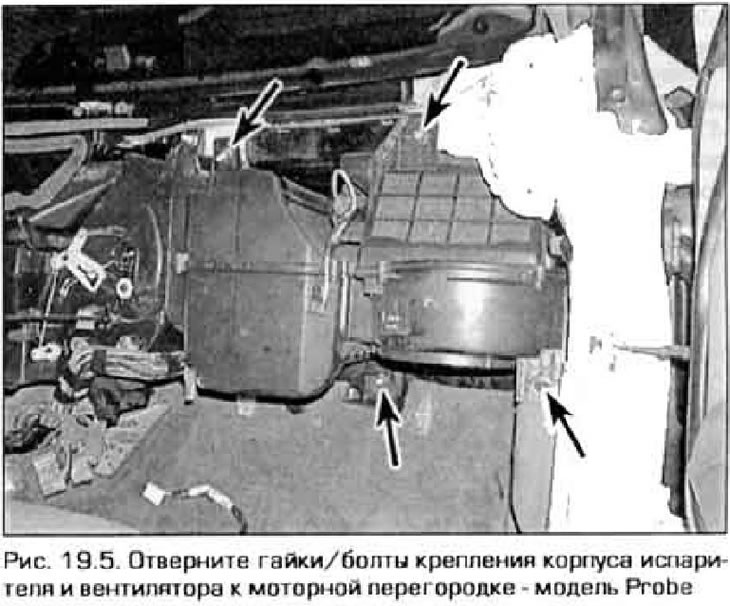
5. Disconnect the evaporator housing from the engine bulkhead (figure 19.5). On Probe models, the evaporator and fan housings are removed together, while on Mazda models, the evaporator housing can be removed without disturbing the fan.
6. Remove the screws connecting the halves of the evaporator housing, separate the housing and remove the core.
7. On Mazda models produced since 1997, disconnect the relief valve from the evaporator. Be careful not to damage the thin copper tube attached to the valve. Immediately seal all openings to protect the system from moisture and dirt.
8. Inspect the evaporator core and fittings for cracks, leaks, or other damage. Replace the evaporator if necessary.
Installation
9. Reinstall the safety valve, replacing the sealing ring underneath it. Place the copper tube back in place. Tighten the valve connections securely.
10. Otherwise, installation is carried out in the reverse order of removal. When replacing O-rings, keep in mind that the rings must match the type of refrigerant in your air conditioner. Do not lubricate the fitting nuts with compressor oil.
11. Take the system to a specialized station for refueling and testing. If the evaporator is replaced with a new one, add 90 ml of oil to the high pressure line of the compressor. Use only oil that is compatible with your system's refrigerant.