MazBook.ru
English Русский
Български
Беларускі
Український
Српски
Hrvatski
Română
Polski
Slovenský
Magyar
• Bookmark • Sitemap • Contacts •   
Cars Opel Cars Ford Cars Volkswagen Cars Audi Cars Kia Cars Renault Cars Peugeot


Familia Capella Mazda3 Mazda6 CX-? Others Articles
Capella 3 (1982-1992, petrol) Capella 3 and 4 (1982-1992) Capella 4 (1987-1992) Capella 5 (1991-1997) Capella 6 (1997-2005, petrol)

Air conditioning condenser — removal and installation (Mazda Capella GF)

  • Home
  • Mazda Capella
  • Capella GF (1997-2005)
  • Power unit
  • Cooling and ventilation
  • Air conditioning condenser — removal and installation
0
Contents: Removal ⇓ Installation ⇓
Caution! The air conditioning system is under excess pressure. Do not disconnect the system lines until the system is discharged. The refrigerant must be properly removed and sent for regeneration to a service station or to a specialized station with the appropriate equipment. Protect your eyes when disconnecting refrigerant lines.


Removal


1. Discharge the air conditioning system (to do this, contact a specialized station).

2. On the Probe model, remove the radiator to access the condenser line.

3. On Mazda models, remove the radiator support brackets.

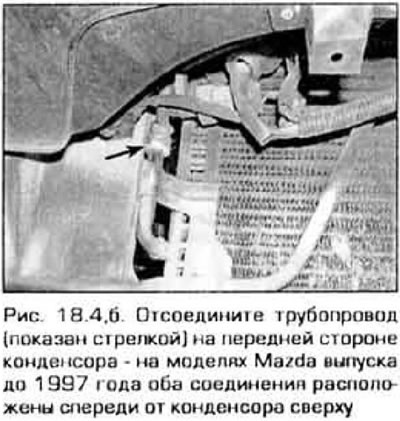
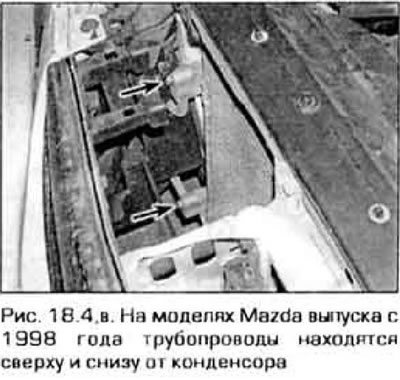
4. Disconnect the pipes from the condenser (figure 18.4, a-c). Plug the holes immediately to prevent dirt and moisture from entering the system.
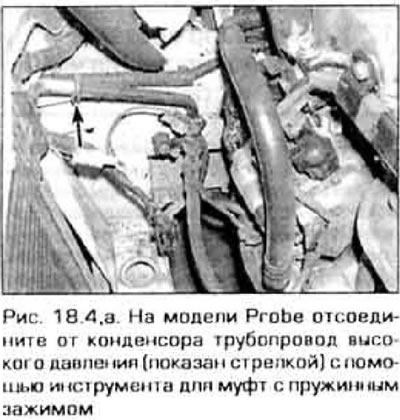
4. Disconnect the pipes from the condenser (figure 18.4, a-c). Plug the holes immediately to…

4. Disconnect the pipes from the condenser (figure 18.4, a-c). Plug the holes immediately to…

5. Loosen the condenser mounting bolts/nuts and remove it from the vehicle (figure 19.5). On Mazda models, when removing the condenser, place a sheet of cardboard between it and the radiator to protect the radiator from damage. Tilt the condenser back and remove it from the car.
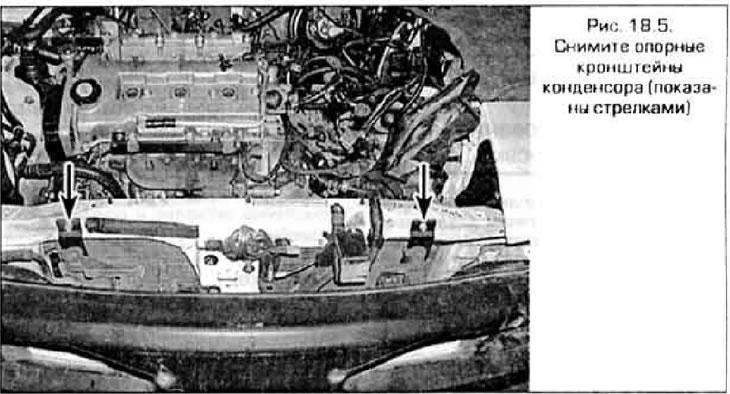


5. Loosen the condenser mounting bolts/nuts and remove it from the vehicle (figure 19.5). On Mazda…


6. Inspect the condenser for cracks, bent fins, damage to the condenser and its fittings, signs of leaks, etc. If necessary, repair or replace the condenser.

Installation


7. Install the condenser in the reverse order of removal. When replacing O-rings, keep in mind that the rings must match the type of refrigerant in your air conditioner. Do not lubricate the fitting nuts with compressor oil.

8. Take the system to a specialized station for filling and testing. If the condenser is replaced with a new one, add 30 ml of oil to the high pressure line of the compressor. Use only oil that is compatible with your system's refrigerant.
This article is available at: russian, bulgarian, belarusian, ukrainian, serbian, croatian, romanian, polish, slovak, hungarian
This text was checked by: German Vorobyov
Share with friends on social networks:

Previous
Capella 6 » Cooling and ventilation
Next

Air conditioning compressor — removal and installation
Air Conditioning Receiver/Dryer — removal and installation
Air Conditioning Compressor Clutch Circuit — check
Air conditioning and heating system — inspection and maintenance
Heater radiator — replacement
Air conditioning evaporator — removal and installation
Air conditioning system expansion nozzle (diffuser) — removal and…
More articles on repairing other Mazda models
Air conditioning refrigerant Mazda3 BK (2003-2009)
Air conditioning refrigerant Mazda6 GG (2002-2008)
Air conditioning system Mazda CX-5KE (2012-2017)
Diagram 13. Radiator fan (Endura-CE without air conditioning) Mazda 121 (3) (1996-2003)
Link in different formats to this article
Comments and feedback from visitors
No comments yet


How much will 36 + 22 ?


Capella 6 (1997-2005, petrol) 
  • General information
  • Introduction to guide
  • User manual
  • Troubleshooting
  • Maintenance
  • Power unit
  • 4-cylinder engines
  • 6-cylinder engines
  • Engine overhaul
  • Cooling and ventilation
  • Power and exhaust systems
  • Engine electrics
  • Control system
  • Transmission
  • Mechanical gearbox
  • Automatic gearbox
  • Clutch and drive shafts
  • Chassis
  • Brake system
  • Car suspension
  • Steering
  • Body
  • Exterior (external elements)
  • Interior (internal elements)
  • Doors, windows and locks
  • Electrical equipment
  • Equipment and devices
  • Electrical circuits
Capella 5 (1991-1997) 
  • General information
  • User manual
  • Maintenance
  • Helpful hints
  • Power unit
  • Petrol engines 1.6 and 1.8
  • Petrol engines 2.0
  • 2.5 petrol engines
  • Overhaul engines 1.6 and 1.8
  • Overhaul engines 2.0 and 2.5
  • Diesel engine 2.0
  • Engine electrics
  • Cooling system
  • Air conditioner
  • Carburetor Nikki 30/34
  • Power system (1.6 and 1.8)
  • Power system (2.0 and 2.5)
  • Control system
  • Transmission
  • Mechanical gearbox
  • Automatic gearbox
  • Clutch and axles
  • Chassis
  • Brake system
  • Suspension and wheels
  • Steering
  • Body
  • Exterior (external elements)
  • Interior (internal elements)
  • Doors and windows
  • Electrical equipment
  • Equipment and devices
  • Electrical circuits
Capella 4 (1987-1992) 
  • General information
  • Introduction to manual
  • Vehicle specifications
  • Power unit
  • Engine repair
  • Lubrication system
  • Cooling system
  • Fuel system (carburetor)
  • Fuel injection (FE)
  • Fuel injection (DOHC)
  • Fuel system (diesel)
  • Ignition system
  • Transmission
  • Clutch
  • Gearbox
  • Drive shafts
  • Chassis
  • Front suspension
  • Rear suspension
  • Steering system
  • Brake system
  • Electrical equipment
  • Equipment and devices
  • Electrical circuits
Capella 3 and 4 (1982-1992) 
  • General information
  • User manual
  • Maintenance
  • Power unit
  • Gasoline engine
  • Engine overhaul (gasoline)
  • Diesel engine
  • Cooling and heating
  • Supply system
  • Ignition system
  • Emission reduction
  • Transmission
  • Clutch
  • Mechanical gearbox
  • Automatic gearbox
  • Drive shafts
  • Chassis
  • Brake system
  • Suspension and wheels
  • Steering
  • Body
  • Exterior (external elements)
  • Interior (internal elements)
  • Electrical equipment
  • Equipment and devices
  • Power devices
  • Electrical circuits
Capella 3 (1982-1992, petrol) 
  • General information
  • User manual
  • Maintenance
  • Troubleshooting
  • Late models
  • Power unit
  • Engine in car
  • Engine overhaul
  • Cooling and heating system
  • Fuel and exhaust system
  • Engine electrical system
  • Emission control system
  • Transmission
  • Mechanical gearbox
  • Automatic gearbox
  • Clutch and drive shafts
  • Chassis
  • Brake system
  • Suspension and wheels
  • Steering
  • Body
  • Exterior (external elements)
  • Interior (internal elements)
  • Electrical equipment
  • Equipment and devices
  • Lighting and lamps
  • Electrical circuits
MazBook.ru © 2018–2026 · Mobile version · Articles and news · Sitemap: EN BG BY UA RS HR RO PL SK HU · Feedback · Site search · Add to bookmarks Familia 5 (BF) · Familia 6 (BG) · Capella 3 (GC) · Capella 3 and 4 (GC) · Capella 4 (GD) · Capella 5 (GE) · Capella 6 (GF) · Mazda3 BK · Mazda6 GG · CX-5KE · Mazda 121 (3) · Mazda BT-50 (1) ·
By continuing to use the site, you agree to the use of cookies 🔐