


Remove the three screws securing the rear cover of the generator.
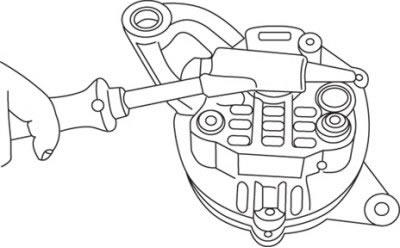
Figure 13.7. The place where the rear cover of the generator is heated with a soldering iron
Using a 200W soldering iron, heat the back cover with the bearing housing for 3-4 minutes or blow hot air on it for a longer period of time (figure 13.7). Finally, it is necessary to heat the bearing housing to a temperature of 50–60°C without heating other parts.
Without allowing the rear cover to cool, remove the front cover with the rotor by inserting a screwdriver blade between the front cover and the stator core. Be careful not to damage the stator windings. Make sure the back cover retaining ring is in place. Clean the rotor contact rings with a soft cloth slightly dampened with solvent.
Remove the screw from the voltage regulator and brush holder mounting plate. Unscrew the terminal "B" fastening nut and remove the washer.
To release the voltage regulator plate, unsolder the connecting wires from the rectifier. Soldering must be done quickly to prevent the rectifier from failing due to overheating.
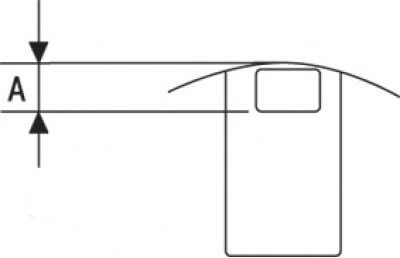
Figure 13.8. Generator brush control dimension: A=2–3 mm
Remove the voltage regulator plate and brush holder. Unsolder the old brushes and solder the new ones. After installing new brushes, the wear limit control line on them should be at a distance of 2–3 mm from the brush holder contour (figure 13.8).
Install the voltage regulator plate and solder the connecting wires. Install the washer and screw on the terminal "B" fastening nut.
Carefully press the brushes in, fixing their position with a thin rod or drill, inserting it through the hole in the back cover. The new brushes have special holes into which the retainer fits.
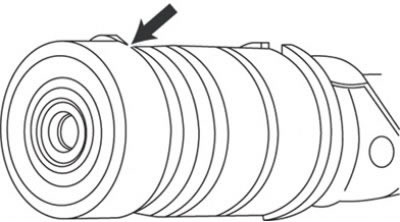
Figure 13.9. Location of the rear bearing retaining ring
Make sure the rear bearing snap ring is in the bearing groove (figure 13.9). Heat the rear bearing cap in the same way as when removing it, install the rotor and front cap.
Screw in the three screws that secure the covers.
Pull out the lock that holds the brushes in the retracted position.
Install the generator on the car.
Caution! If the generator has reached the end of its useful life, it is more practical to install a new one than to repair the old one.
Important! Before performing repairs, check the availability and cost of spare parts. You will need a powerful soldering iron for repairs; in addition, certain work skills are required.