
Wear and damage to the timing belt
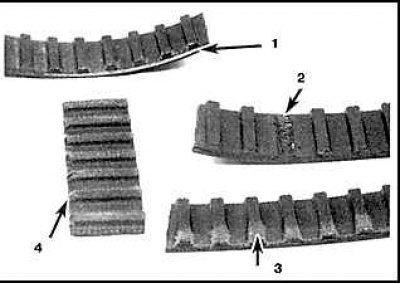
1. Stratification
2. Missing prong
3. Worn surface
4. Rounded side
Removing
1. Disconnect the negative battery cable.
2. Remove the cylinder head cover.
3. Remove spark plugs from all cylinders.
4. Loosen the water pump pulley bolt. Remove the power steering pump and air conditioning compressor drive belt and the alternator drive belt. Remove the water pump pulley.
5. Put the car on the handbrake and block the rear wheels. Raise and secure the front of the vehicle.
6. Remove the right front wheel.
7. Remove the mudguard of the right front fender.
8. Remove the crankshaft pulley.
9. Install a jack under the engine. Raise the engine slightly and remove its right support.
10. Unscrew the bolts and remove the top cover of the timing belt and the dipstick tube for measuring the oil level.
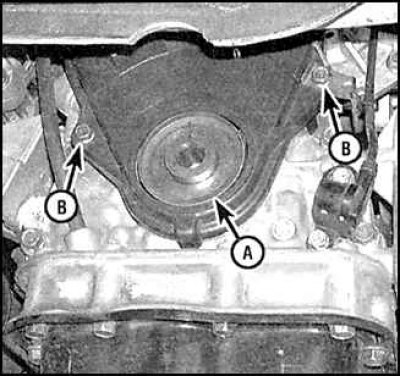
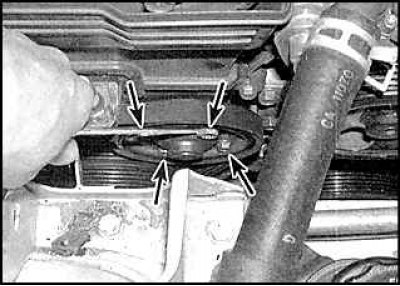
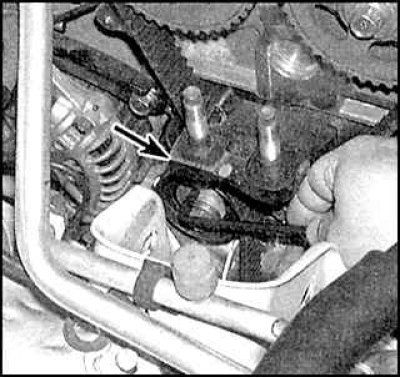
11. Remove the timing belt guide (A) and bottom cover bolts (IN).
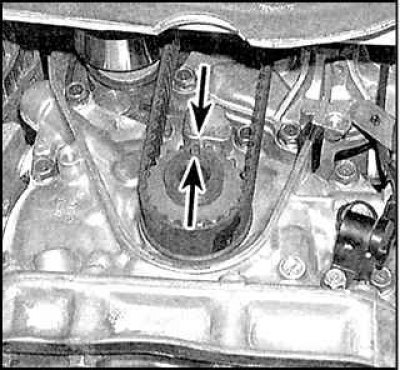
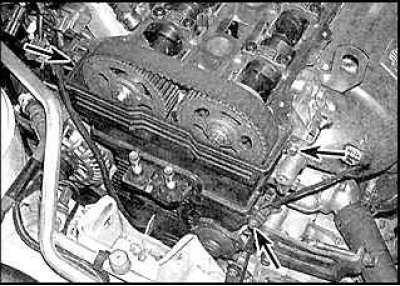
12. Rotate the crankshaft and align the timing marks on the crankshaft sprocket.
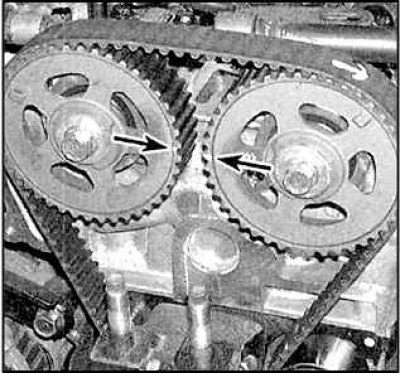
13. Align the timing marks of the camshaft sprockets.
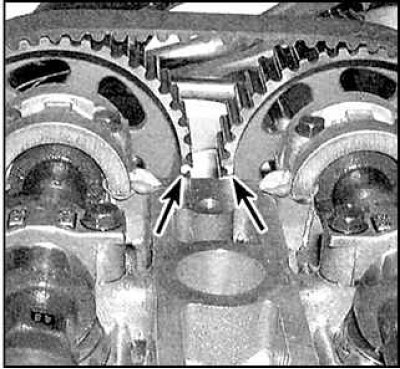
14. The camshaft sprockets also have timing marks on the rear surface.
15. If you are going to reuse the timing belt, make a mark on it indicating the direction of rotation.
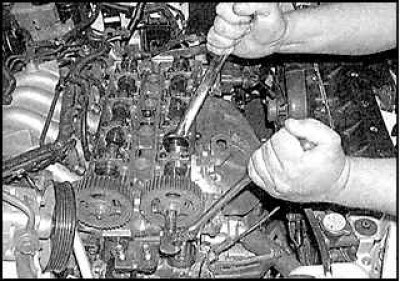
16. Using a special tool, you can block the camshaft sprockets and simplify further work on the timing belt.
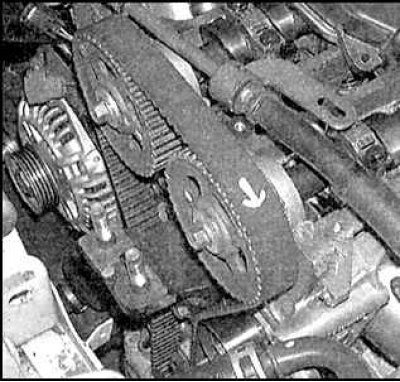
17. Loosen the timing belt tension. Rotate the tensioner pulley and remove the spring.
18. Remove the timing belt.
19. If necessary, remove the crankshaft sprocket and crankshaft sensor.
20. If necessary, lock the camshaft with a wrench, unscrew the bolts and remove the camshaft sprockets. The intake camshaft sprocket has a mark on the front surface "I", and the exhaust valve shaft sprocket is marked "E".
Examination
Attention! While the timing belt is removed, try not to rotate the crankshaft and camshafts.
1. Inspect idler pulley and idler pulley bearings to see if they rotate freely. Check the tensioner spring. Replace worn or damaged parts as necessary.
2. If the timing belt has been severely damaged, carefully clean all the sprockets on which it was installed.
3. If there are cracked or broken teeth on the belt, then the camshafts or the shafts of the water and oil pumps are sticking.
4. If the belt is badly worn, inspect the sprockets for scratches and burrs.
5. If the belt is only worn on one side, check the belt guide and check the alignment of the sprockets.
6. If wear is found, be sure to replace the timing belt.
Installation
1. Thoroughly clean the timing belt installation area at the front of the engine.
2. Install the tensioner pulley and intermediate pulley.
3. Install the camshaft sprockets and crankshaft sprocket.
4. Align the sprocket timing marks.
5. Put the timing belt on the sprockets and pulleys. and remove the camshaft sprocket blocking tool.
6. Rotate the tensioner pulley and install the spring.
7. Rotate the crankshaft two full turns and check the timing marks. When you turn the crankshaft, stop if you feel resistance. Most likely, due to incorrect alignment of the marks, the valves touch the pistons. Recheck the labeling and only then continue.
8. Install the remaining parts, start the engine and check its operation.