
Removing
Bolt tightening sequence

1. Remove the cylinder head cover.
2. Remove the ignition distributor.
3. Remove the timing belt and camshaft sprockets.
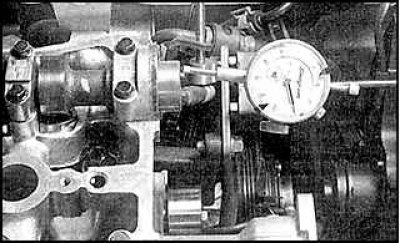
4. Measure the free play of the shafts using a special device. If the free play is out of range, replace the camshaft and/or thrust plates or cylinder head.
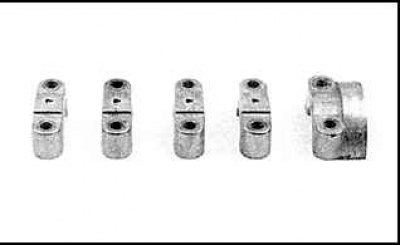
5. Using the reverse sequence of tightening, loosen in several sets (1/4 turn) camshaft bearing cap bolts (see fig. Bolt tightening sequence).
6. Remove the covers and arrange them in order. All lids must be numbered and marked with the letters I (intake valve shaft covers) or E (exhaust valve shaft covers).
7. Remove the camshaft.

8. Remove the pushers with a magnet.
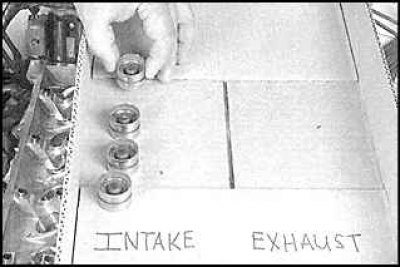
9. Arrange the pushers in order so that you do not mix them up during installation.
Attention! Hydraulic tappets should be kept upside down in clean engine oil.
10. Thoroughly clean the camshafts and remove their seals.
Installation
1. Apply molybdenum grease to the pushers and install them in place.
2. Apply molybdenum grease to the cams and camshaft bearing journals.
3. Install the shafts in the head. Install the shaft bearing caps and insert the bolts.
4. Be sure to apply sealant to the head mating surface of the first cap before installation.
5. Using the sequence shown, tighten the cap bolts in several steps (1/4 turn) (see fig. Bolt tightening sequence).
6. Install new camshaft seals.
7. Install remaining parts and check engine operation. If any extraneous sounds occur, check the pushers (see subsection 3.1.10) or contact a specialist.