


Caution! Gasoline is highly flammable, so take all fire safety precautions when working with any component of the fuel system. See the warnings at the beginning of paragraph 2.
1. Check electrical connectors and ground connections. Poor connections are the main cause of control system failures.
2. Make sure that. that the battery is fully charged, since with reduced voltage neither the control unit nor the sensors will work reliably.
3. Check the air filter. A dirty or clogged filter can reduce engine power and fuel efficiency.
4. Check the operation of the fuel pump (see paragraph 3). If the pump fuse is blown, replace it and check again. If the fuse blows again, check the wiring to the pump for shorts to ground (see wiring diagrams. in Chapter 12).
5. Check the vacuum hoses connected to the intake manifold for cracks, breaks, or other damage that could cause vacuum leaks.
6. Disconnect the air duct from the throttle body and inspect the throttle body for carbon, deposits and dirt, especially around the throttle body. If there are any deposits in the valve body, determine the cause by checking the operation of the exhaust gas recirculation and crankcase ventilation systems (see chapter 6).
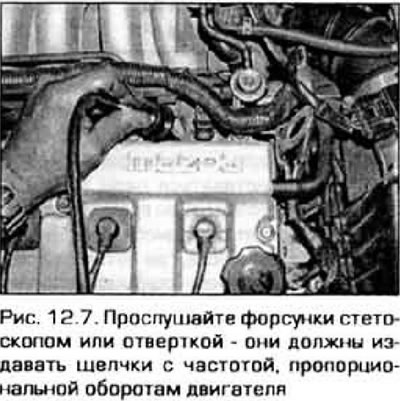
7. Start the engine, Use a stethoscope to listen to each injector. Periodic clicks of the electromagnet being activated should be heard from the working injector (figure 12.7). The frequency of clicks should increase as engine speed increases. If there is no stethoscope. place a long screwdriver on the nozzle and listen through the handle.
8. If the injector does not seem to be working (does not make clicking sounds), take out a special tester for injectors and insert it into the injector connector.
Note: These devices cannot be used on a V6 engine due to the specific installation of the injectors. Start the engine and see. the tester's PI light is blinking. If the light is flashing, it means that pulses of sufficient amplitude are being supplied to the injector. If the tester light does not flash, then additional checks are required. They can be done at a service station.
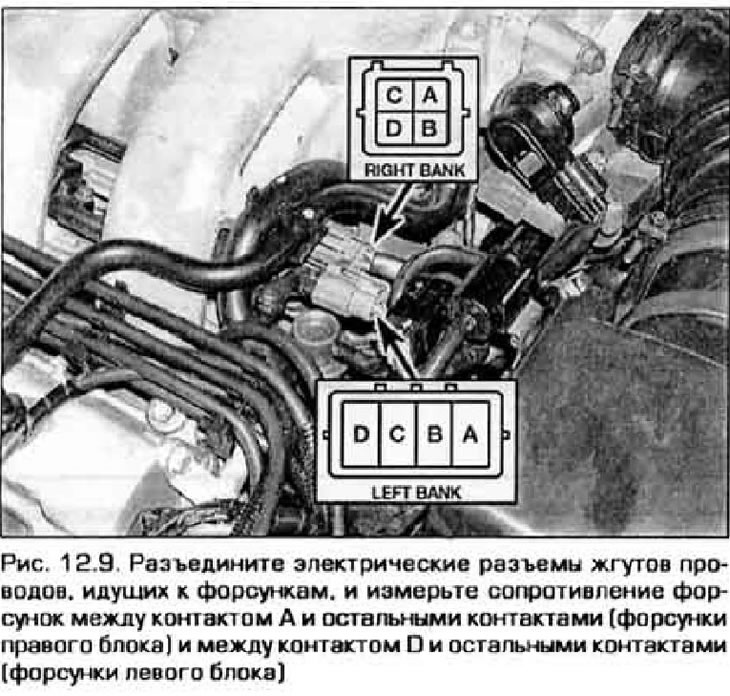
9. Stop the engine and disconnect the electrical connectors from the injectors. Measure the resistance of the solenoids of all injectors using an ohmmeter. Compare the obtained results with the values given in Technical data. On a 4-cylinder engine, the resistance can be measured directly at the injector contacts. On a V-shaped engine, you need to measure at the contacts of the wiring harness connectors going to the injectors (figure 12.9). The connector contacts correspond to the following injectors:
Right block:
- A, B - injector of cylinder No. 1
- A, C - injector of cylinder No. 5
- A, D - injector of cylinder No. 3
Left block:
- D, C - injector of cylinder No. 2
- D, B - injector of cylinder No. 4
- D, A - injector of cylinder No. 6
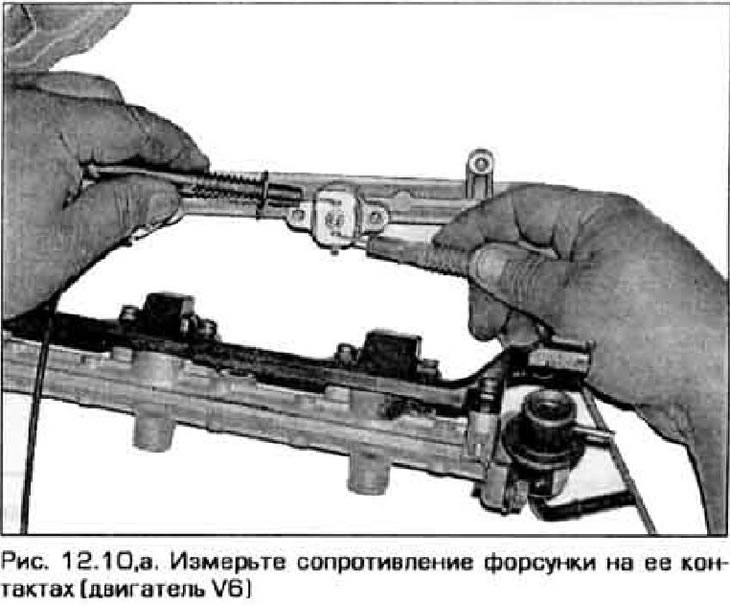
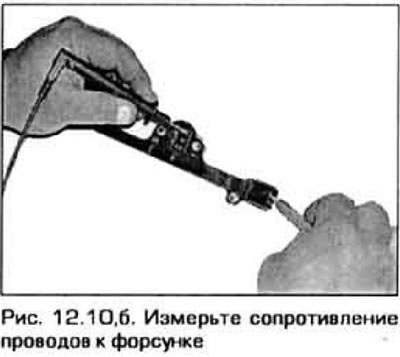
10. If the injector resistance does not match Technical data, take it off (see paragraph 15) and measure the resistance of the injector and wiring separately to determine exactly where the fault is located (figure 12.10).
11. The remaining control system checks are described in Chapter 6.
(The original article is on: www.MAZbook.ru)