


Contents: Examination ⇓ Replacement ⇓
Examination
1. The coolant temperature sensor is a thermistor that changes its resistance depending on the temperature. When the resistance of the thermistor changes, the value of the voltage removed from it also changes. As the temperature decreases, the resistance of the sensor increases, and as the temperature increases, it decreases.
2. Measure the resistance of the sensor. To do this, disconnect its electrical connector (Figure 7.2 and 1.1,a).
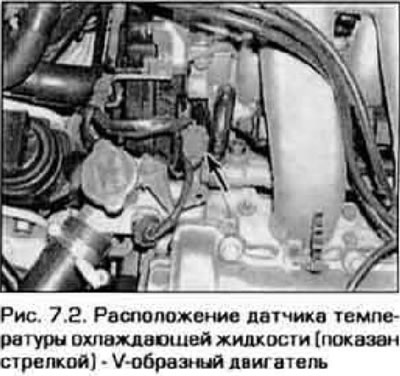
3. Measure the resistance at the sensor contacts. It should be in the range of 2200-2700 ohms at room temperature (20°C). Start the engine or remove the sensor and warm it with a hair dryer. The sensor resistance should drop to 290-350 ohms at 80°C. If the test yields different results, replace the sensor. If the engine was running with the connector disconnected, be sure to clear the fault code that occurred in this case.
Replacement
Caution! Wait until the engine has cooled completely before starting work.
4. Turn off the ignition.
5. Before removing the old sensor, wrap the threads of the new sensor with Teflon sealing tape to prevent leaks and corrosion.
6. Disconnect the electrical connector from the sensor and unscrew the sensor. Coolant will leak from the sensor hole, so screw in a new sensor as soon as possible.
(The original text can be found on MAZBOOK.ru)
Caution: Handle the sensor with care. Damage to the sensor will result in malfunction of the fuel supply system.
7. Install the sensor in reverse order. Check the coolant level and top up if necessary.