
Removing
1. Disconnect the negative cable from the battery.
Warning! If your vehicle has an anti-theft audio system, make sure you have the unlock code before disconnecting the battery.
2 If you remove the rear unit cover (closest to the engine bulkhead), remove pre-intake manifold (see paragraph 8).
3. Disconnect the high-voltage wires from all the candles in the block and turn out the candles.
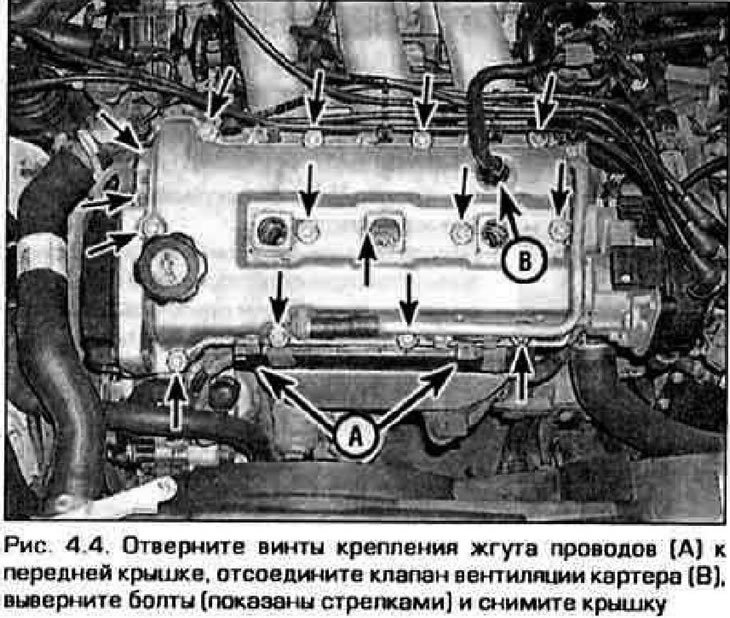
4. On the cover of the front block, unscrew the bolt securing the tube to the crankcase valves or disconnect the hose, and leave the tube attached to the cover (fig 4.4).
5. Turn out on two top bolts fastening of singing of a cover of a gear belt from each party.
6. Turn out bolts of fastening of a cover to a head of the block of cylinders and remove a cover. If the lid is dry, tap it with a mallet. If that doesn't help, try sticking a thin knife between the cap and the head and use it to cut through the gasket. Do not try to press the cover off the head with a lever, as this can damage the machined plane of the block.
Installation
7. Before installing the cover, scrape off the remaining gasket and sealant from the mating surfaces of the cover and block, then wipe the surfaces with a cloth moistened with nitro thinner or acetone. If the mating surfaces are not clean enough, the joint will leak after assembly.
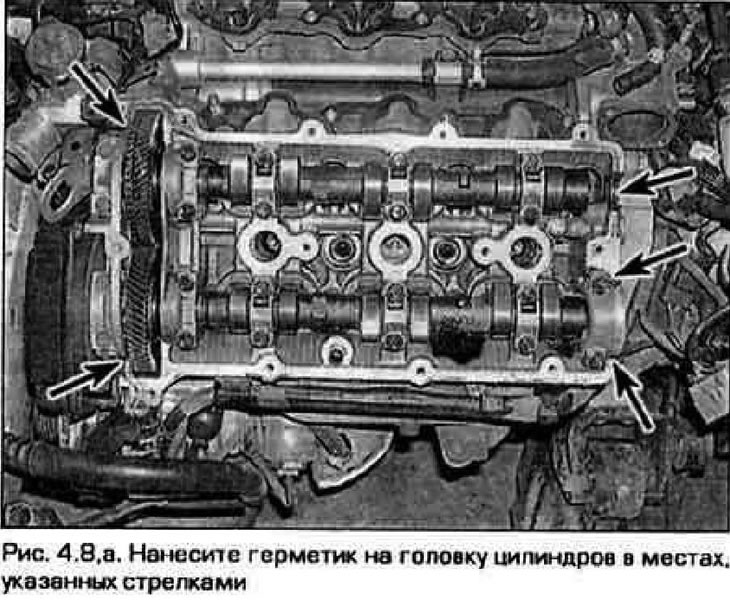
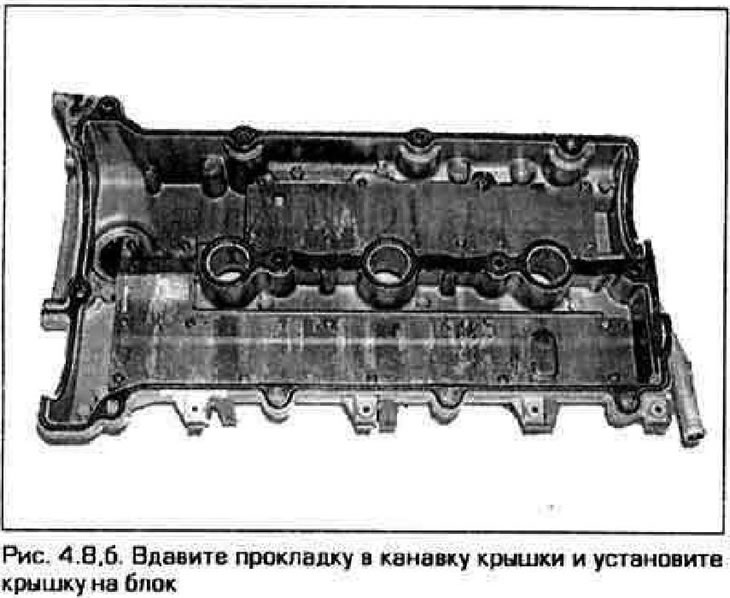
8. Apply a coat of RTV sealant to the block at the locations shown in fig. 4.8,a and install the cover with a new gasket (pic. 4.8b).
9. Screw on the cap nuts and tighten them in three to four passes until the required torque is reached. After that screw and tighten bolts of a cover of a gear belt.
10. Reinstall all previously removed parts, hoses and wires in the reverse order of their removal. Start the engine and check for leaks.