


Contents: Removal ⇓ Installation ⇓
Caution: Allow the engine to cool before starting this operation.
Removal
1. Disconnect the negative cable from the battery.
Warning. If your vehicle has a theft-protected audio system, make sure you have the key to unlock it before disconnecting the battery.
2. Wet the manifold fasteners with low viscosity oil and allow it time to penetrate the threads.
3. Disconnect the oxygen sensor connectors on the front and rear sides.
4. Disconnect the exhaust gas recirculation pipe from the rear manifold and from the cylinder head (see chapter 6).
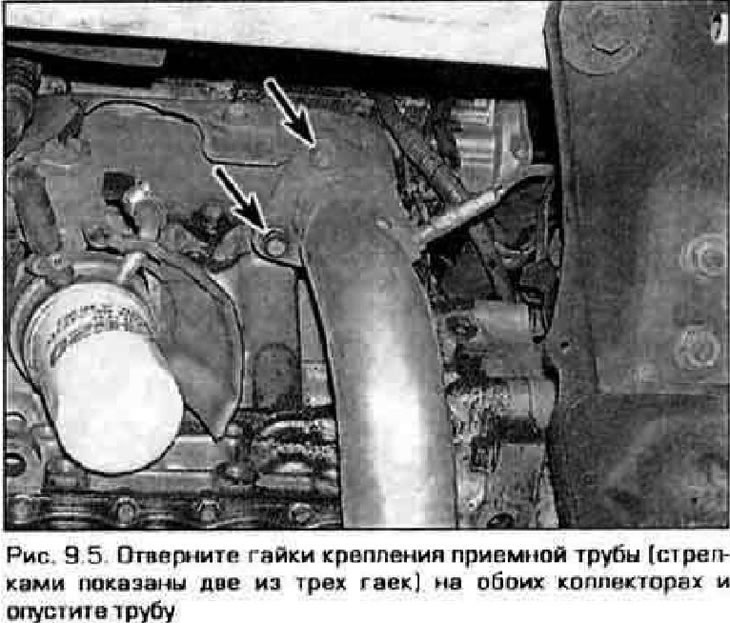
5. Loosen the nuts securing the intake pipe to the front and rear manifolds and lower the pipe (figure 9.5).
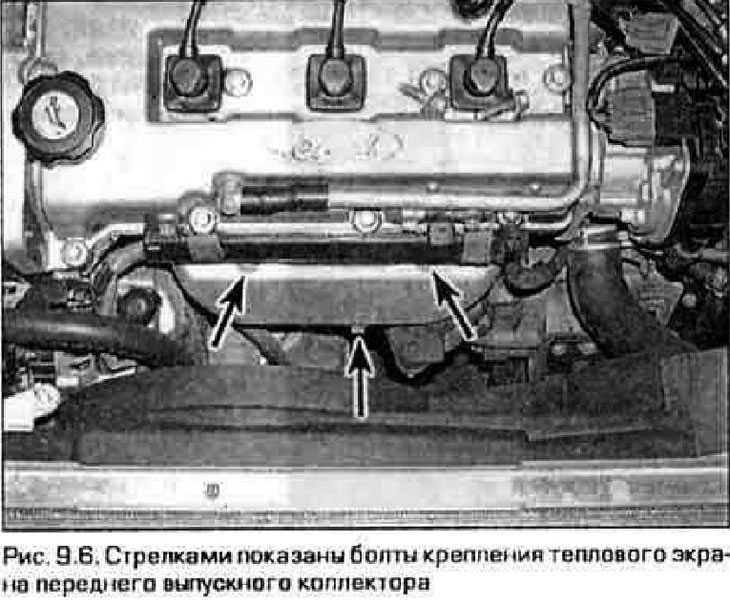
6. Remove the bolts and heat shields from each manifold (figure 9.6).
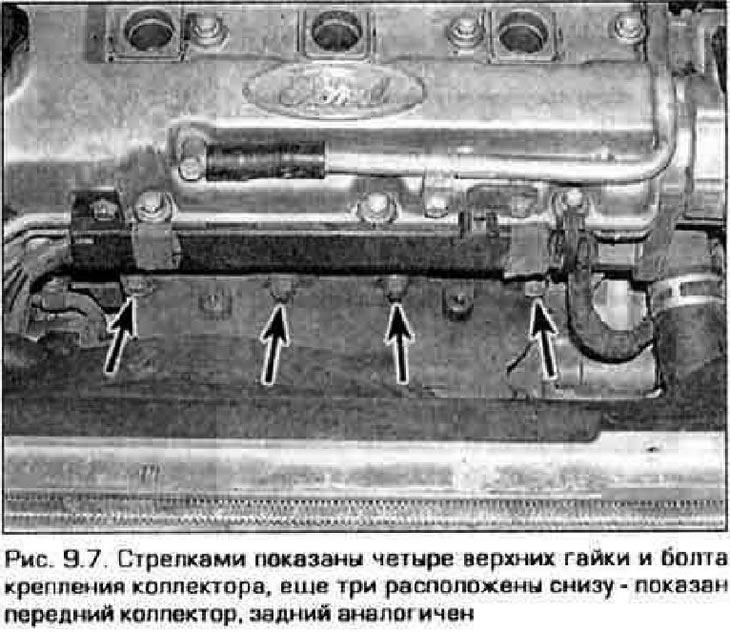
7. Unscrew the bolts and nuts securing the manifolds to the cylinder head and remove them from the studs (figure 9.7).
8. Inspect the manifolds and fasteners for cracks, warping, and other damage.
Installation
9. Scrape off any old grease and carbon deposits from the mating surfaces of the manifolds and cylinder heads. If the old gasket was leaking exhaust gases, check the flatness of the manifold mounting surface. To do this, place a steel ruler on its edge on the surface of the manifold and try to insert the feeler gauge between the surface and the ruler. Minor warping can be eliminated by mechanical processing of the manifold.
10. Place new gaskets on the cylinder head studs.
11. Install the manifolds and screw the nuts into place.
12. Gradually, in three to four passes, tighten the fasteners to the required torque in sequence from the middle to the ends of the manifold.
13. Install the remaining parts in the reverse order of removal. When connecting the exhaust pipe to the manifolds, replace the gaskets.
14. Start the engine and check for gas leaks.